vCard
vCard
 Homemade by CVG
 My Homemade Apps
 Thingiverse
 Strava
Wooden Globe
Roughly a year after I made a Padel Racket for Mark, my partners in many crimes, Christophe & Rozanne organised a garden party for too many good reasons. And once again, I proposed to upgrade the money that we wanted to give with some… “gift wrapping”.
The Concept
Okay, something you need to know about Christophe & Rozanne: they are travellers, no globetrotters. So the theme was quickly decided upon and digging through my collection of “things I’d love to make”… a wooden globe was an evident choice.
After some google’ing I found a PDF of a design I have seen some time before. Time to fire up the laser cutter.
Always Test First
I knew upfront this was going to be a big “make”. Not only in side but surely in effort. Before I threw some 40+ sheets of wood on the laser cutter, I first did some tests with parts of the overall design, to make sure that the more construction-complex parts would actually fit.
Most of them did and some resulted in small touch-ups to the PDF to make it work better.
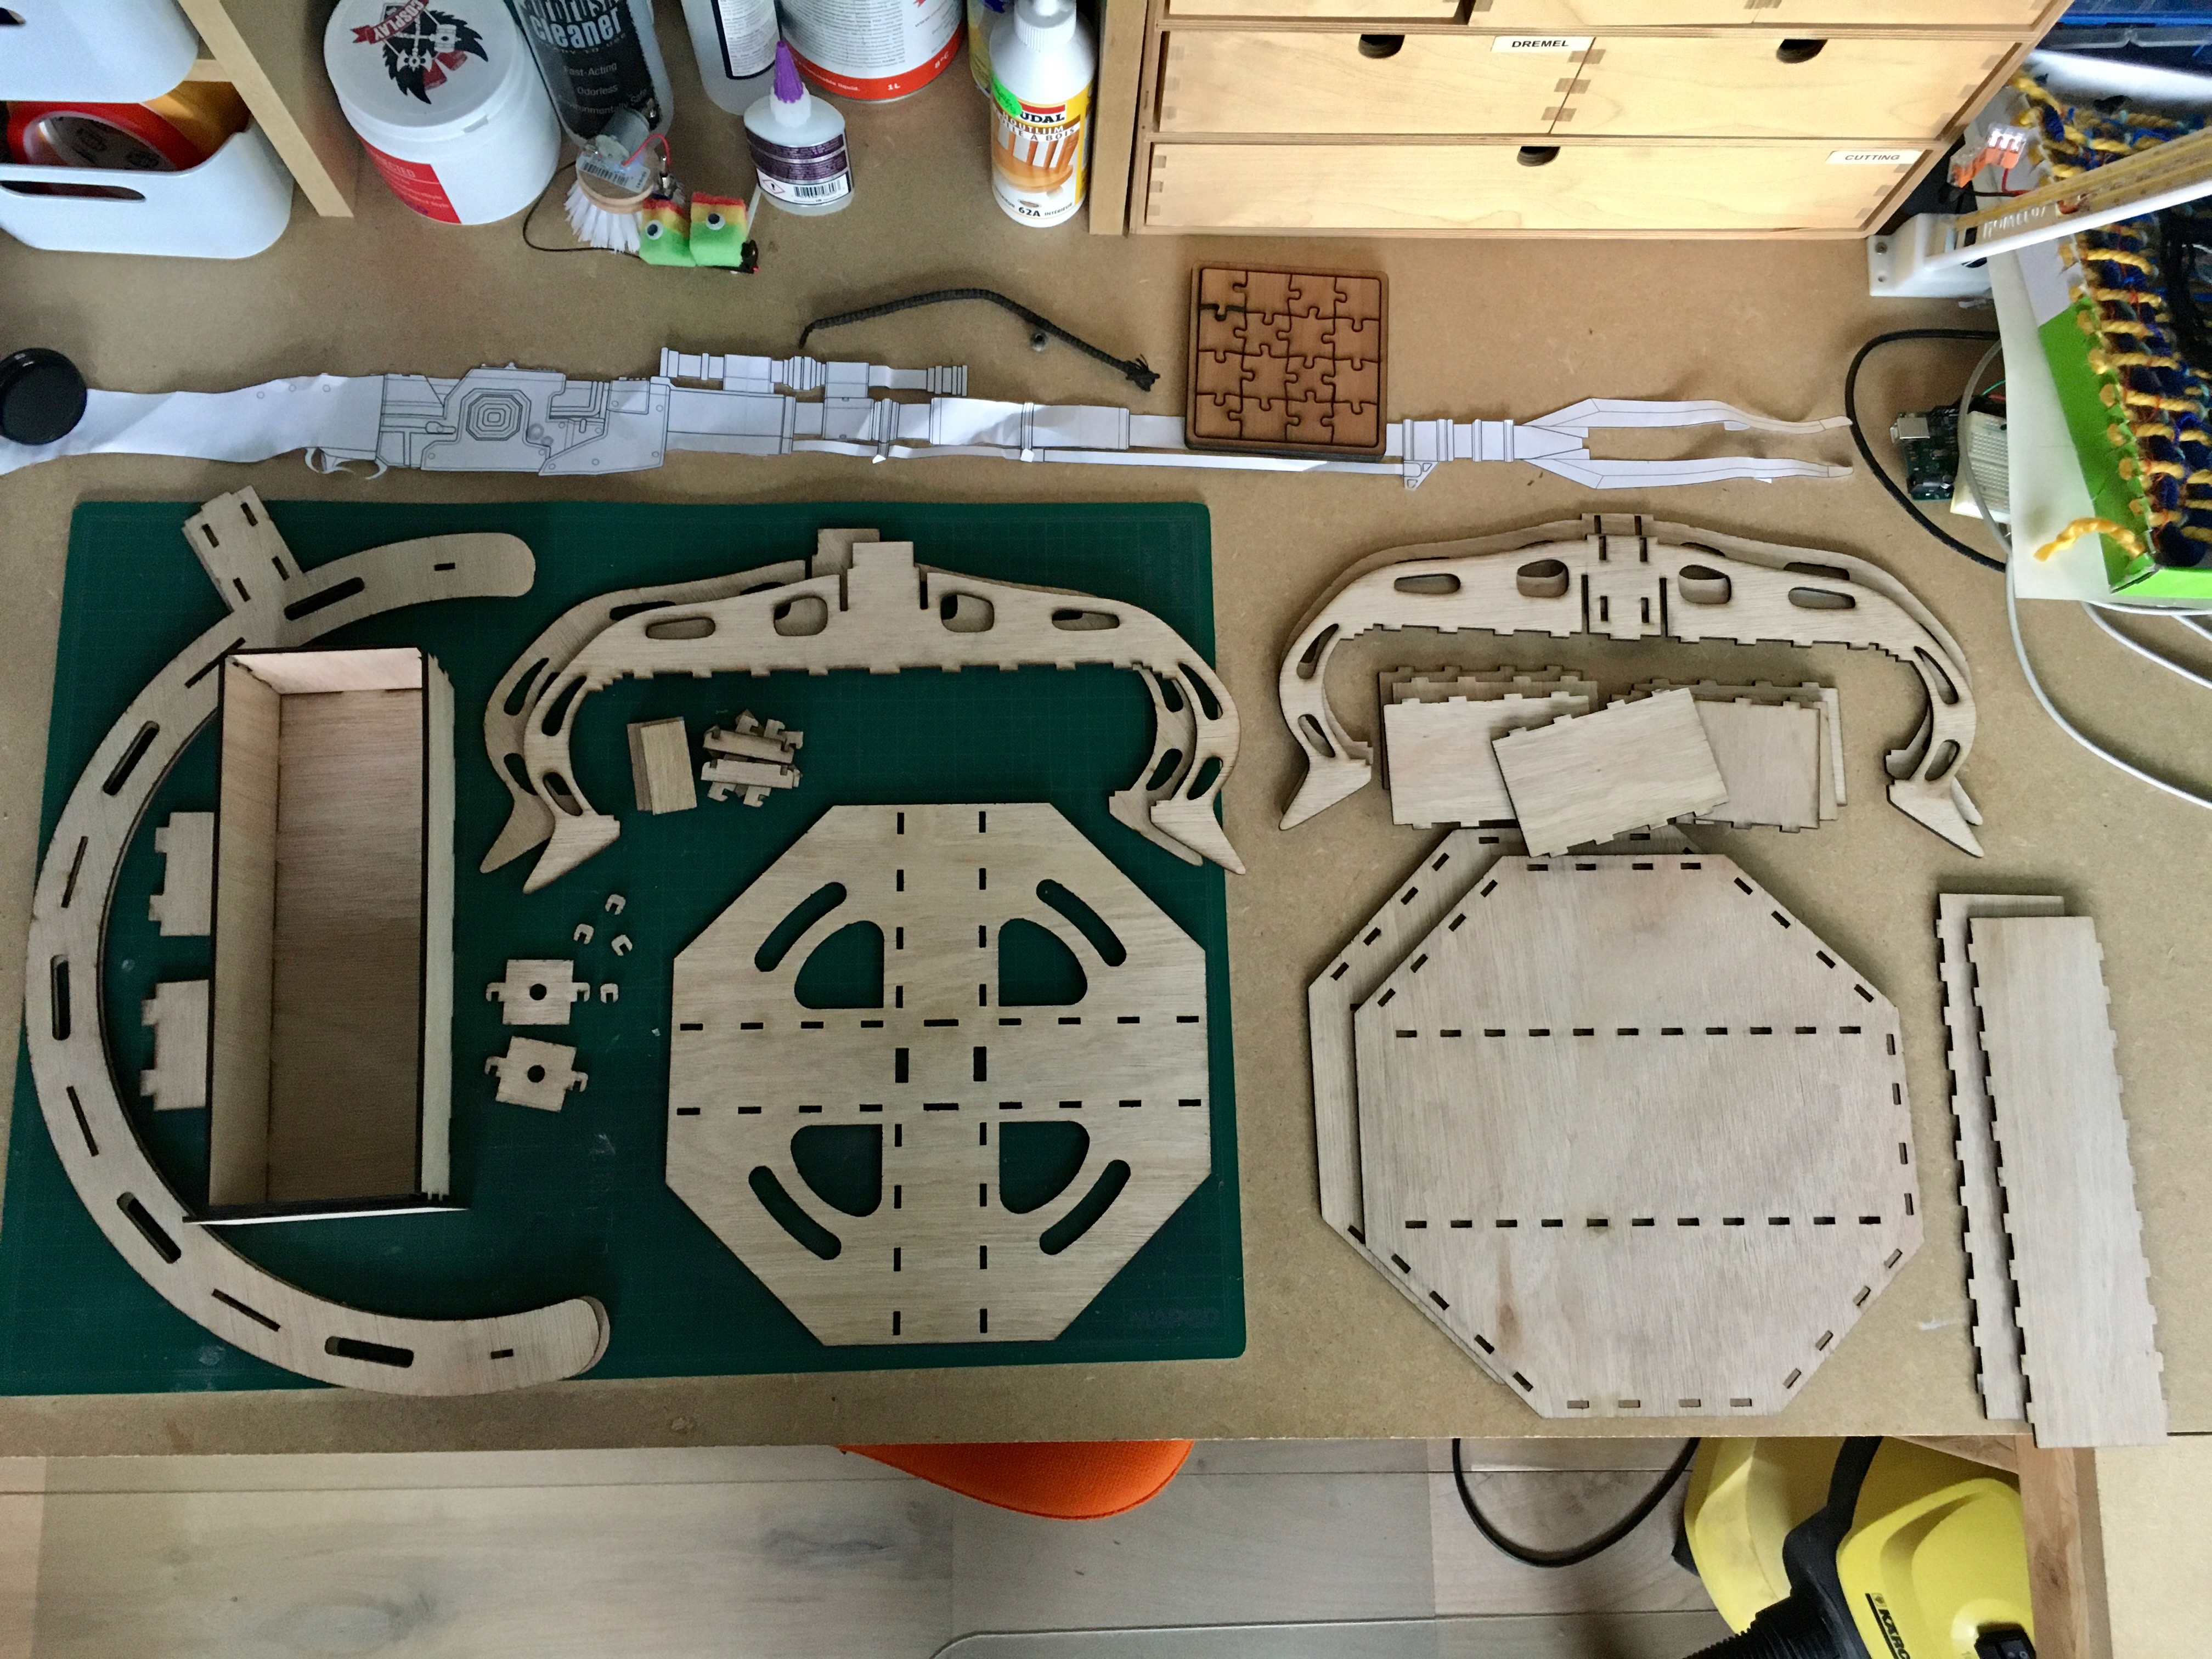
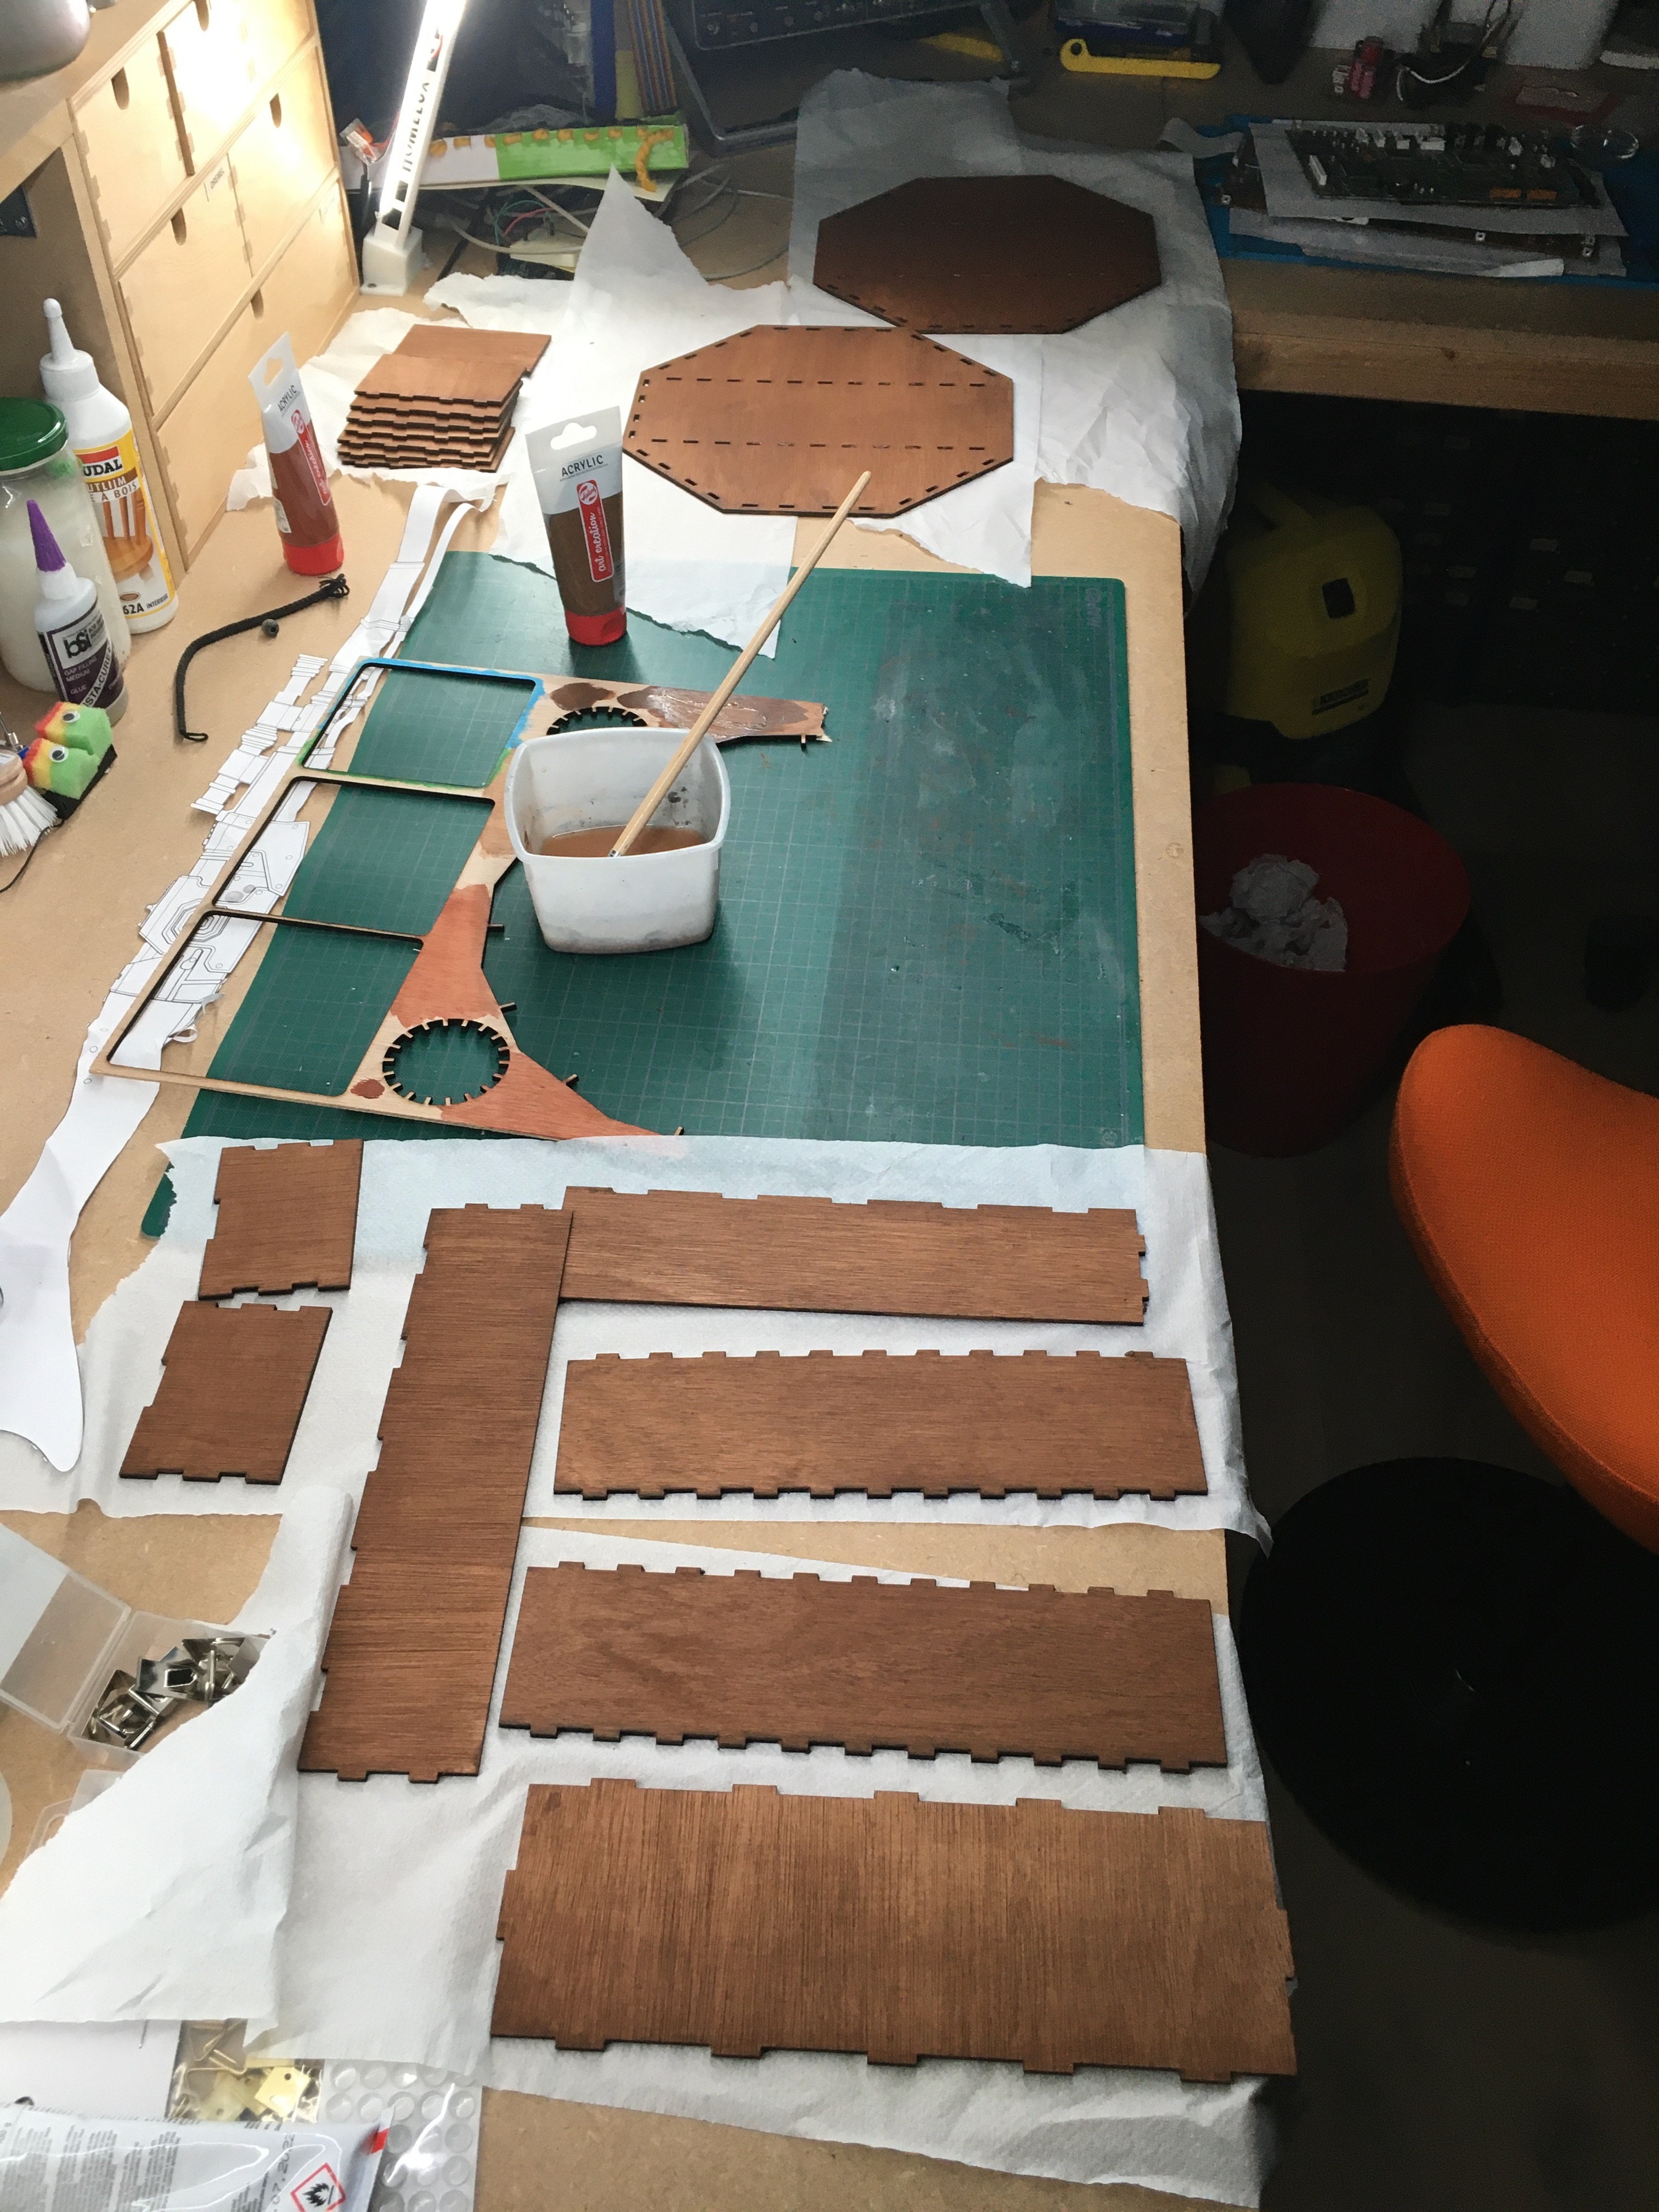
Constructing the Arm and Drawer
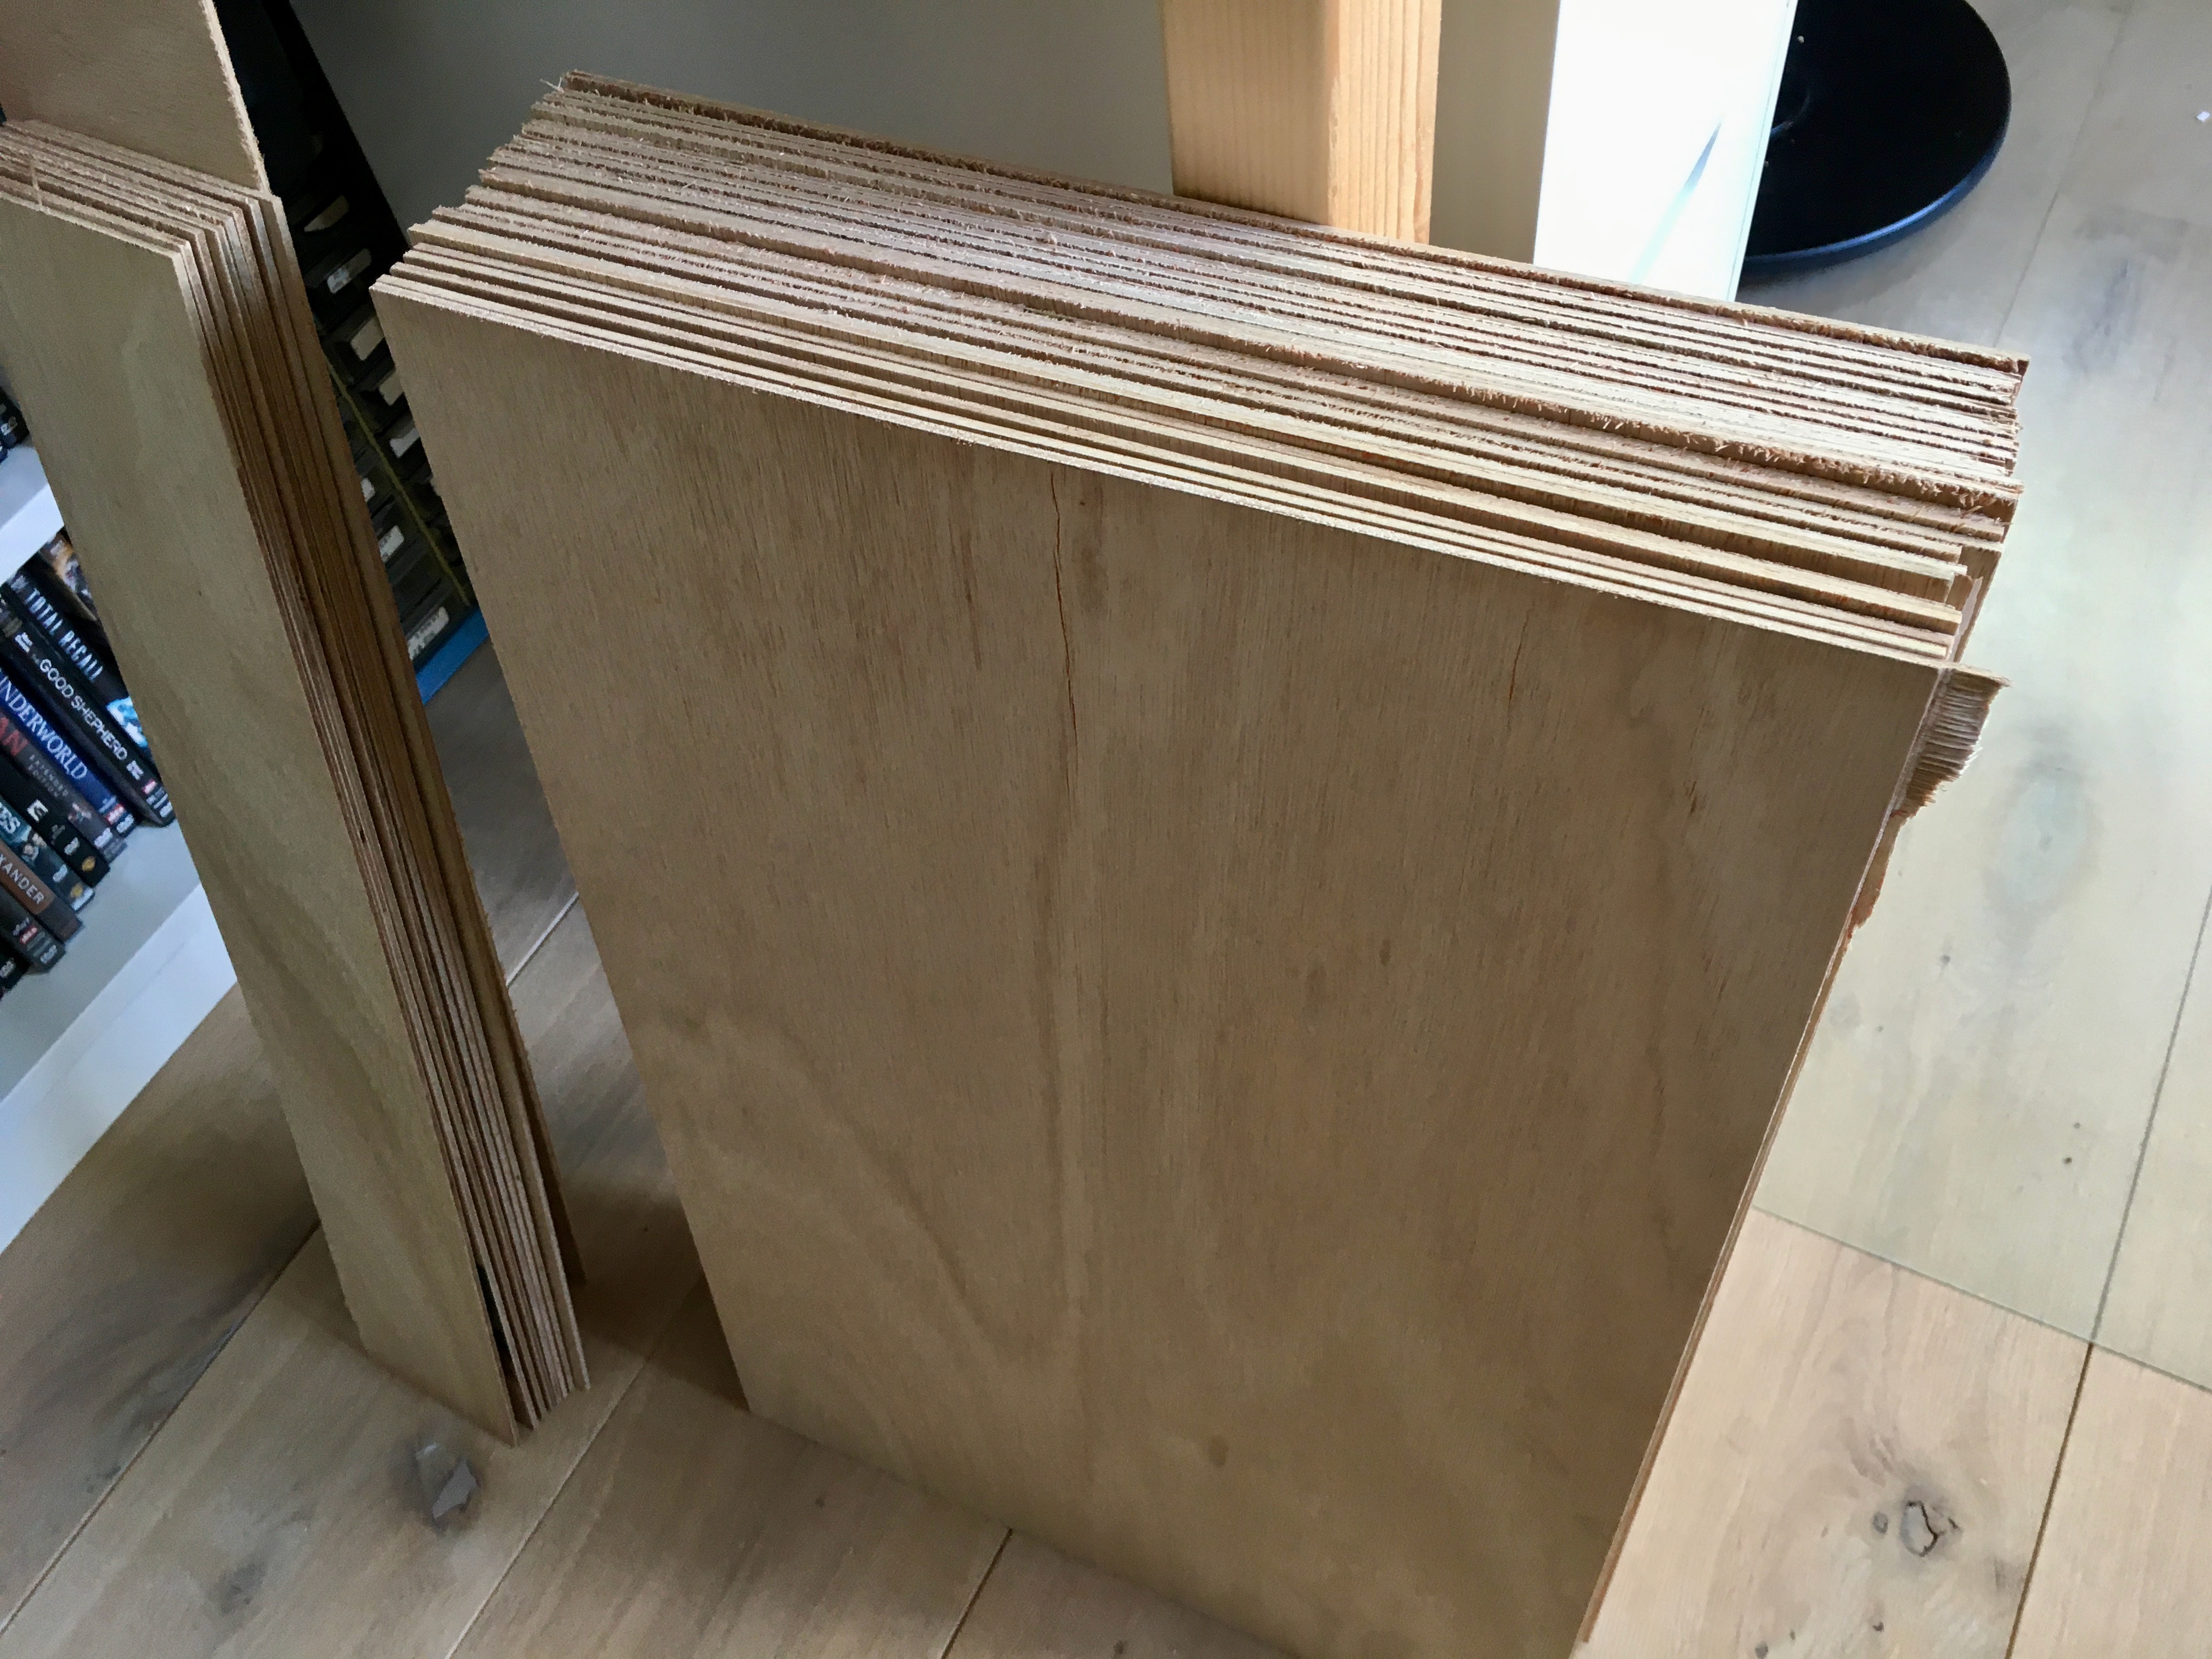
And then I could really fire up the cutter. Well, almost, I first had to break down the PDF with all parts into some 40+ sheets of wood.
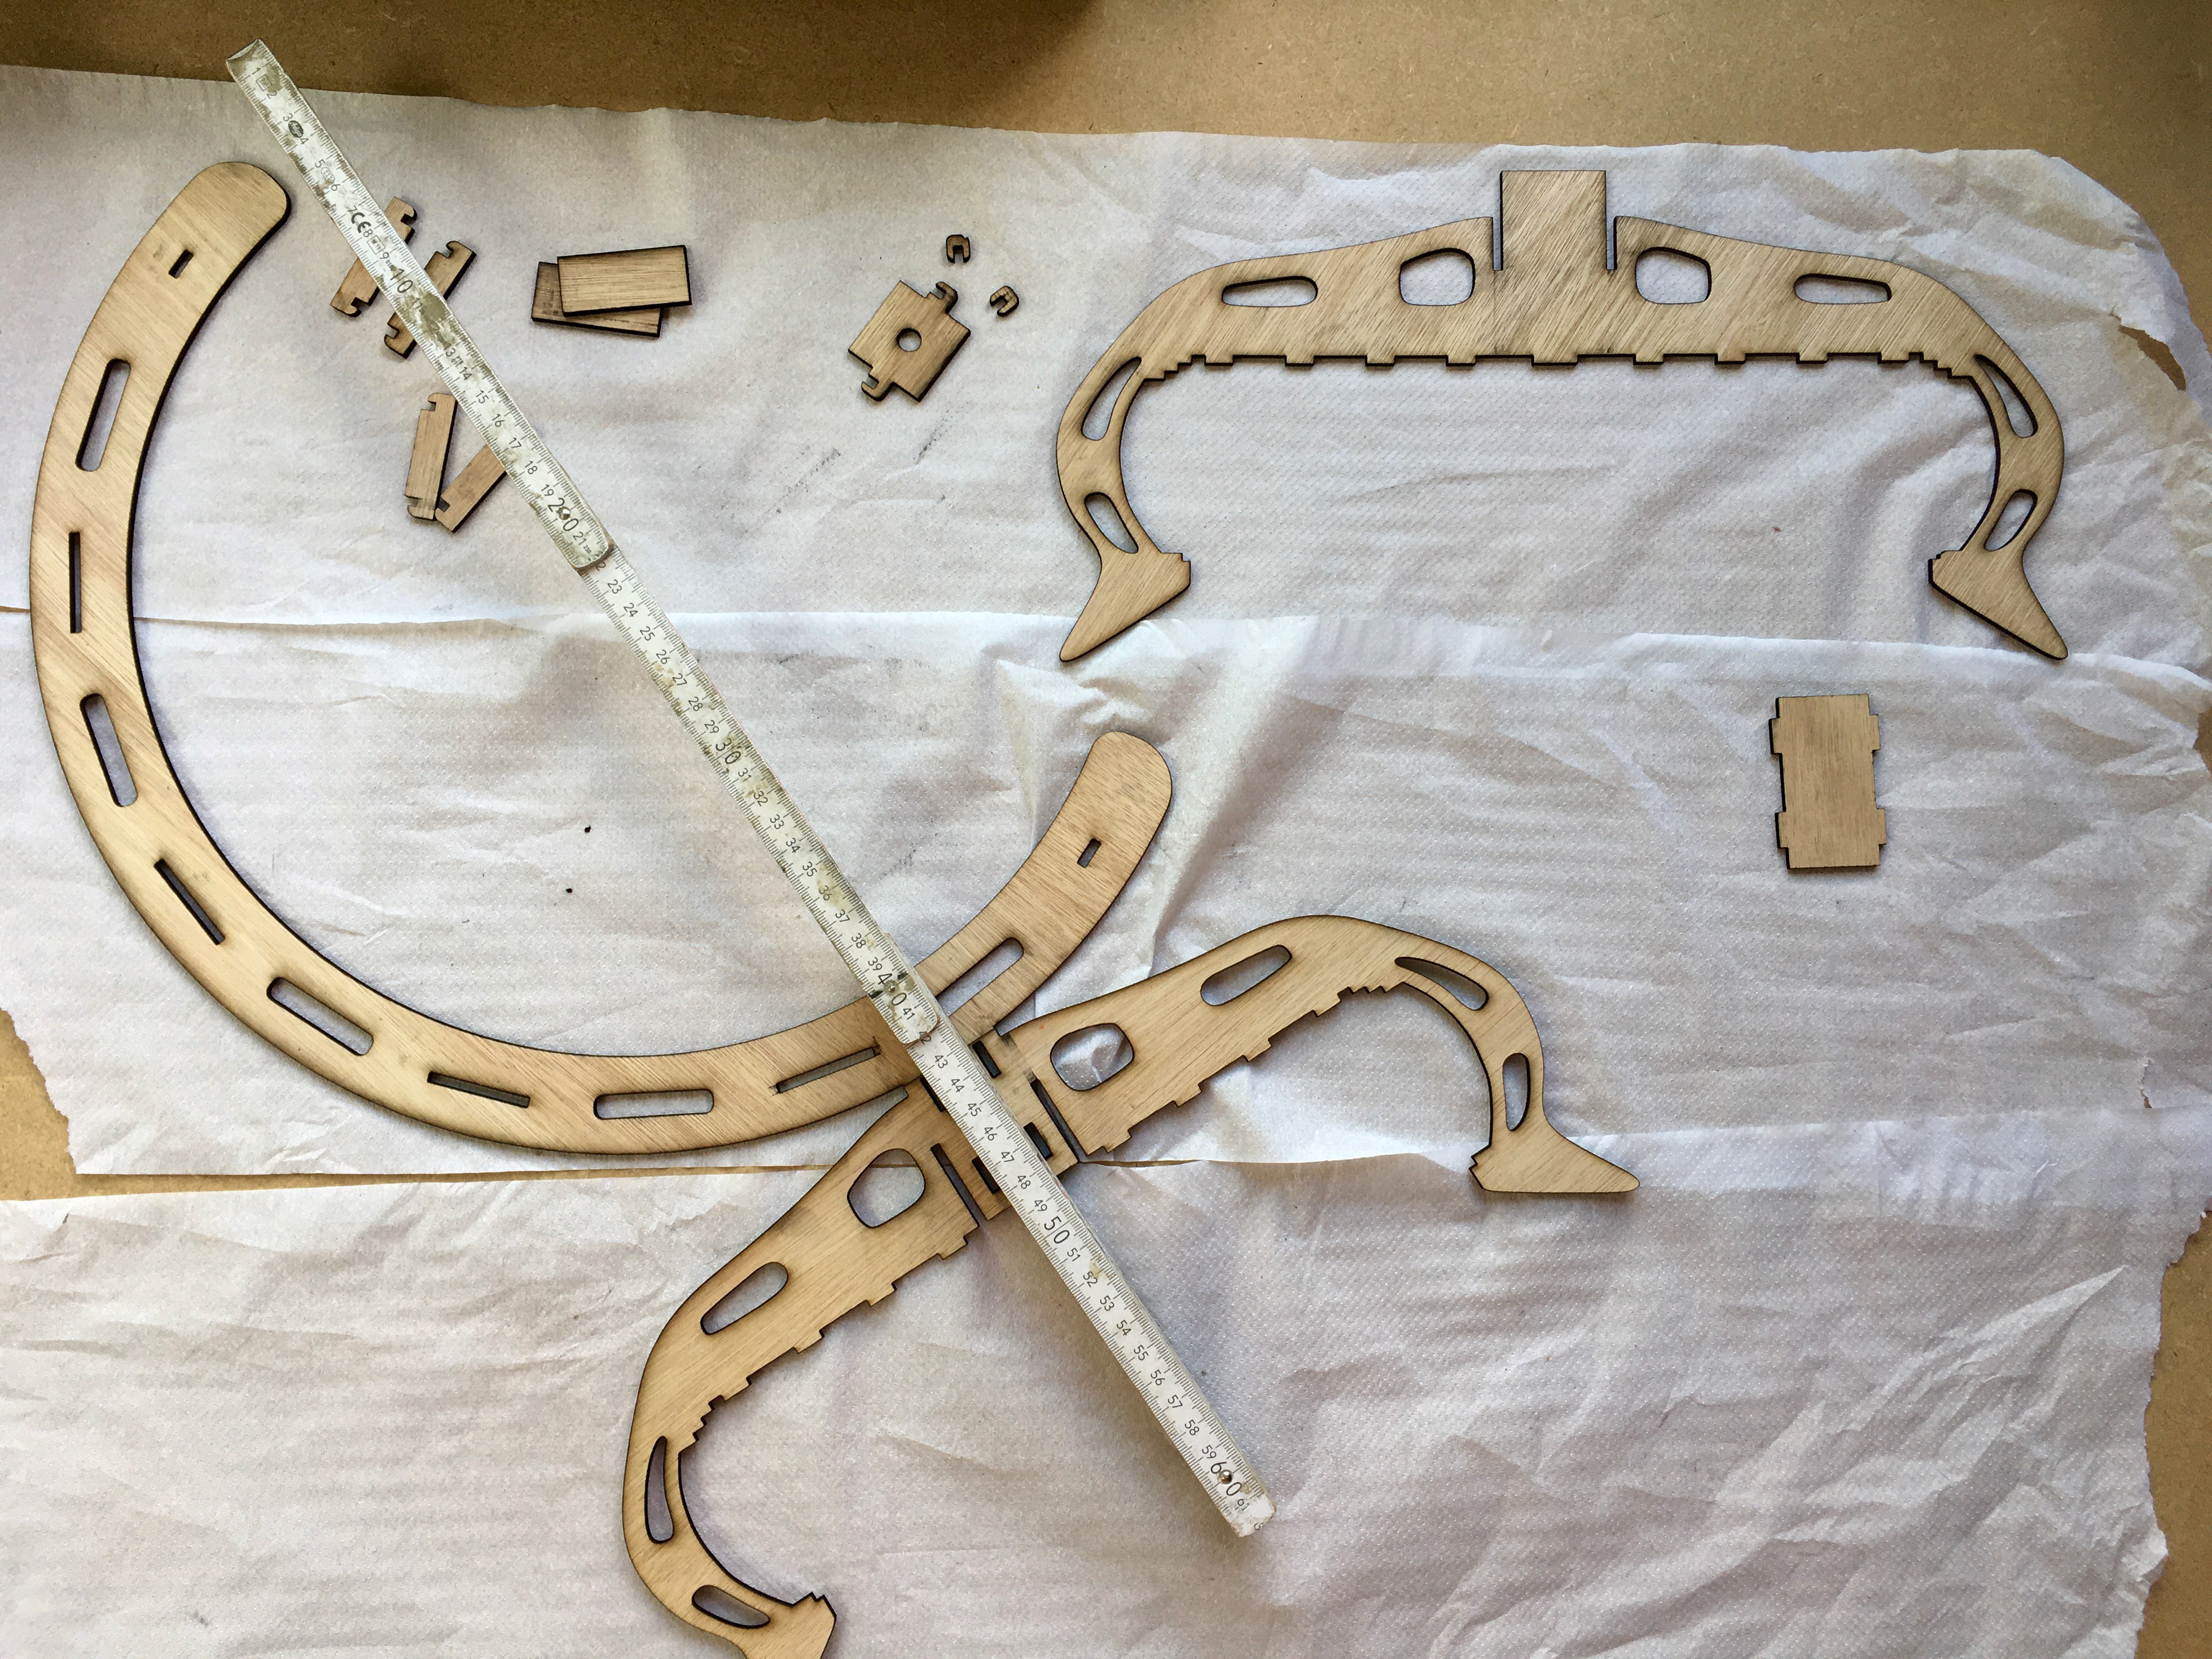
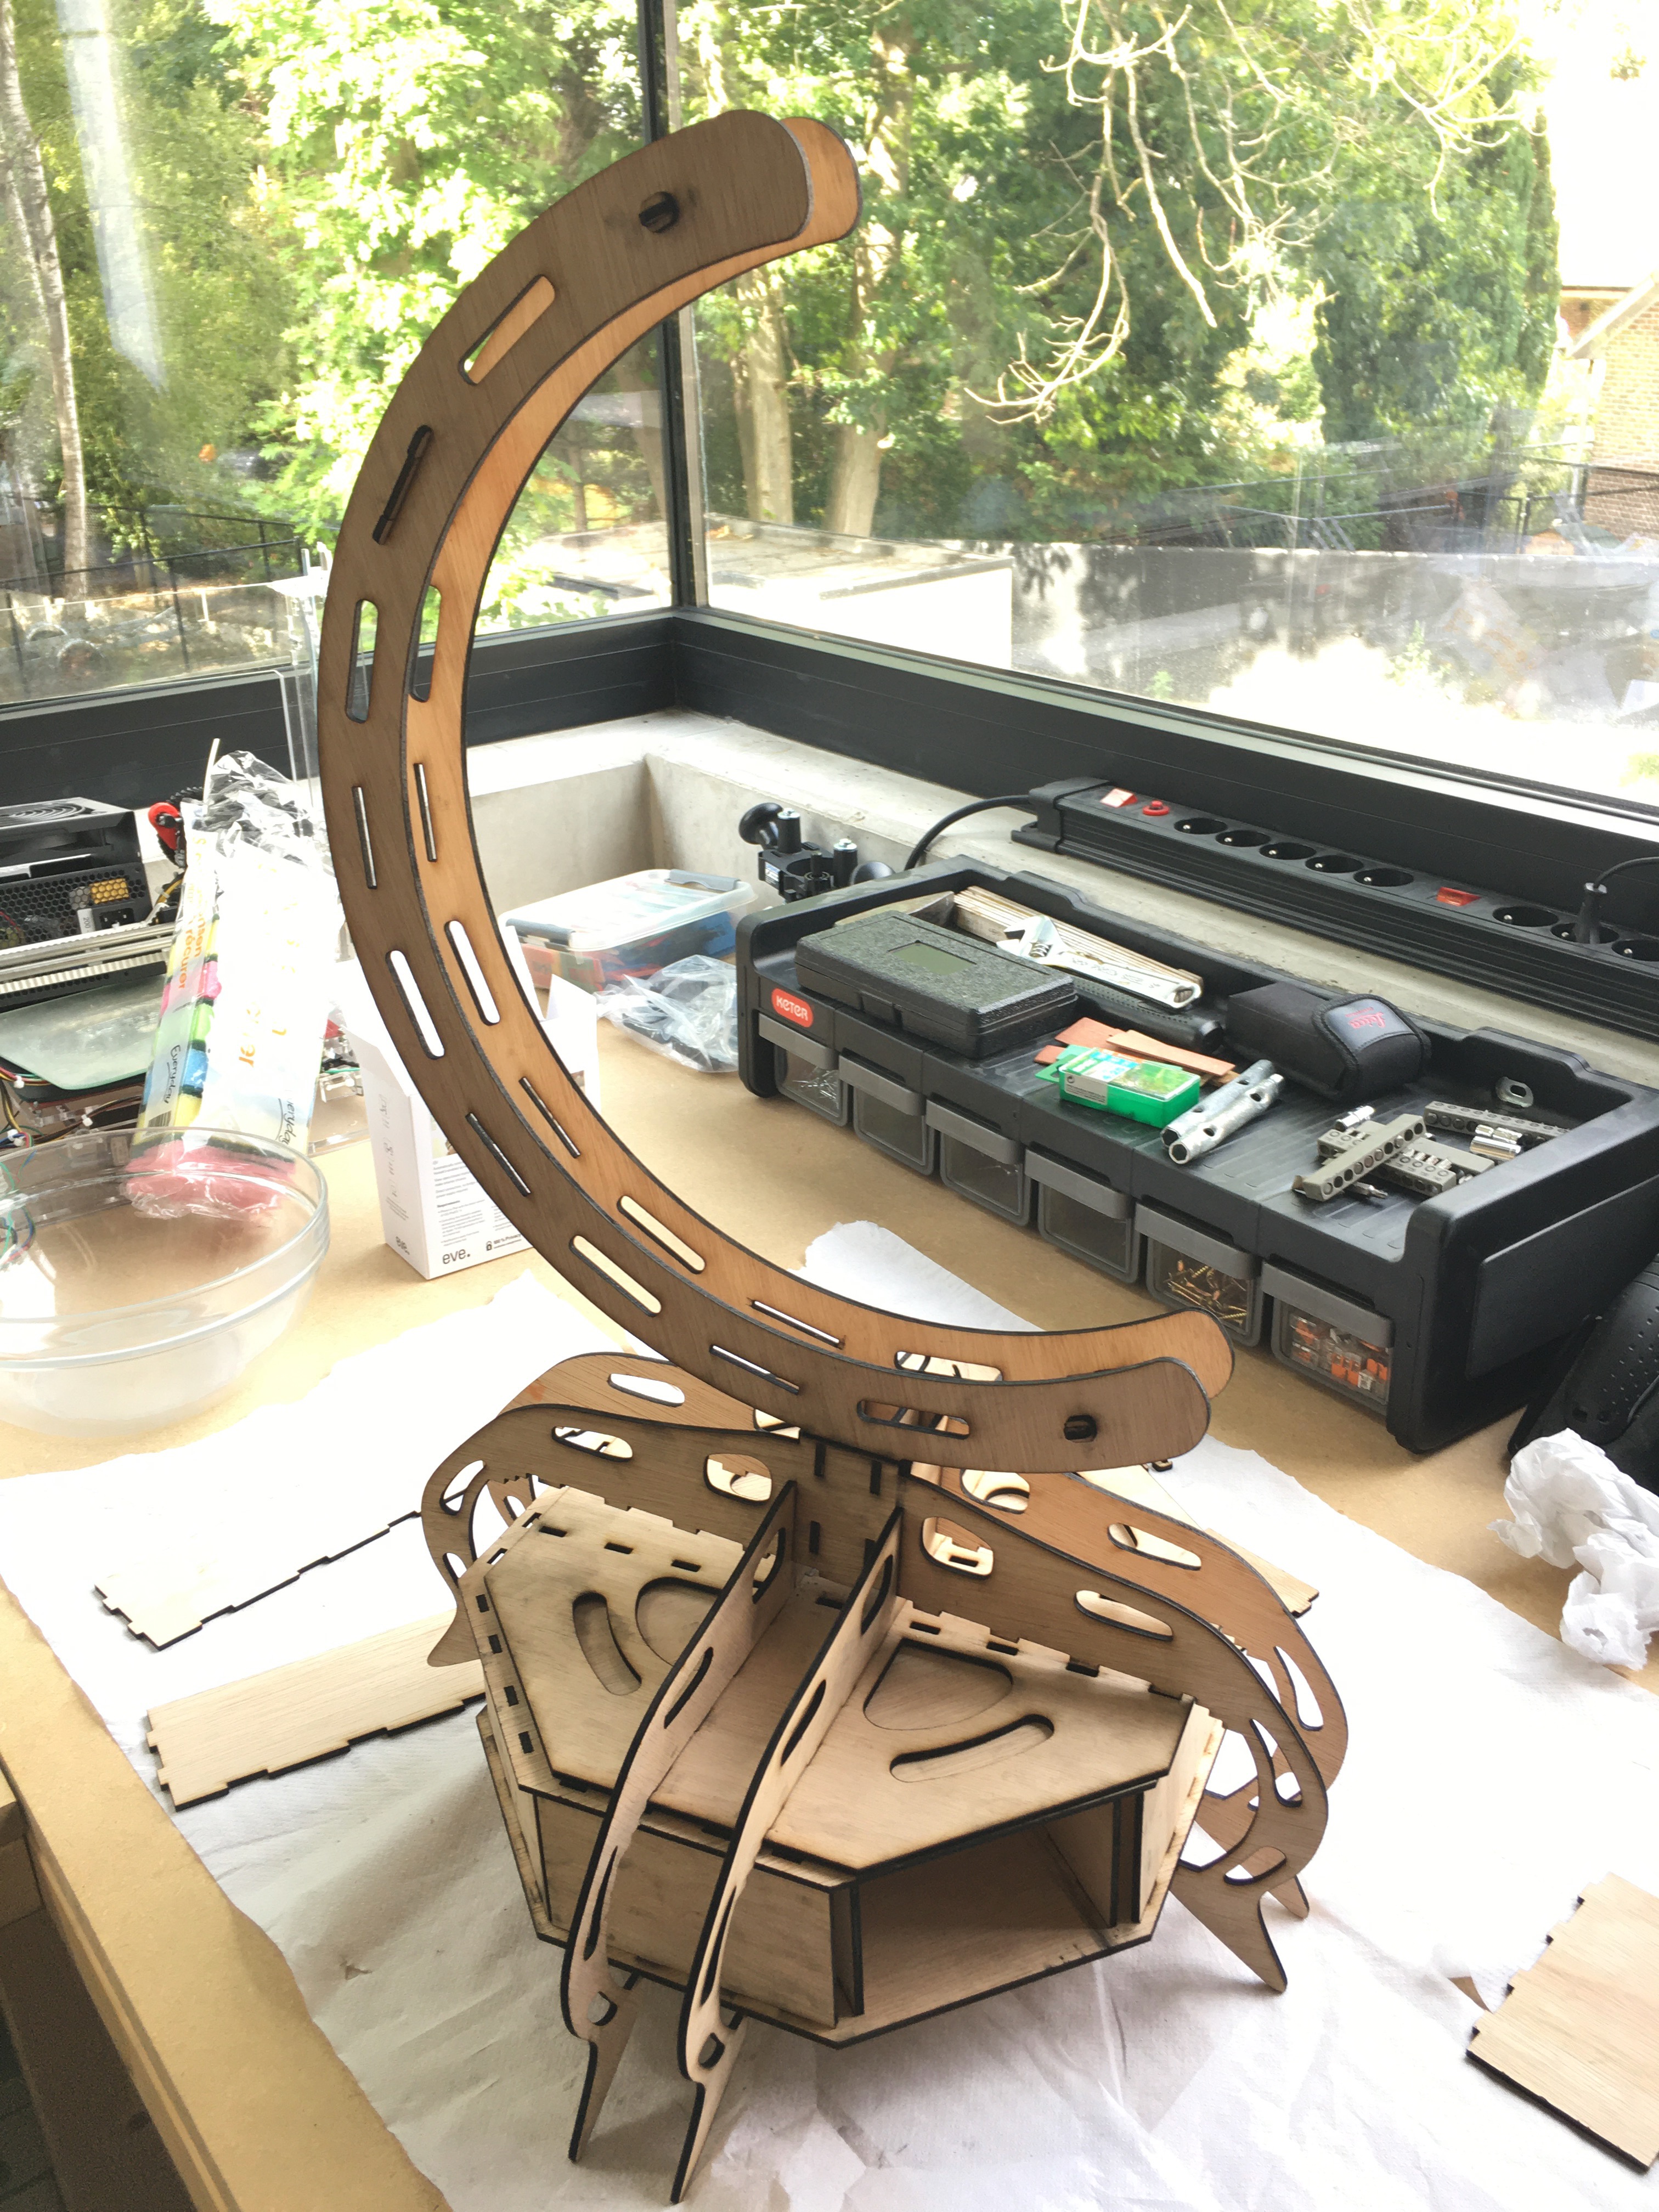
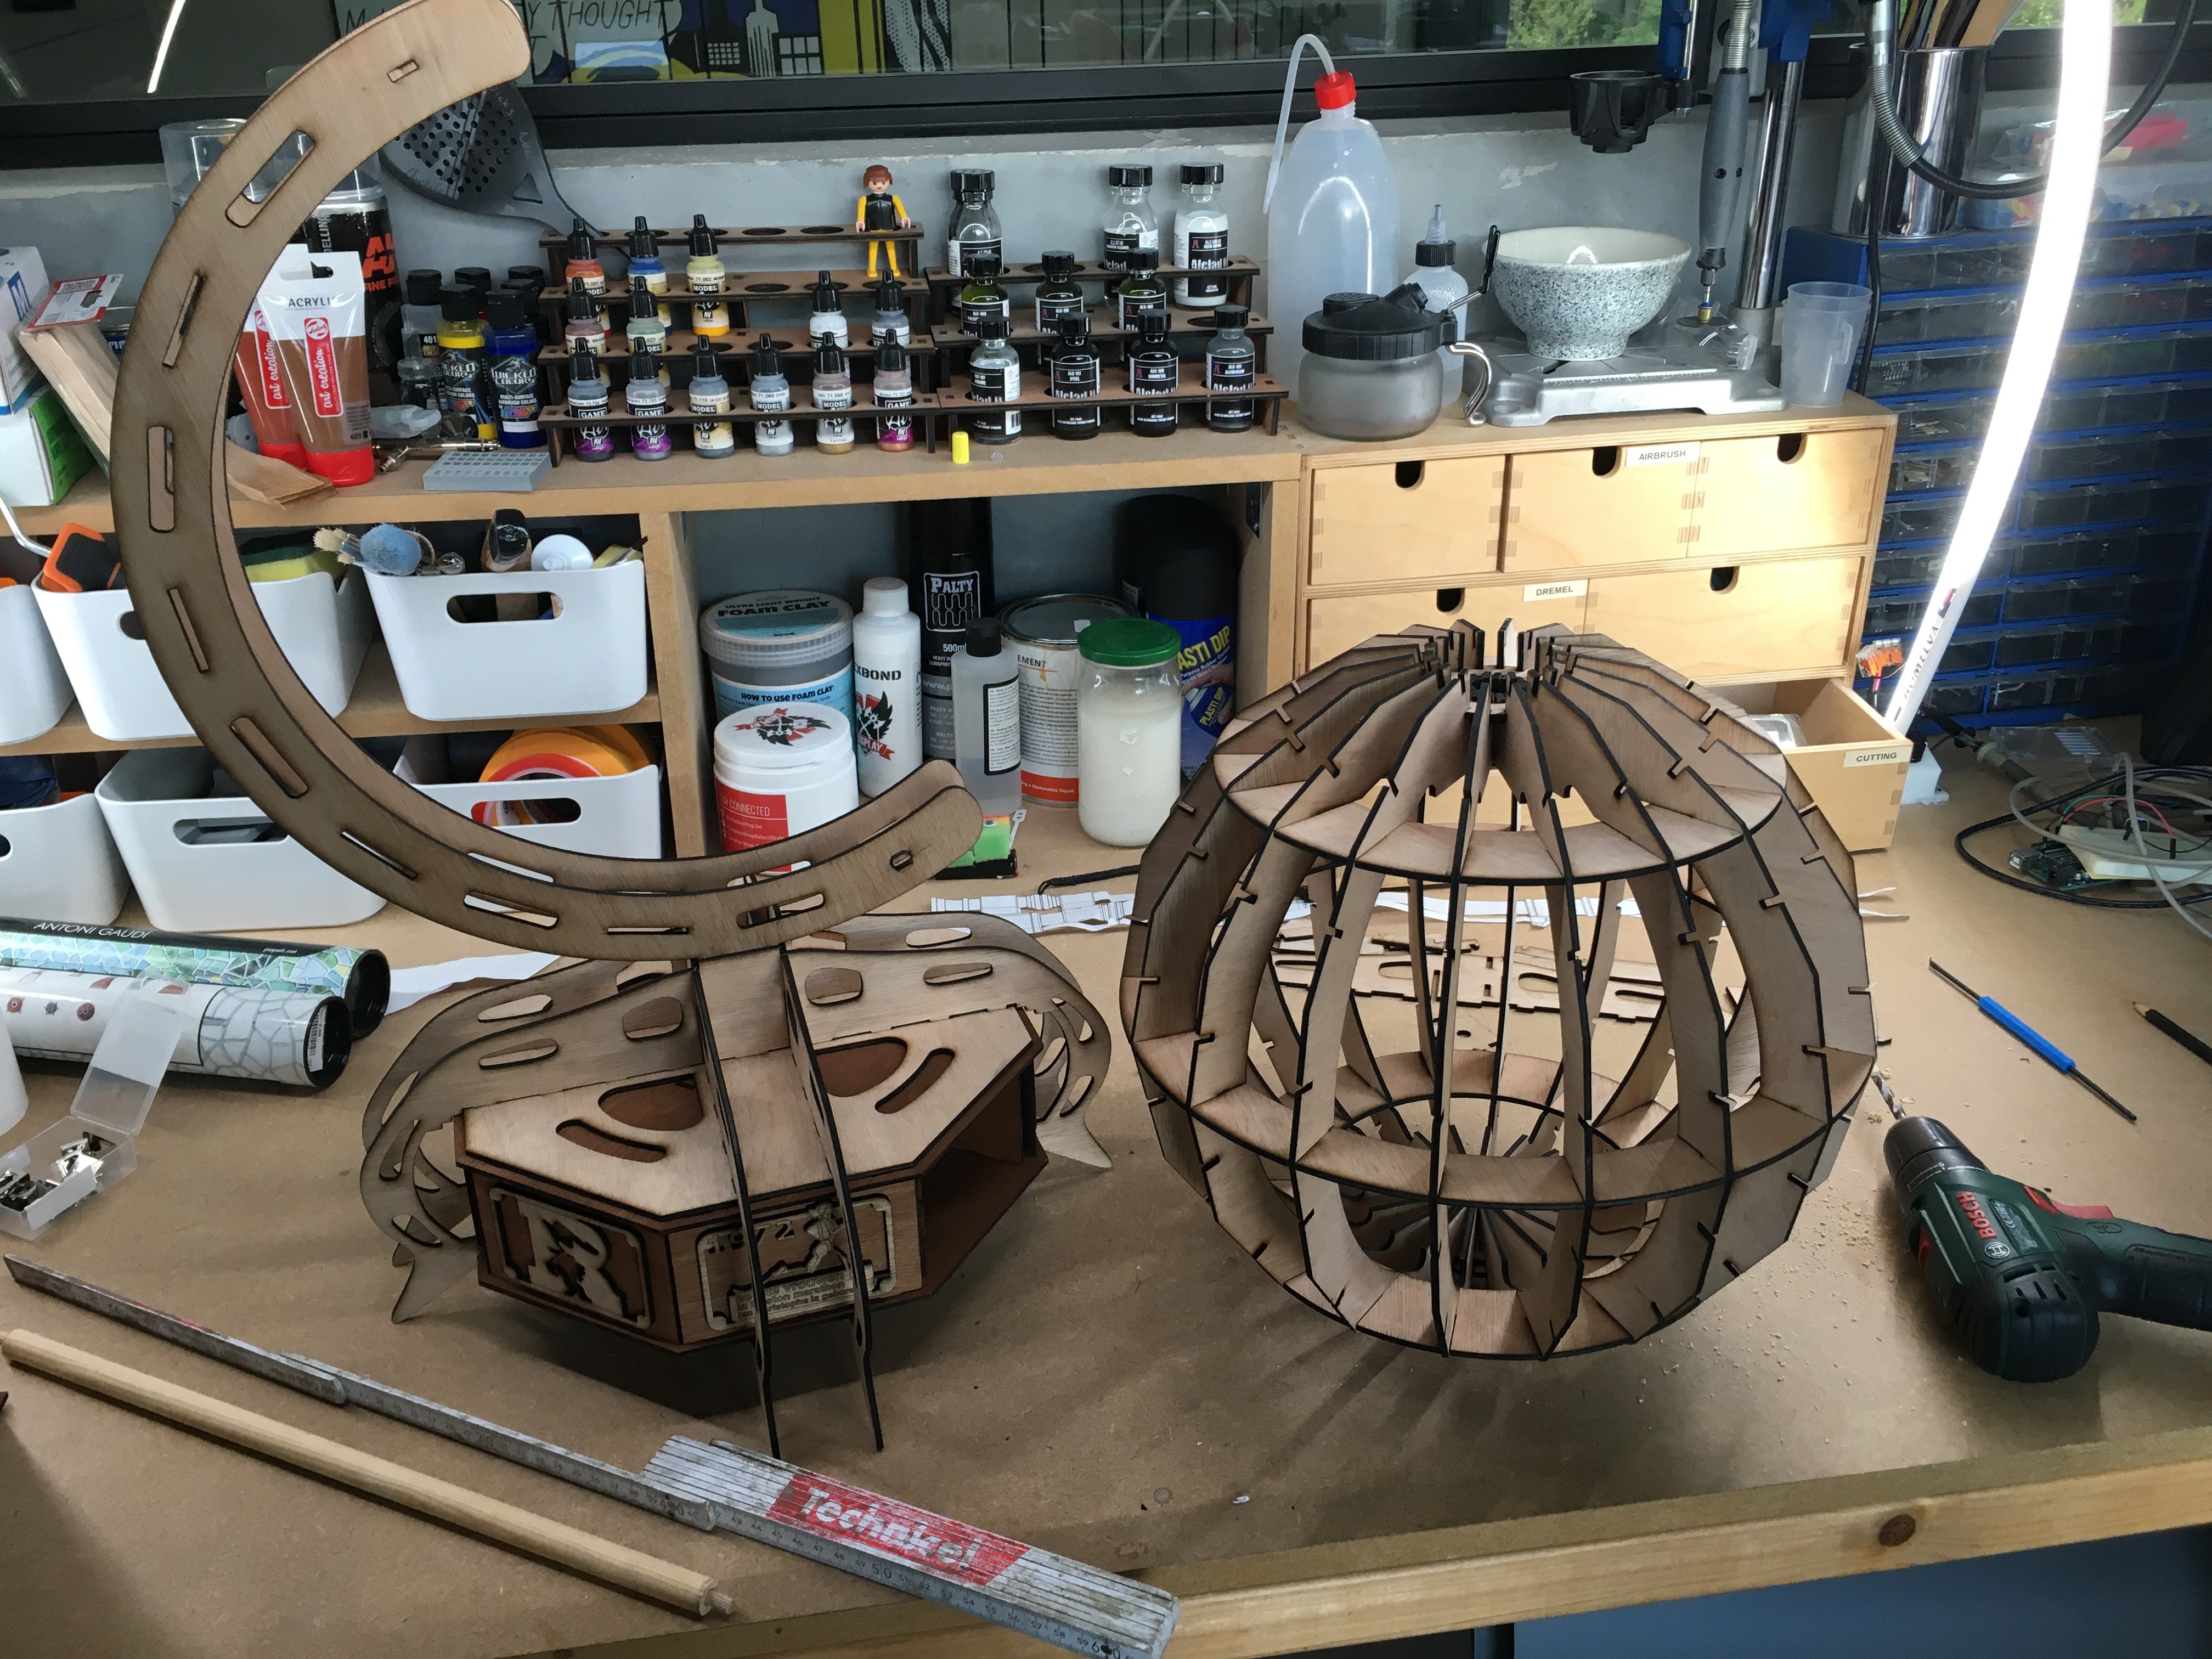
Well, almost, I also had to cut the biggest pieces in two, because they couldn’t be fit on the bed size of my cutter. I had to come up with a redesign of the large arm that holds the entire globe and the drawer beneath it. It took a few experiments, but in the end, the 60cm tall construction worked out perfectly. And I had all pieces to construct the arm and drawer.
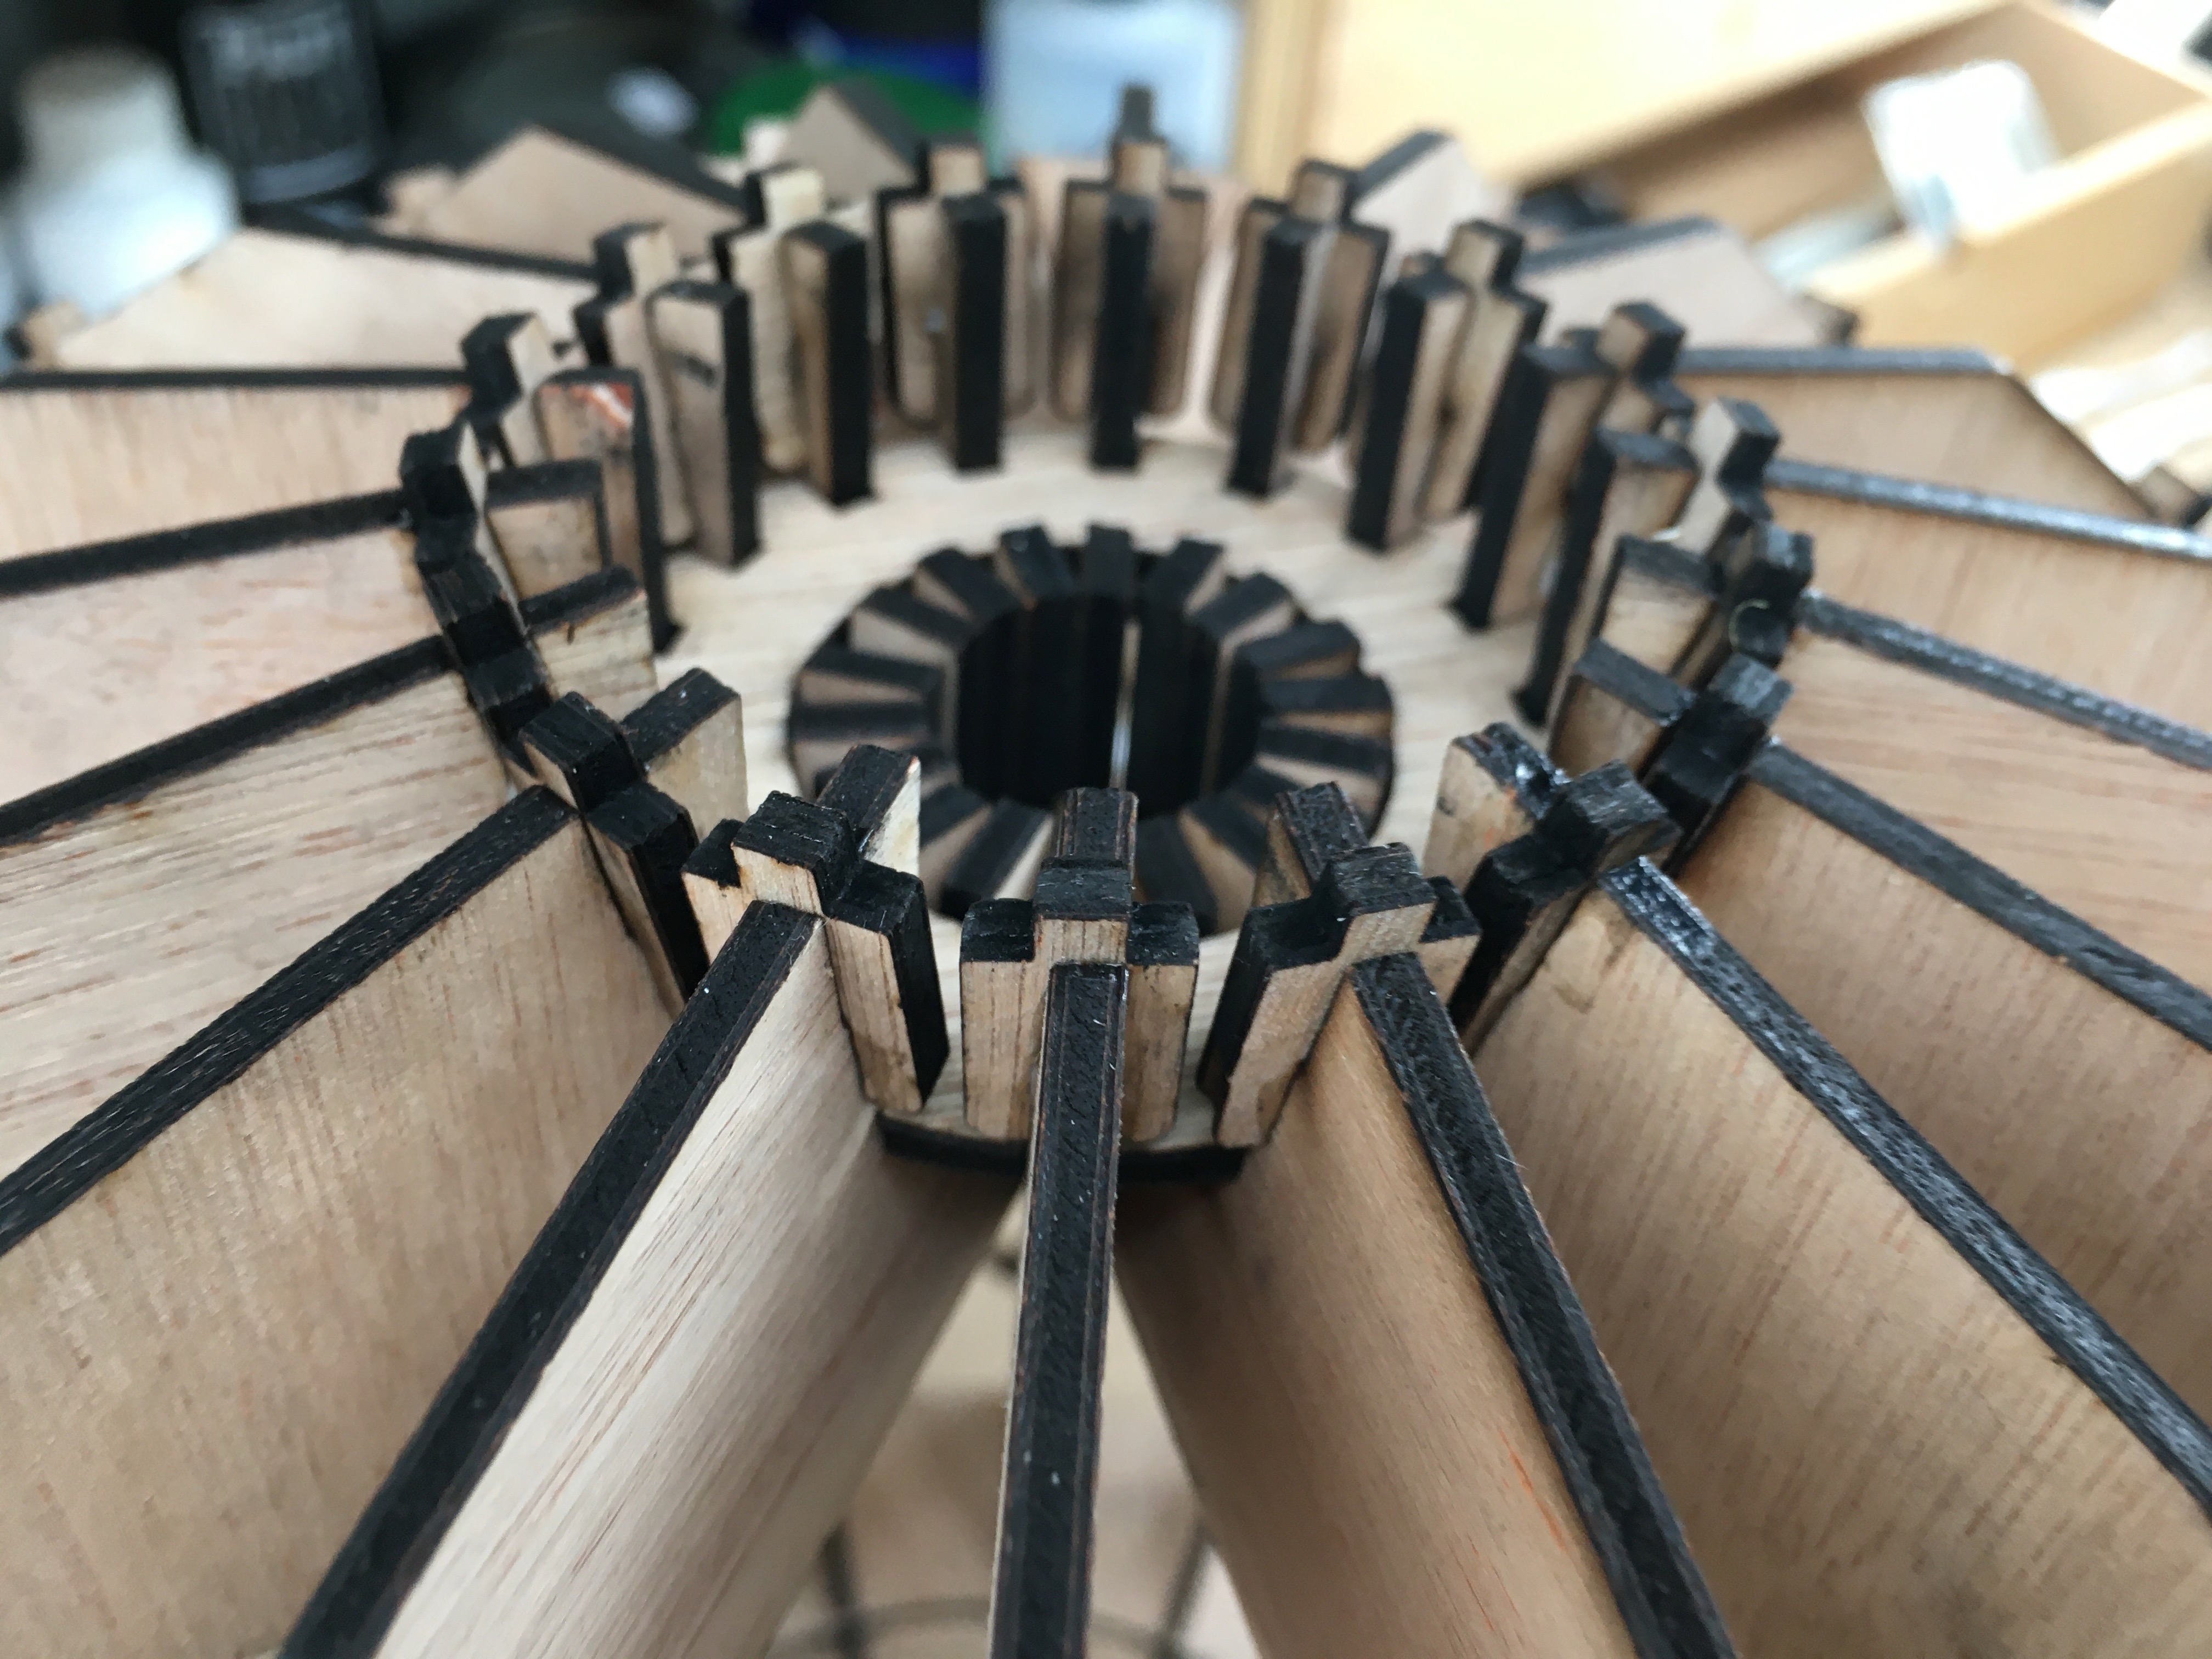
The Actual Globe - Inner Structure
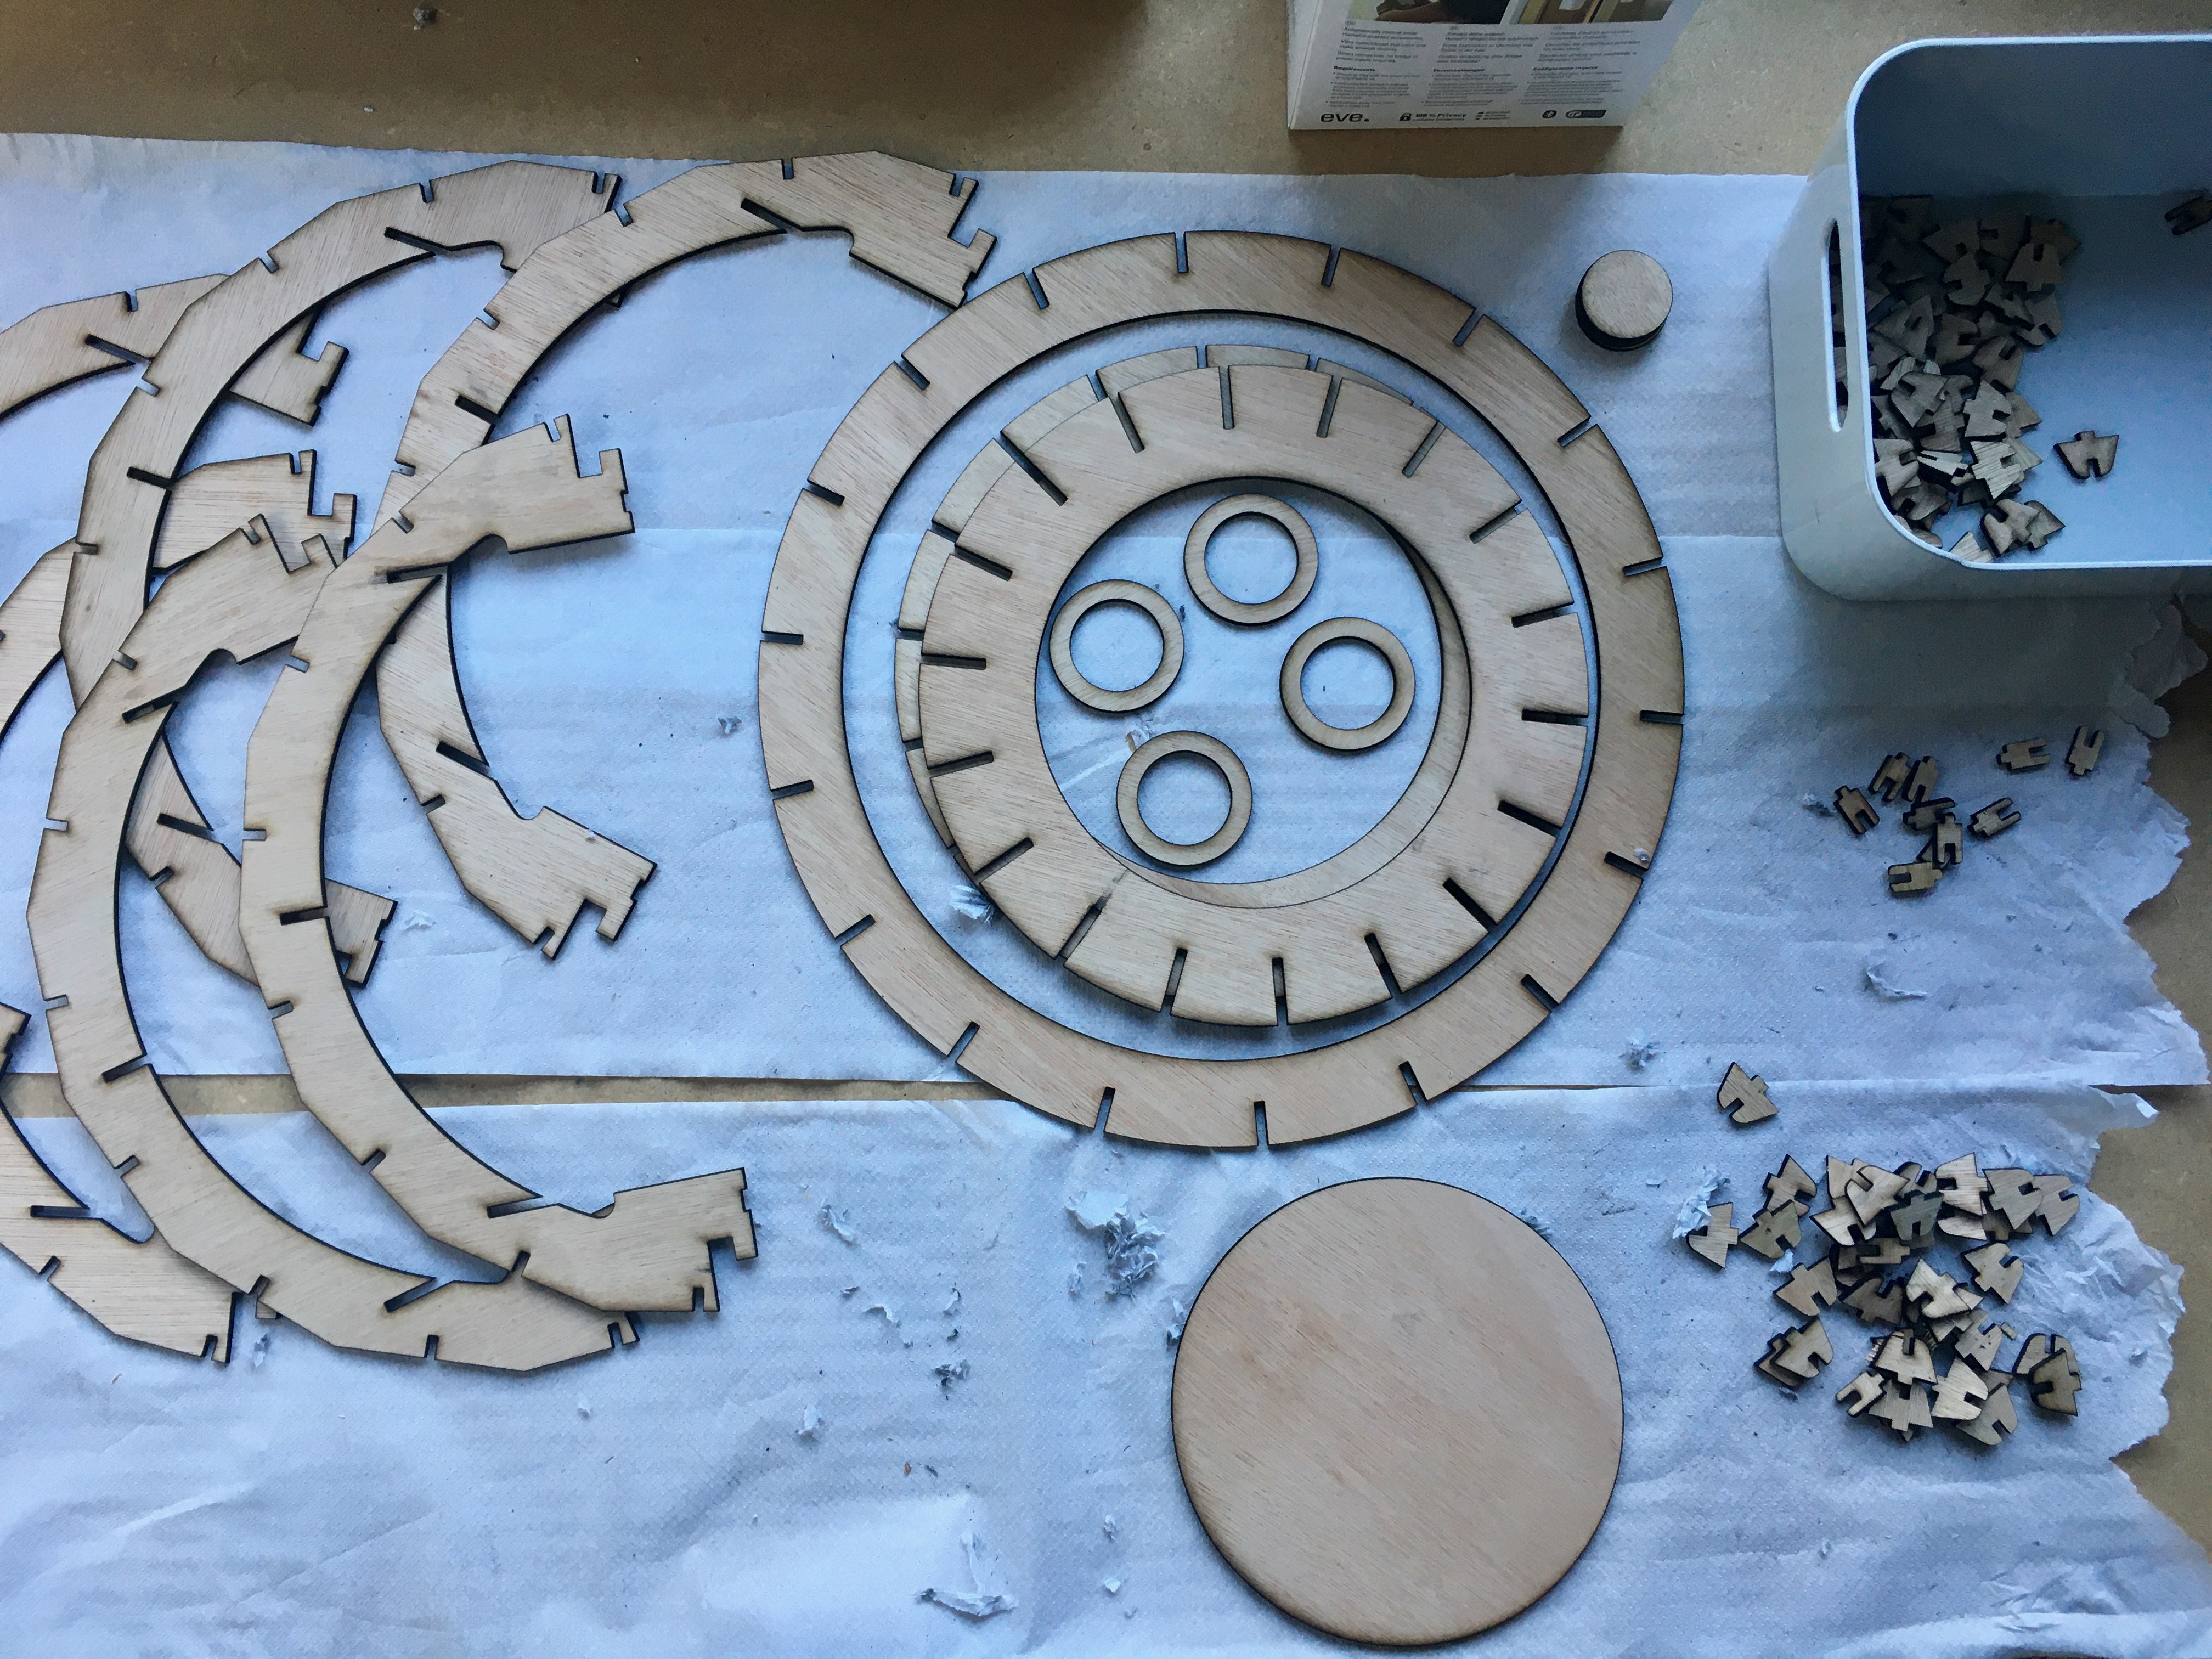
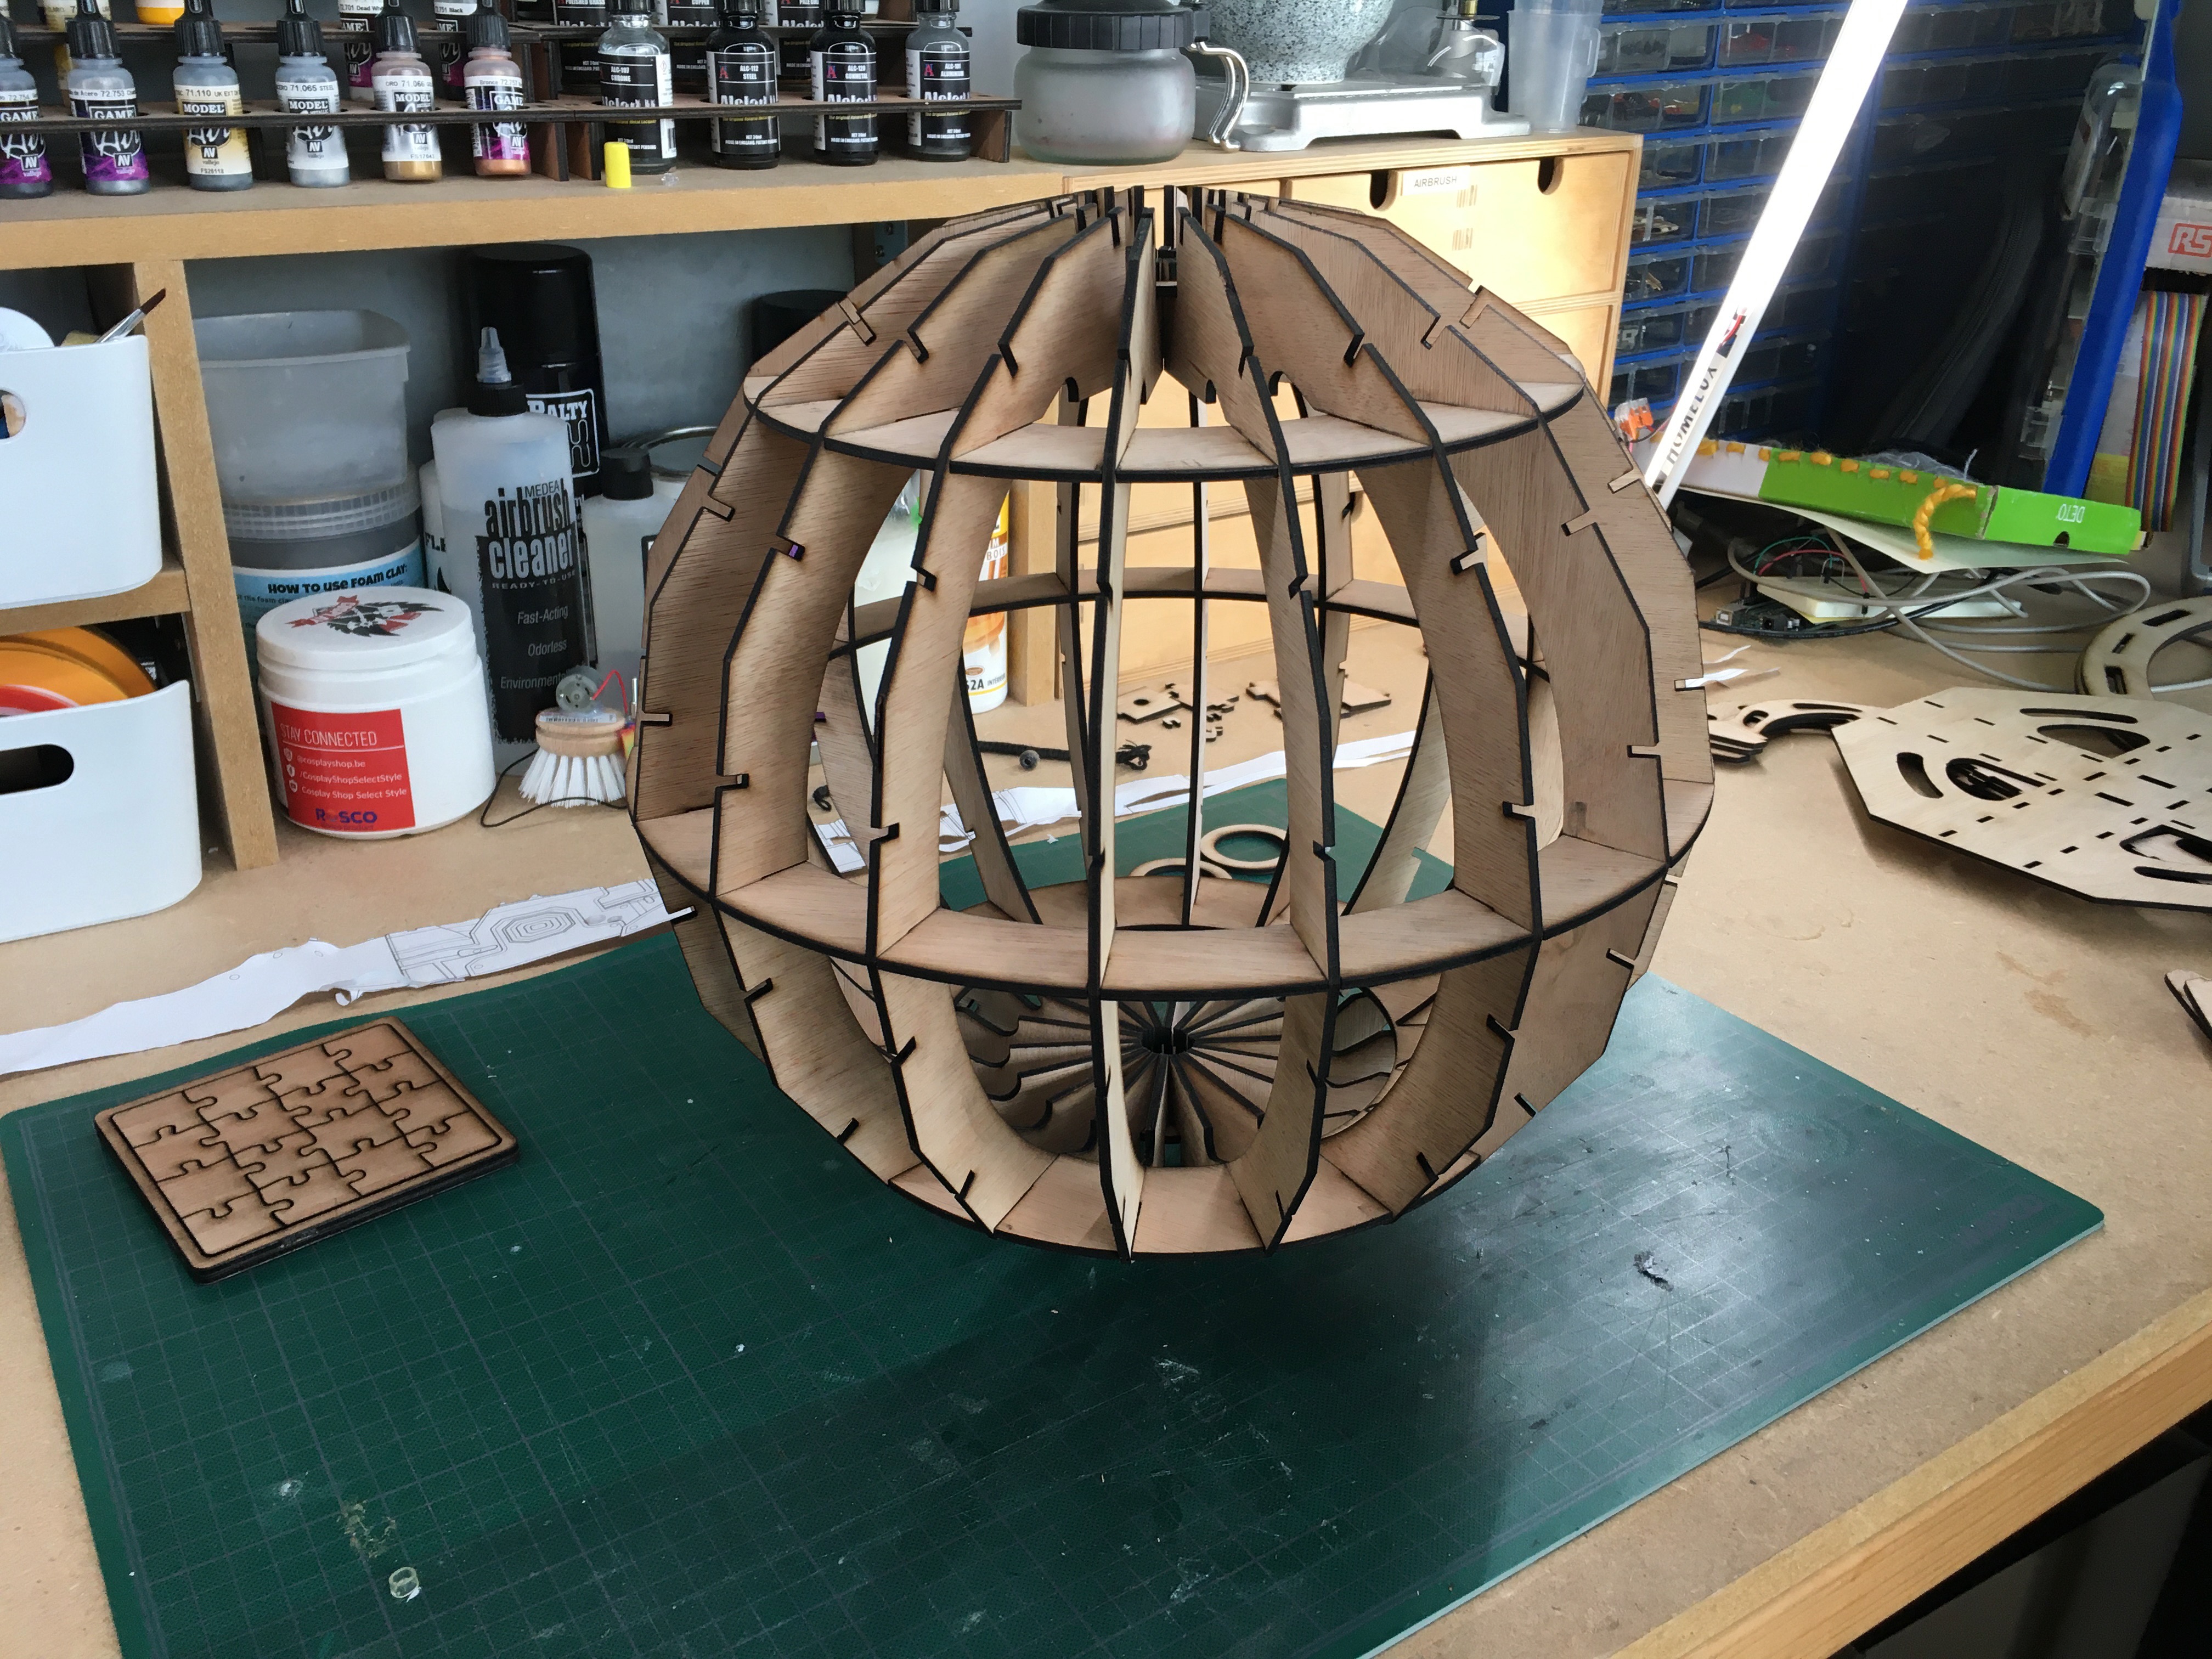
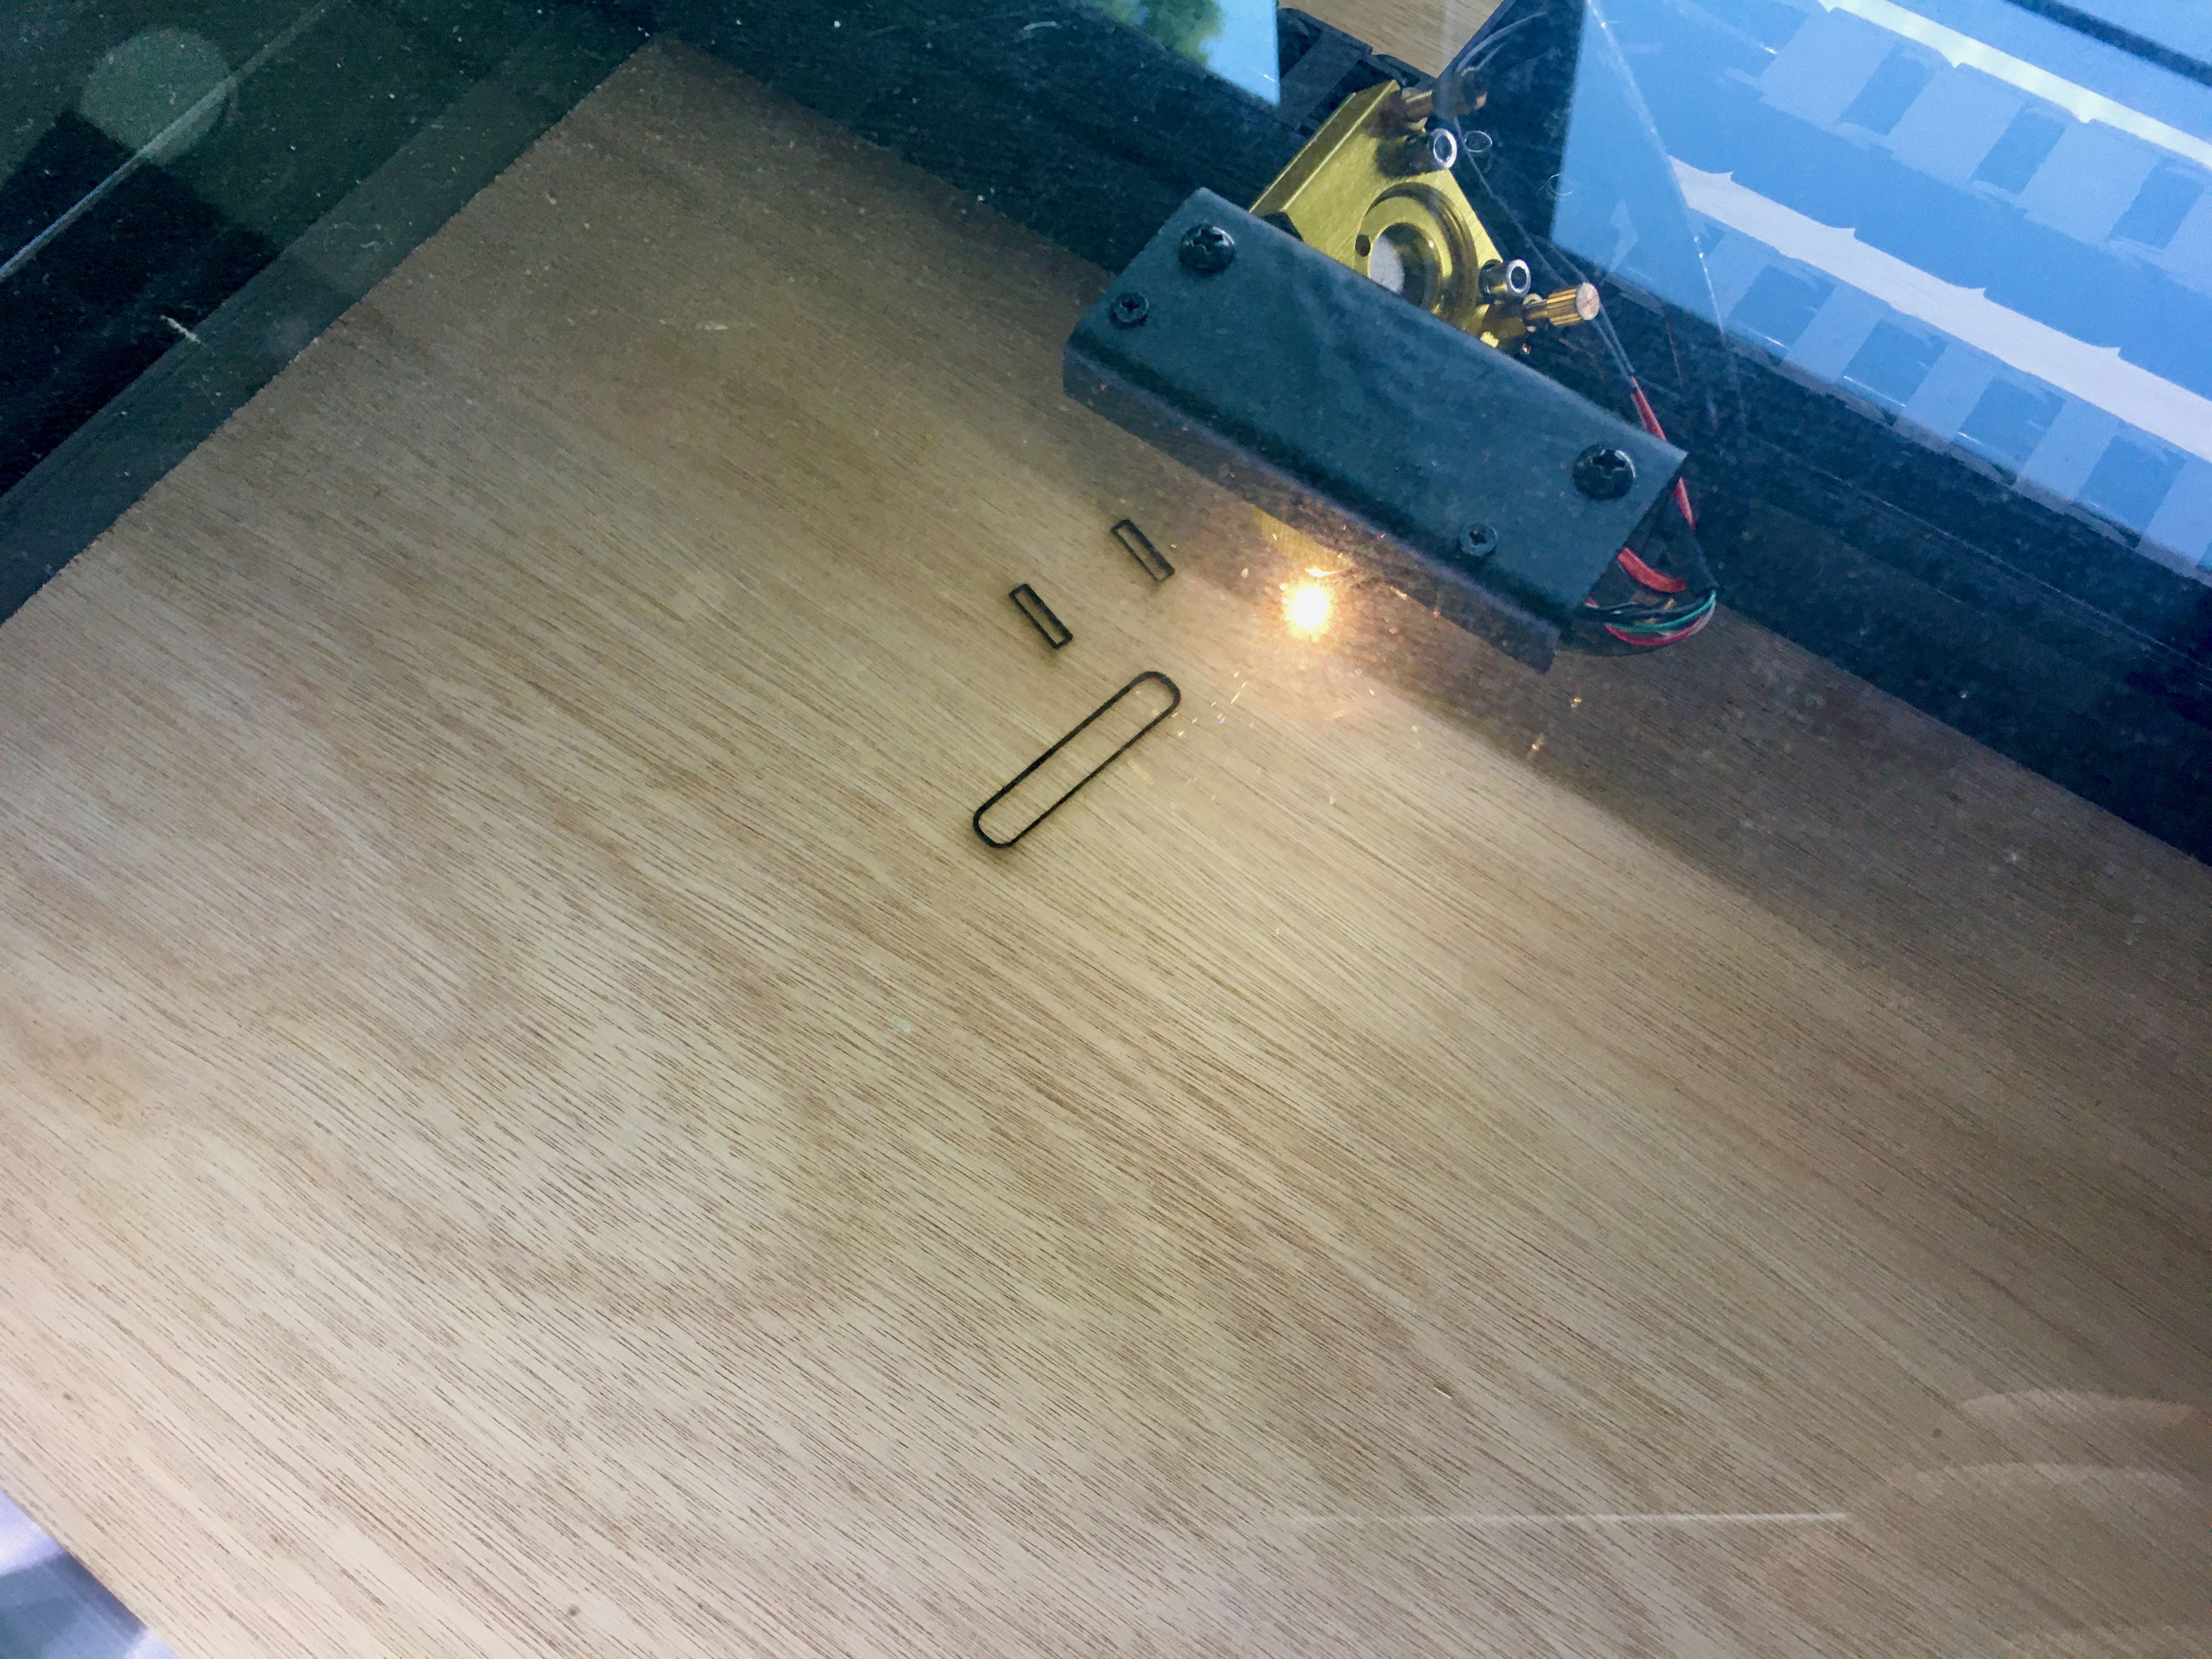
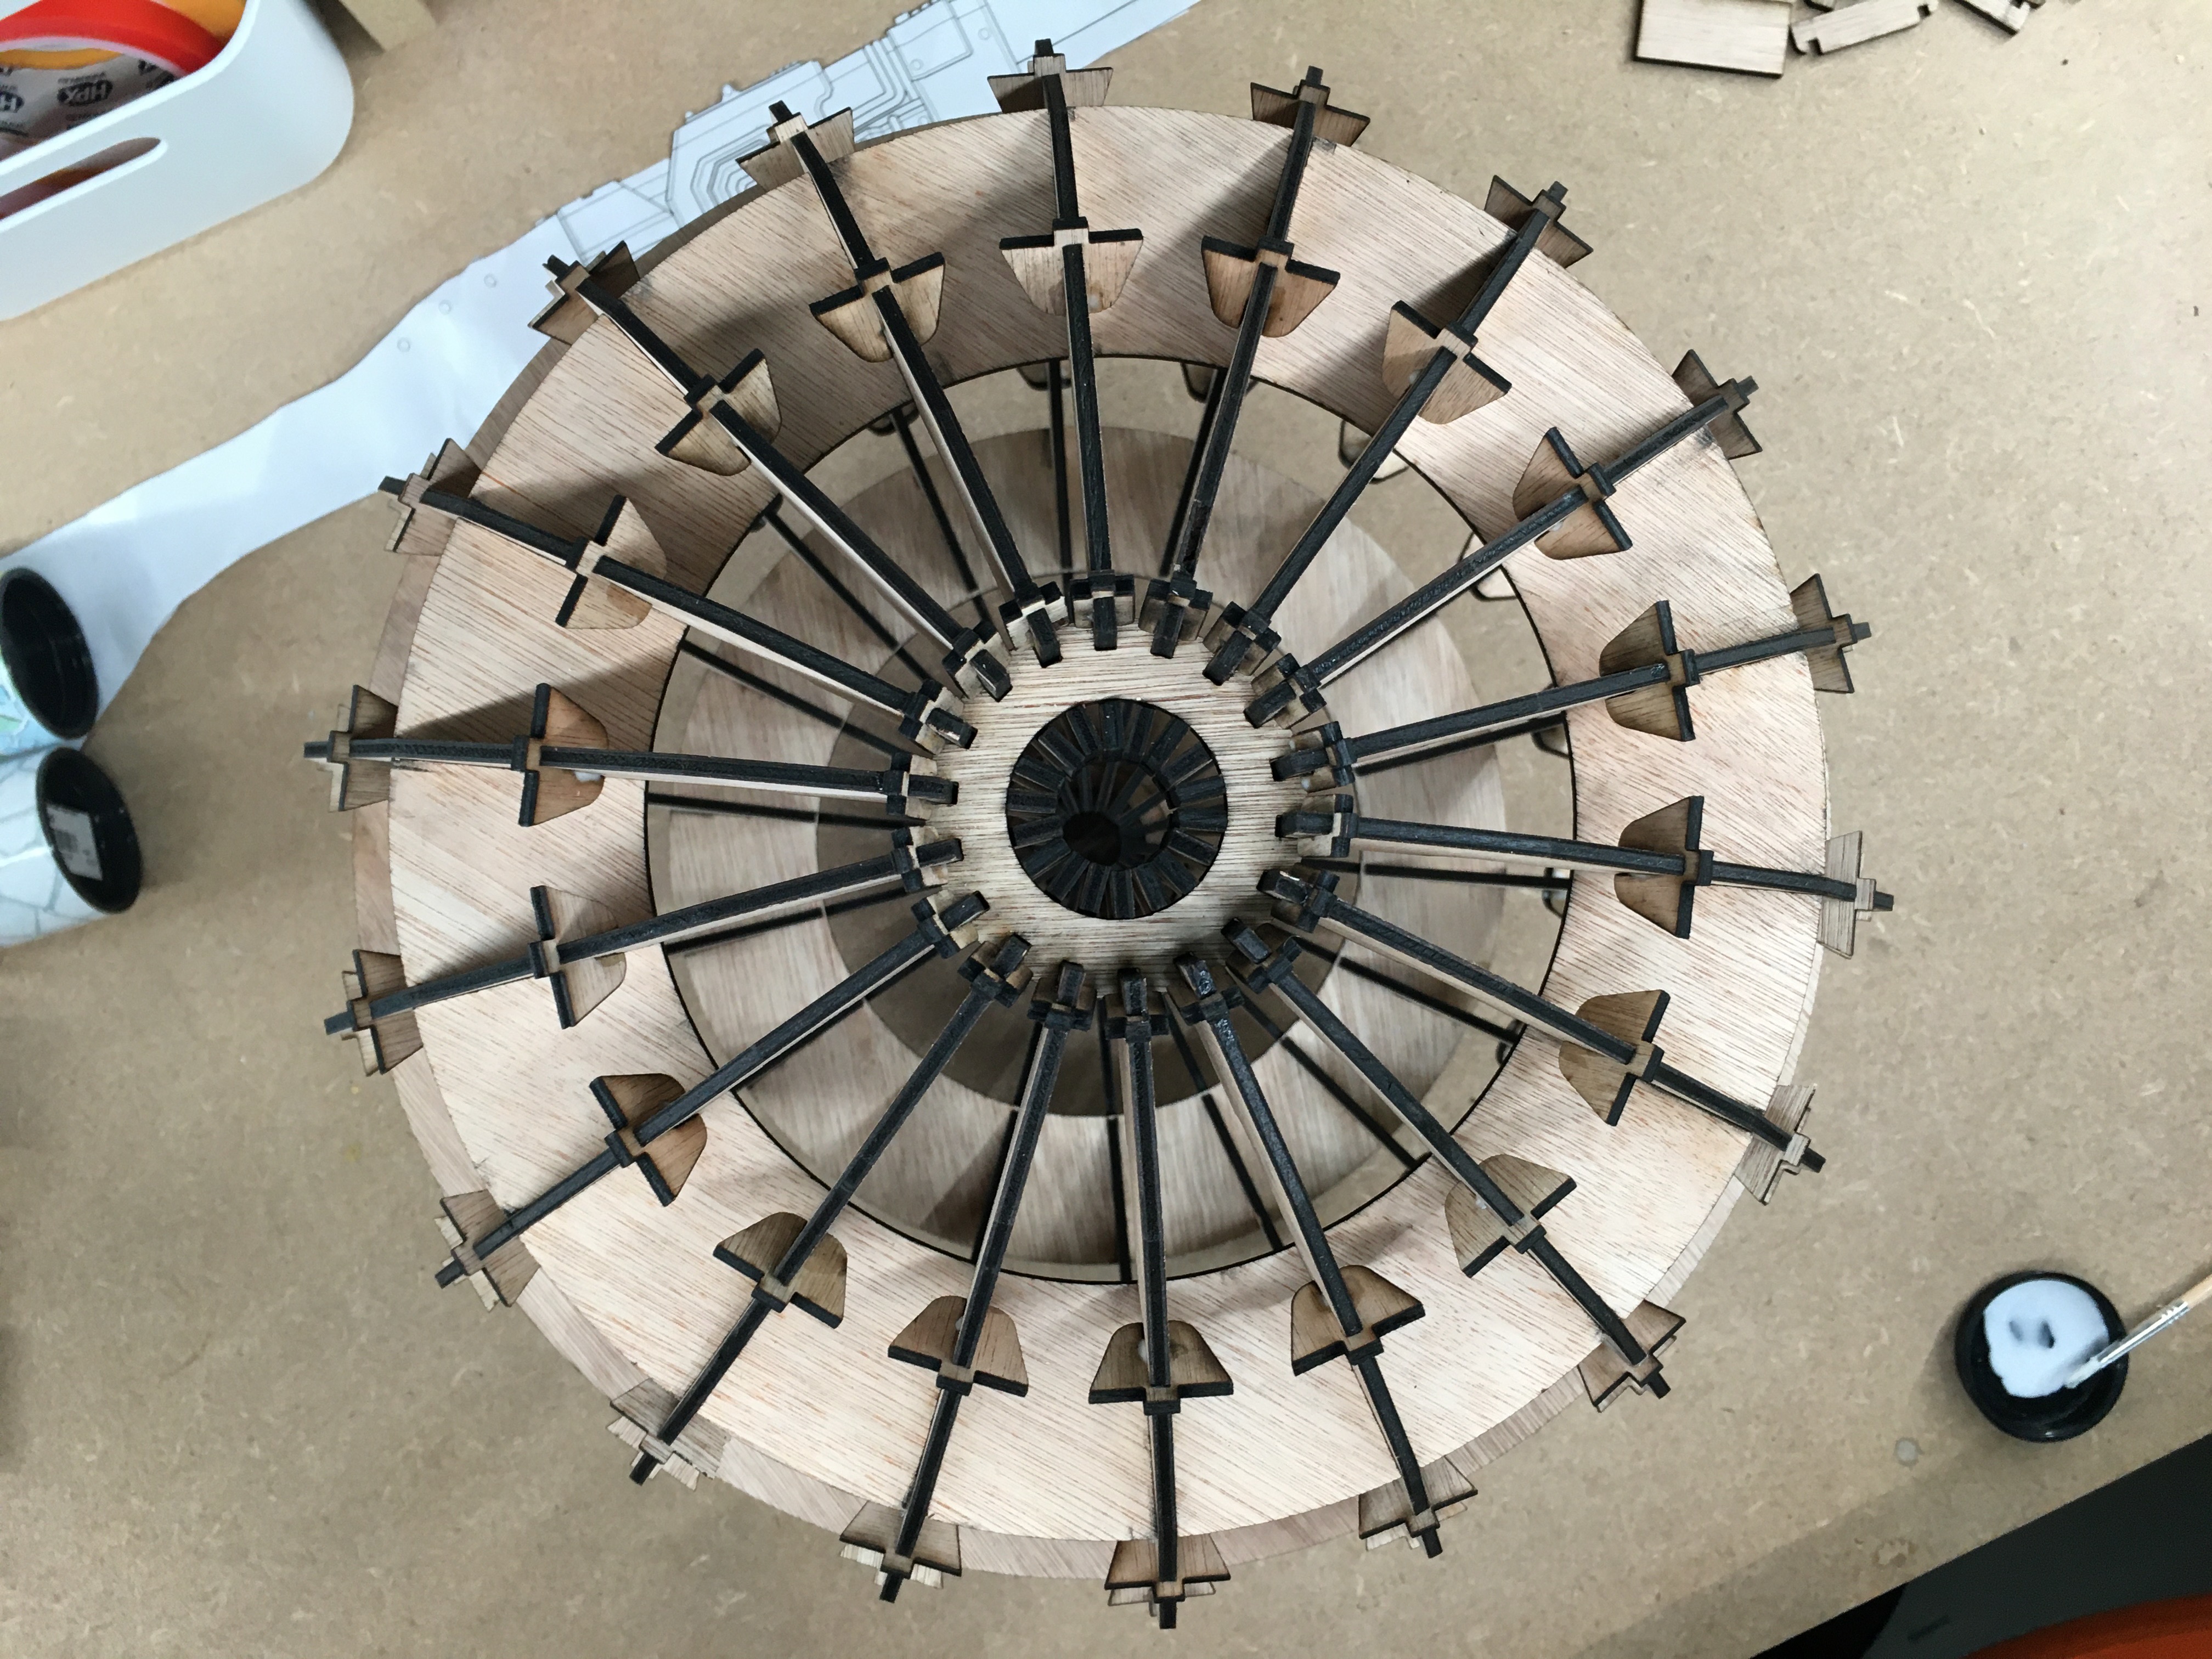
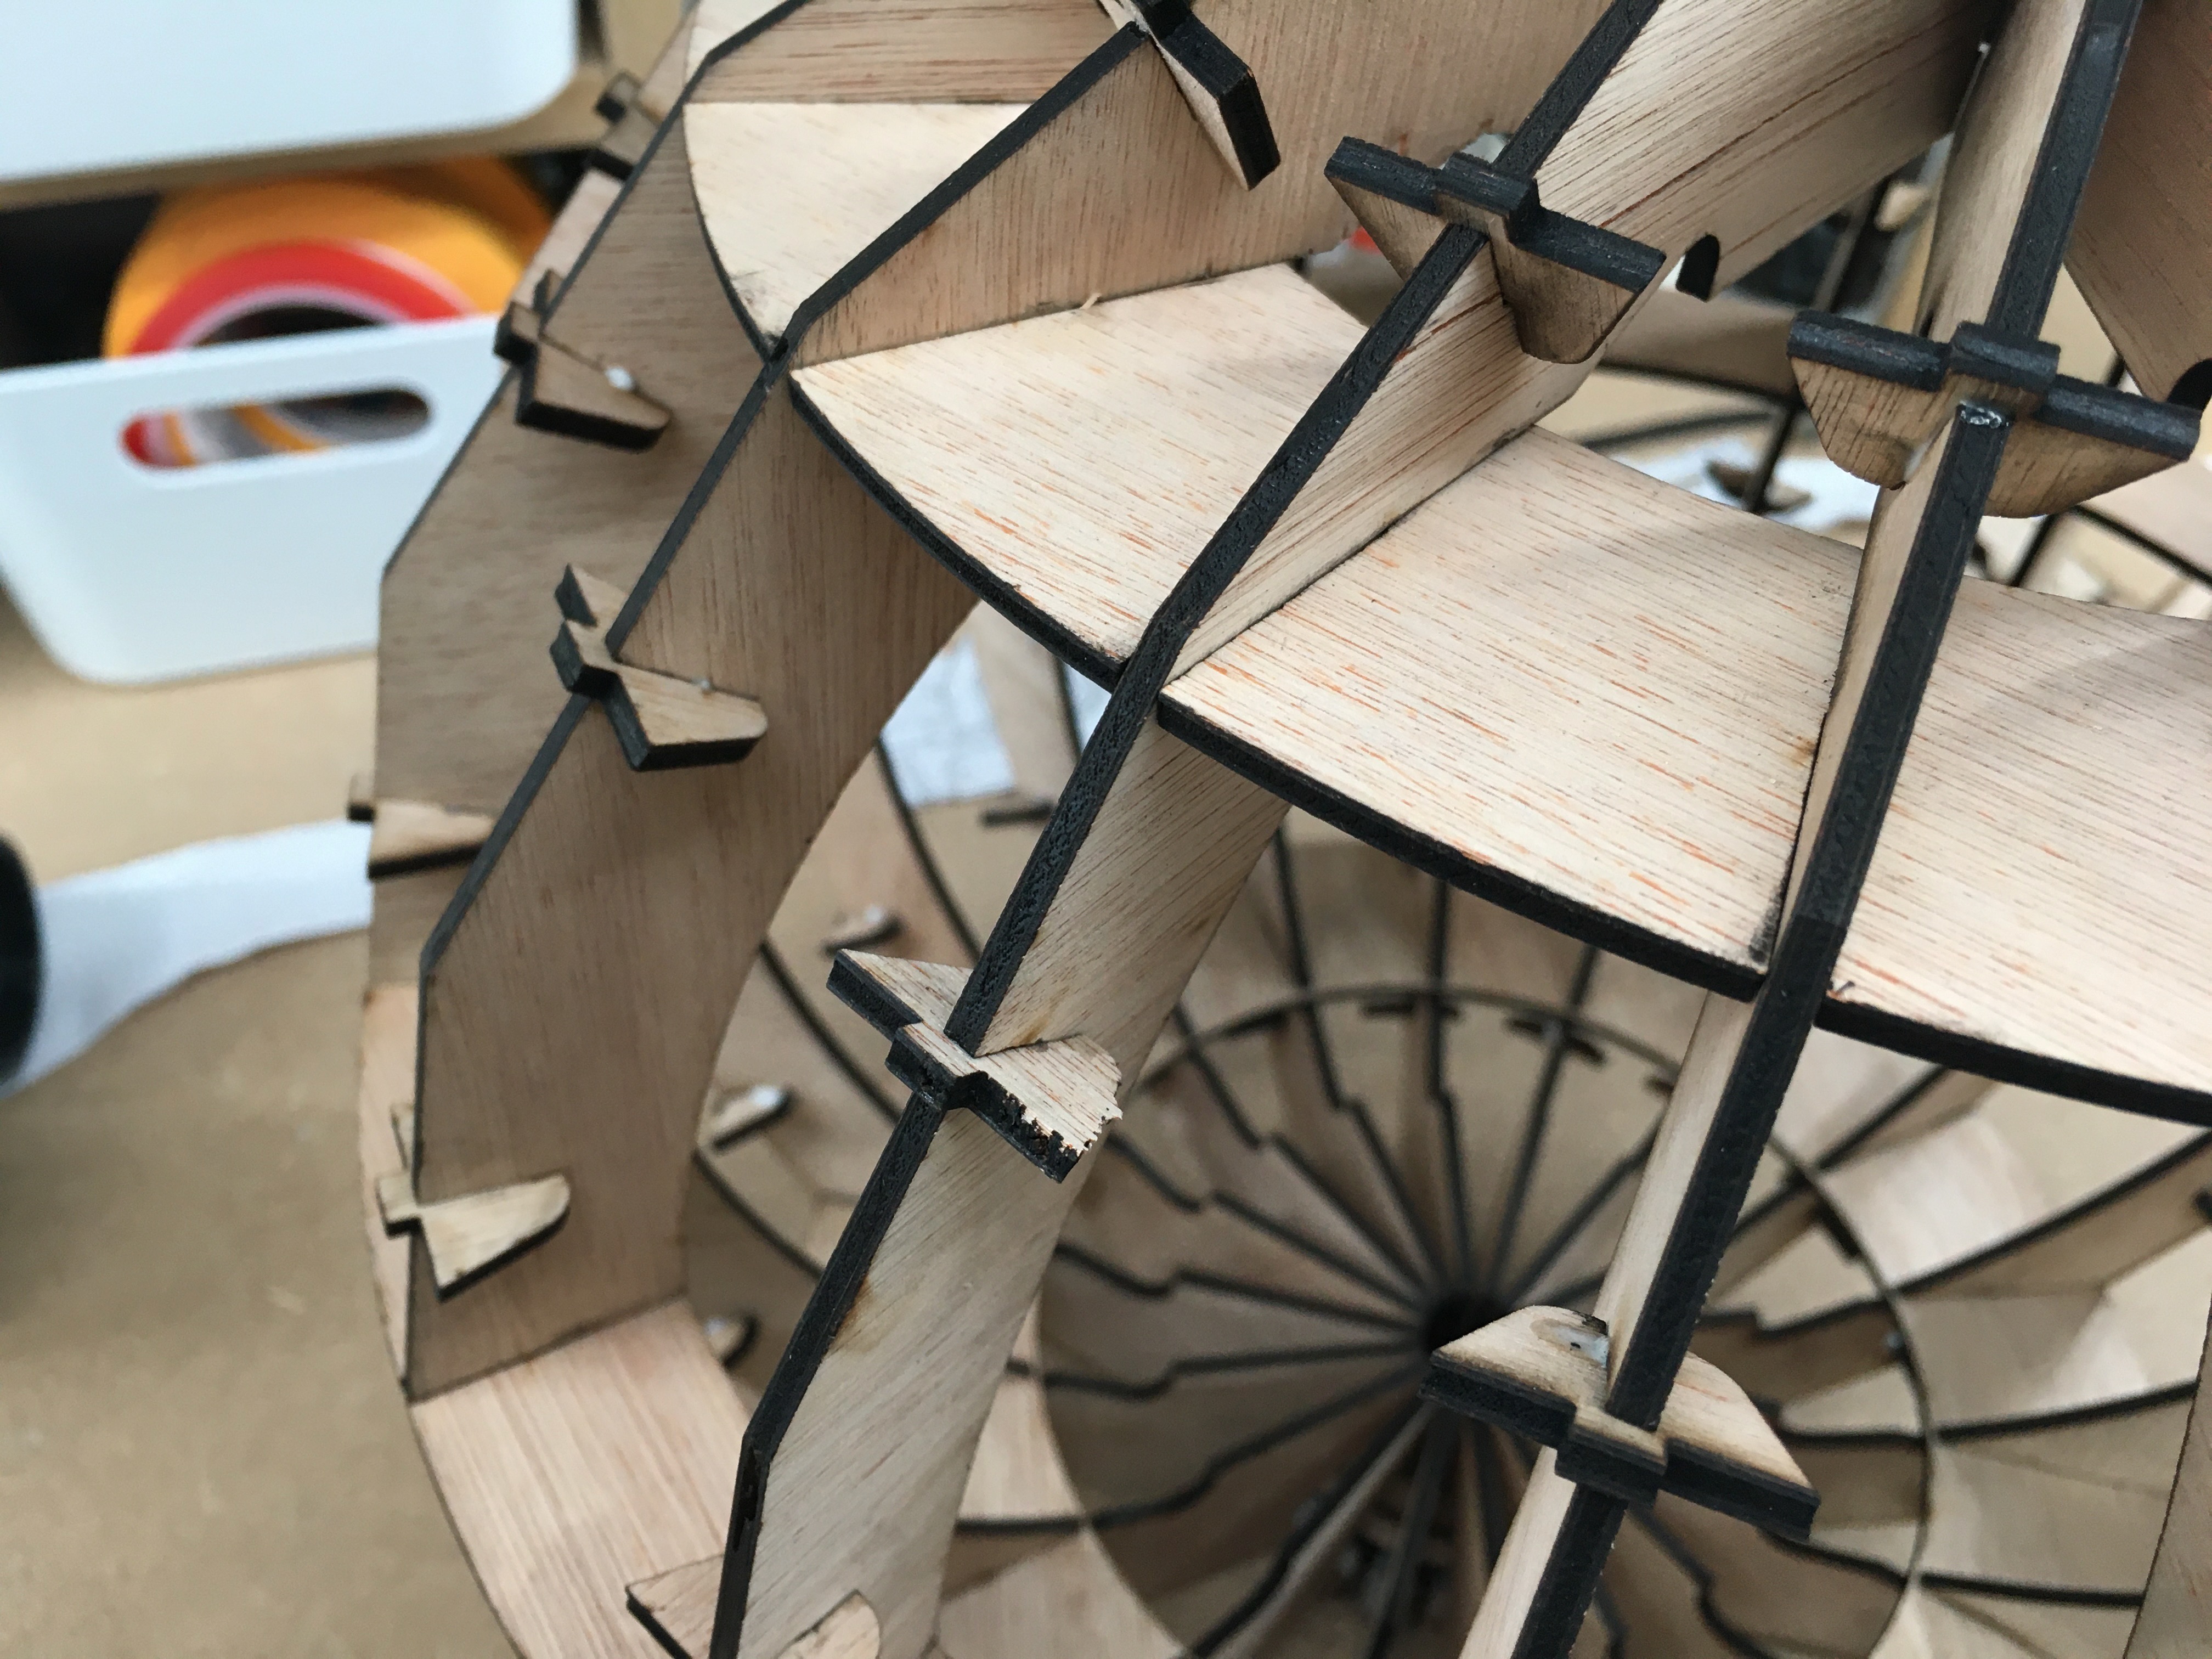
Next up was the globe itself. It consists of a nice construction of horizontal and vertical circles onto which “panels” are mounted using small “connectors”. Nice, but an enormous amount of small pieces to puzzle together.
I first focussed on the inner-structure, since I still needed to find a way to mount the globe onto the arm, and I wanted to do that before I started finishing the globe with (two layers of) panels.
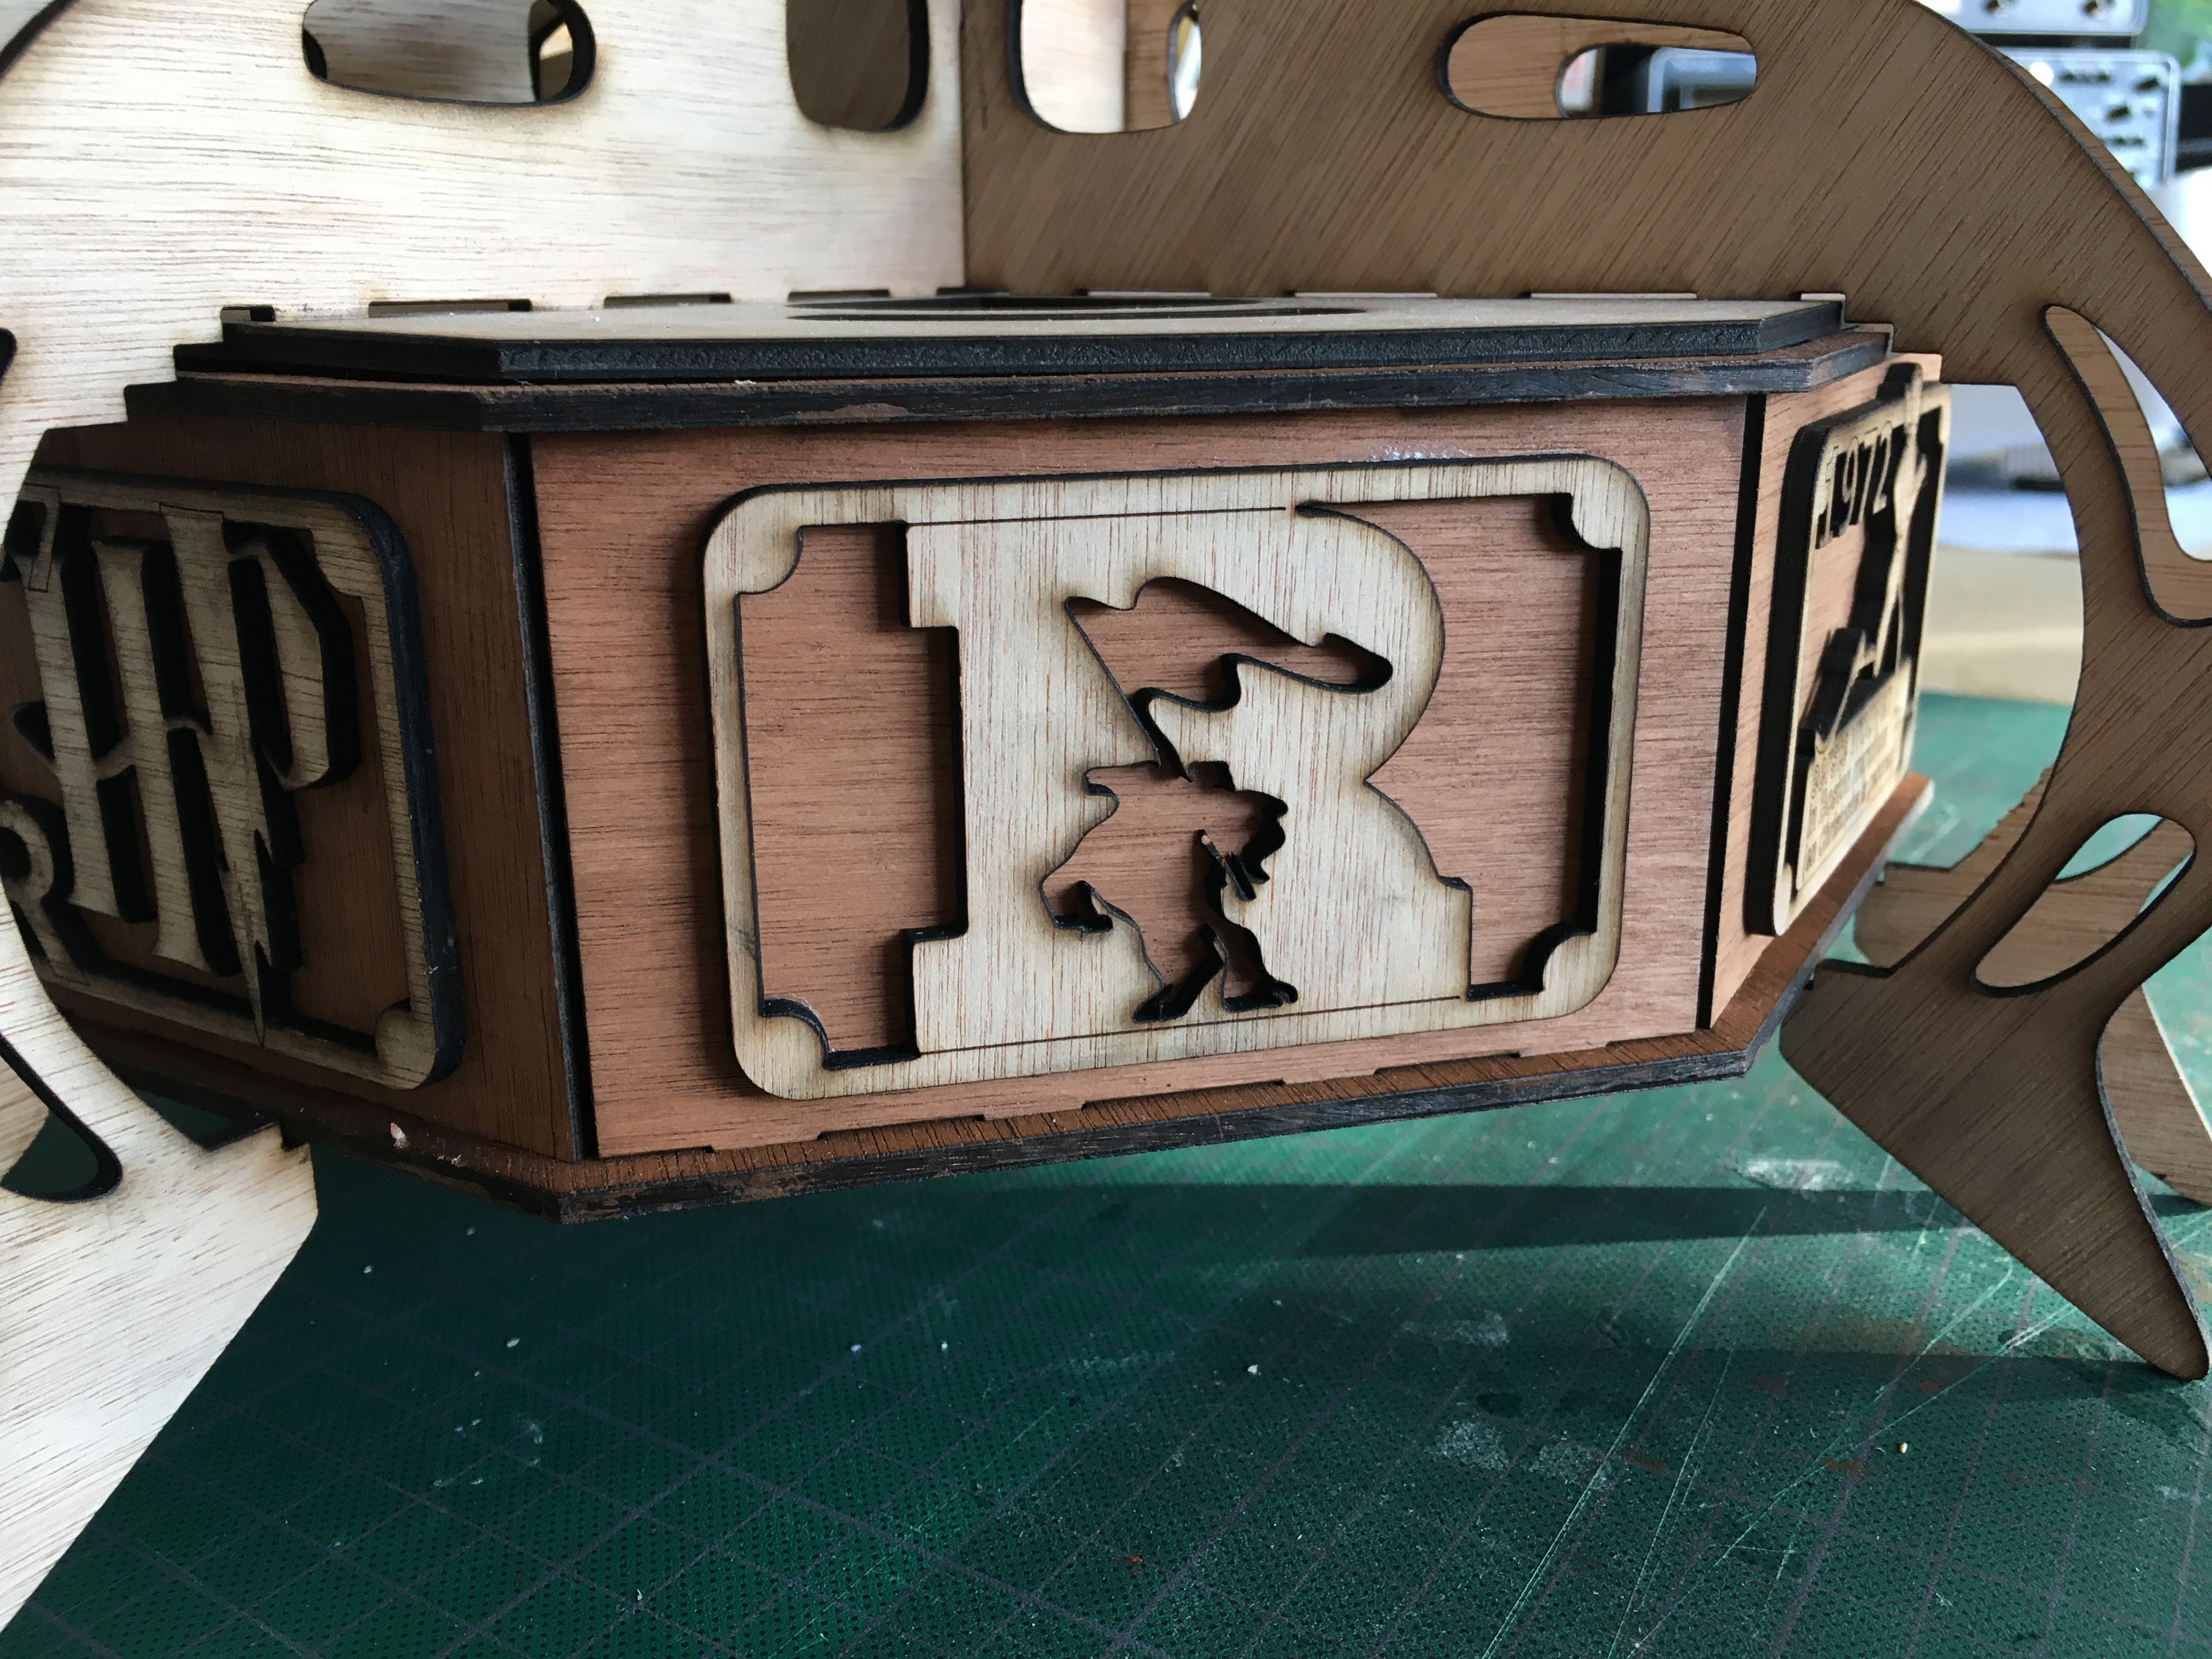
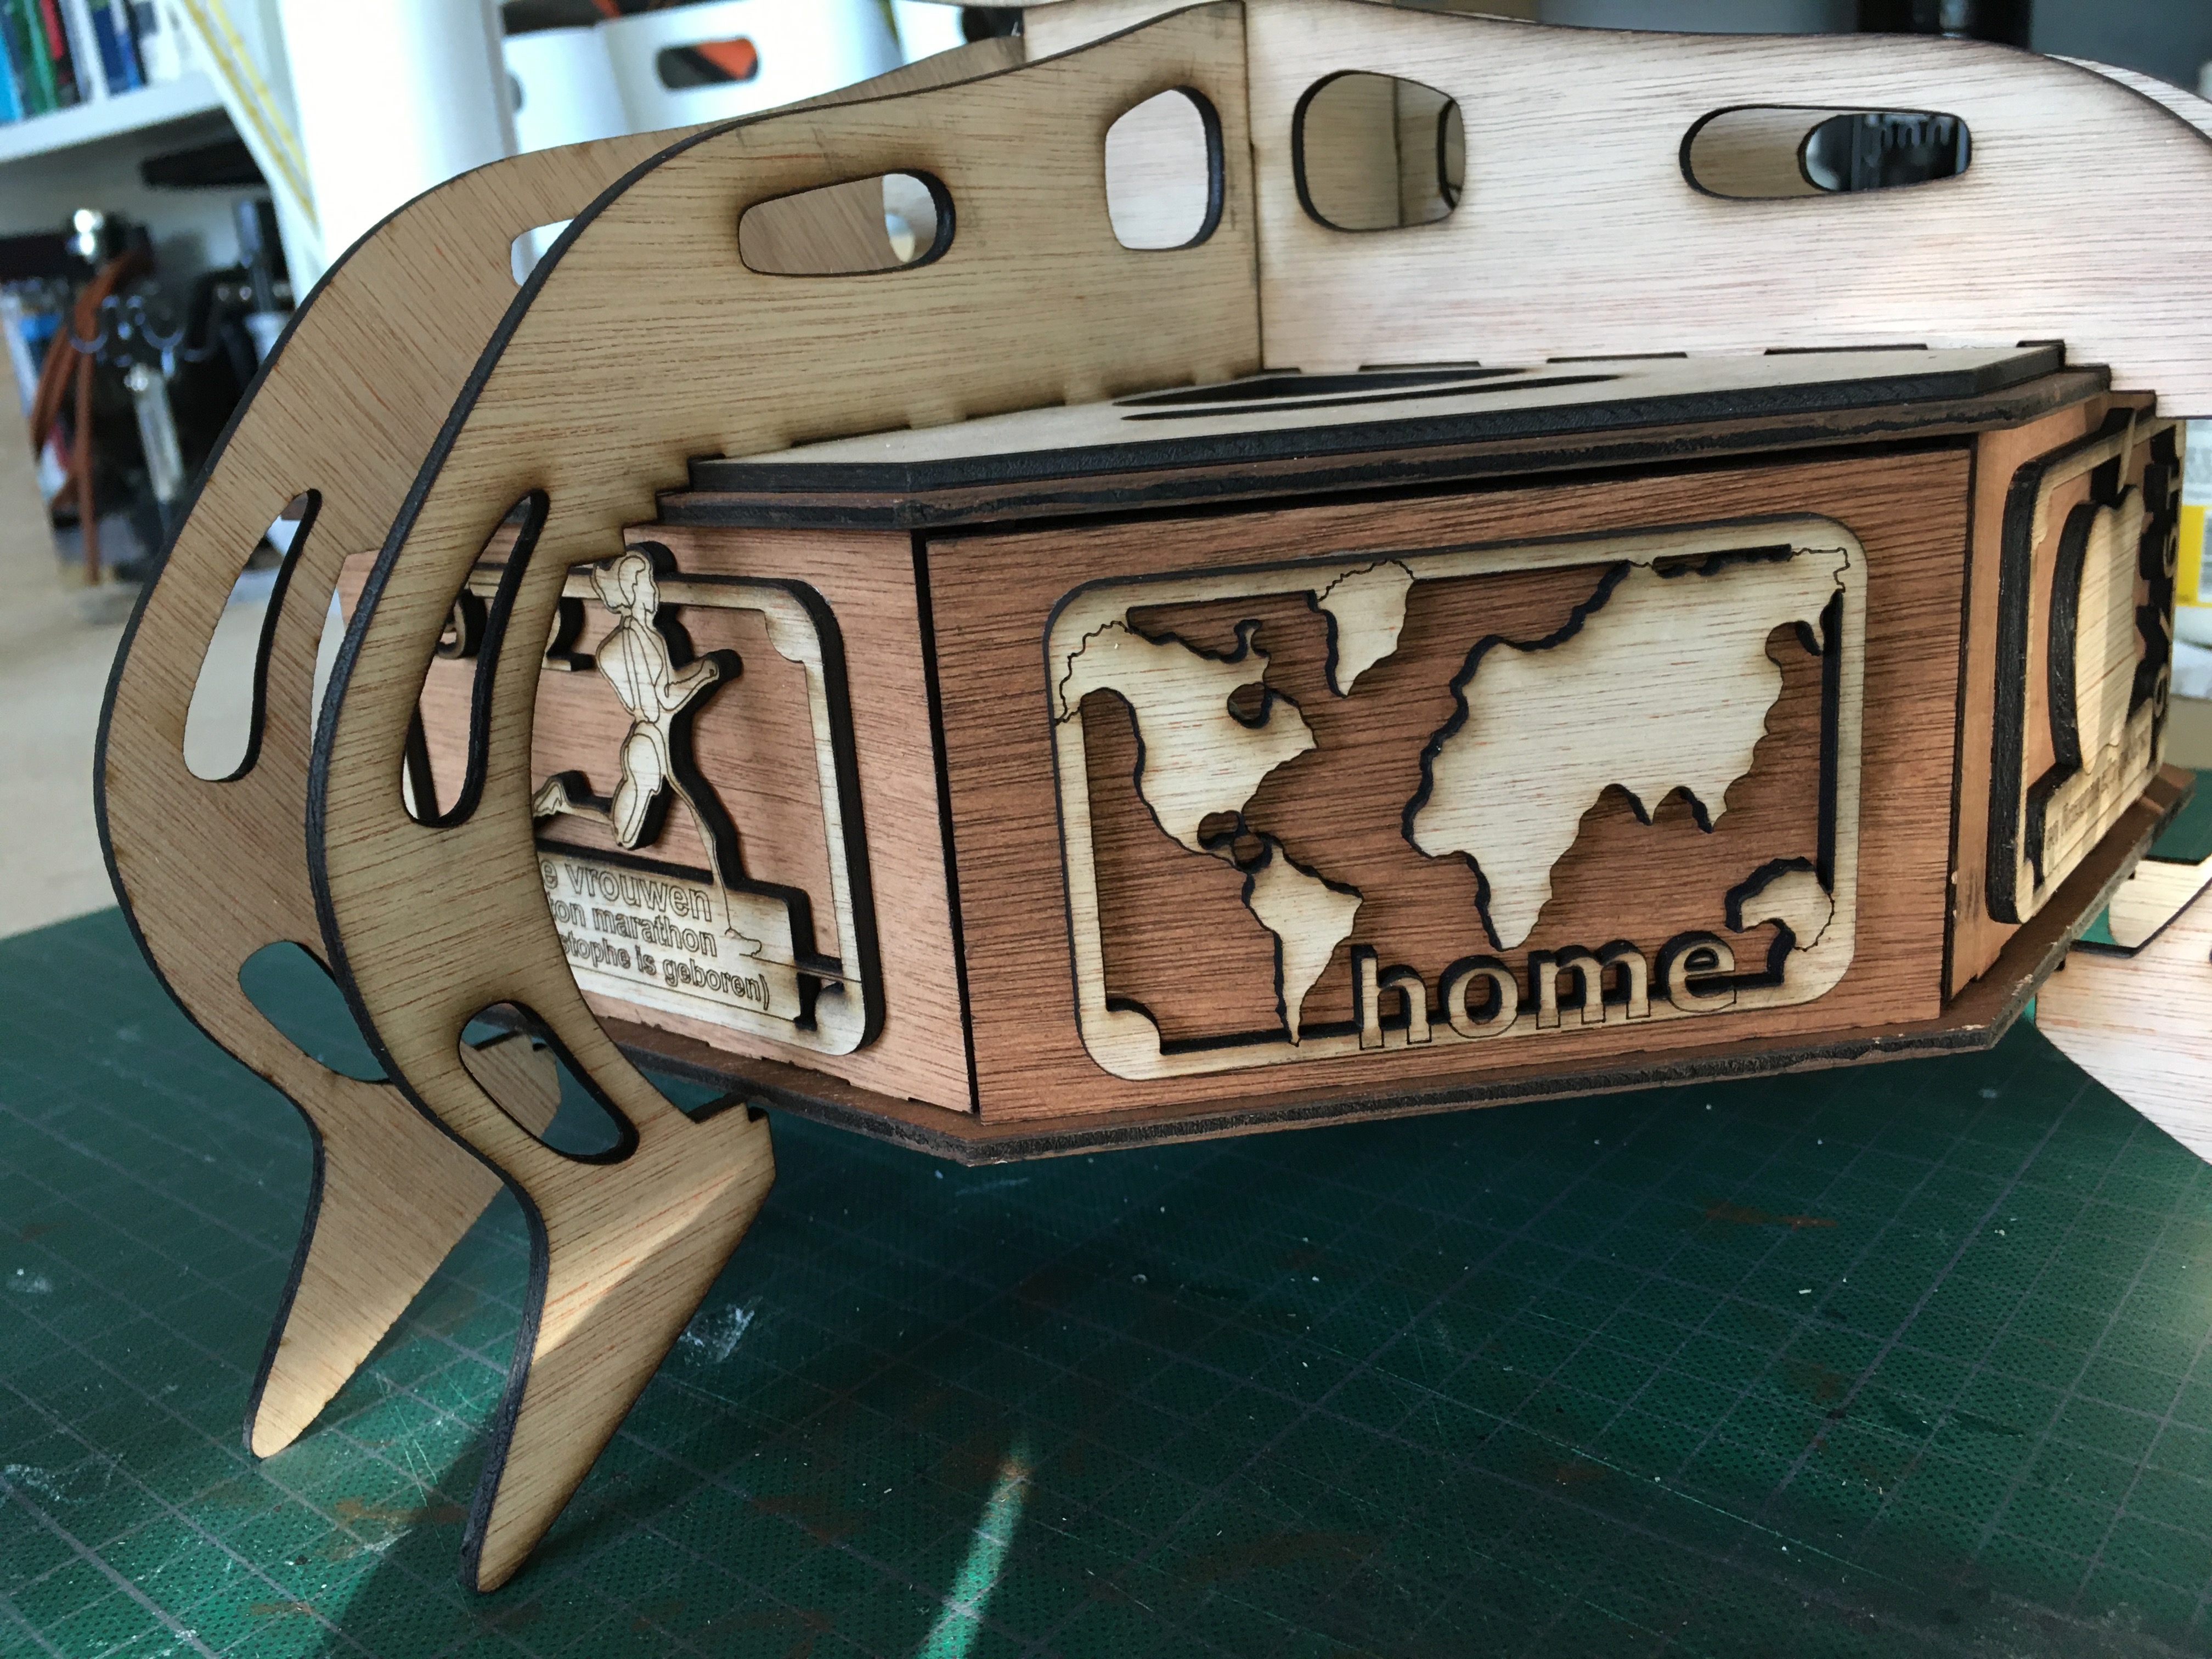
Decorating the Drawer
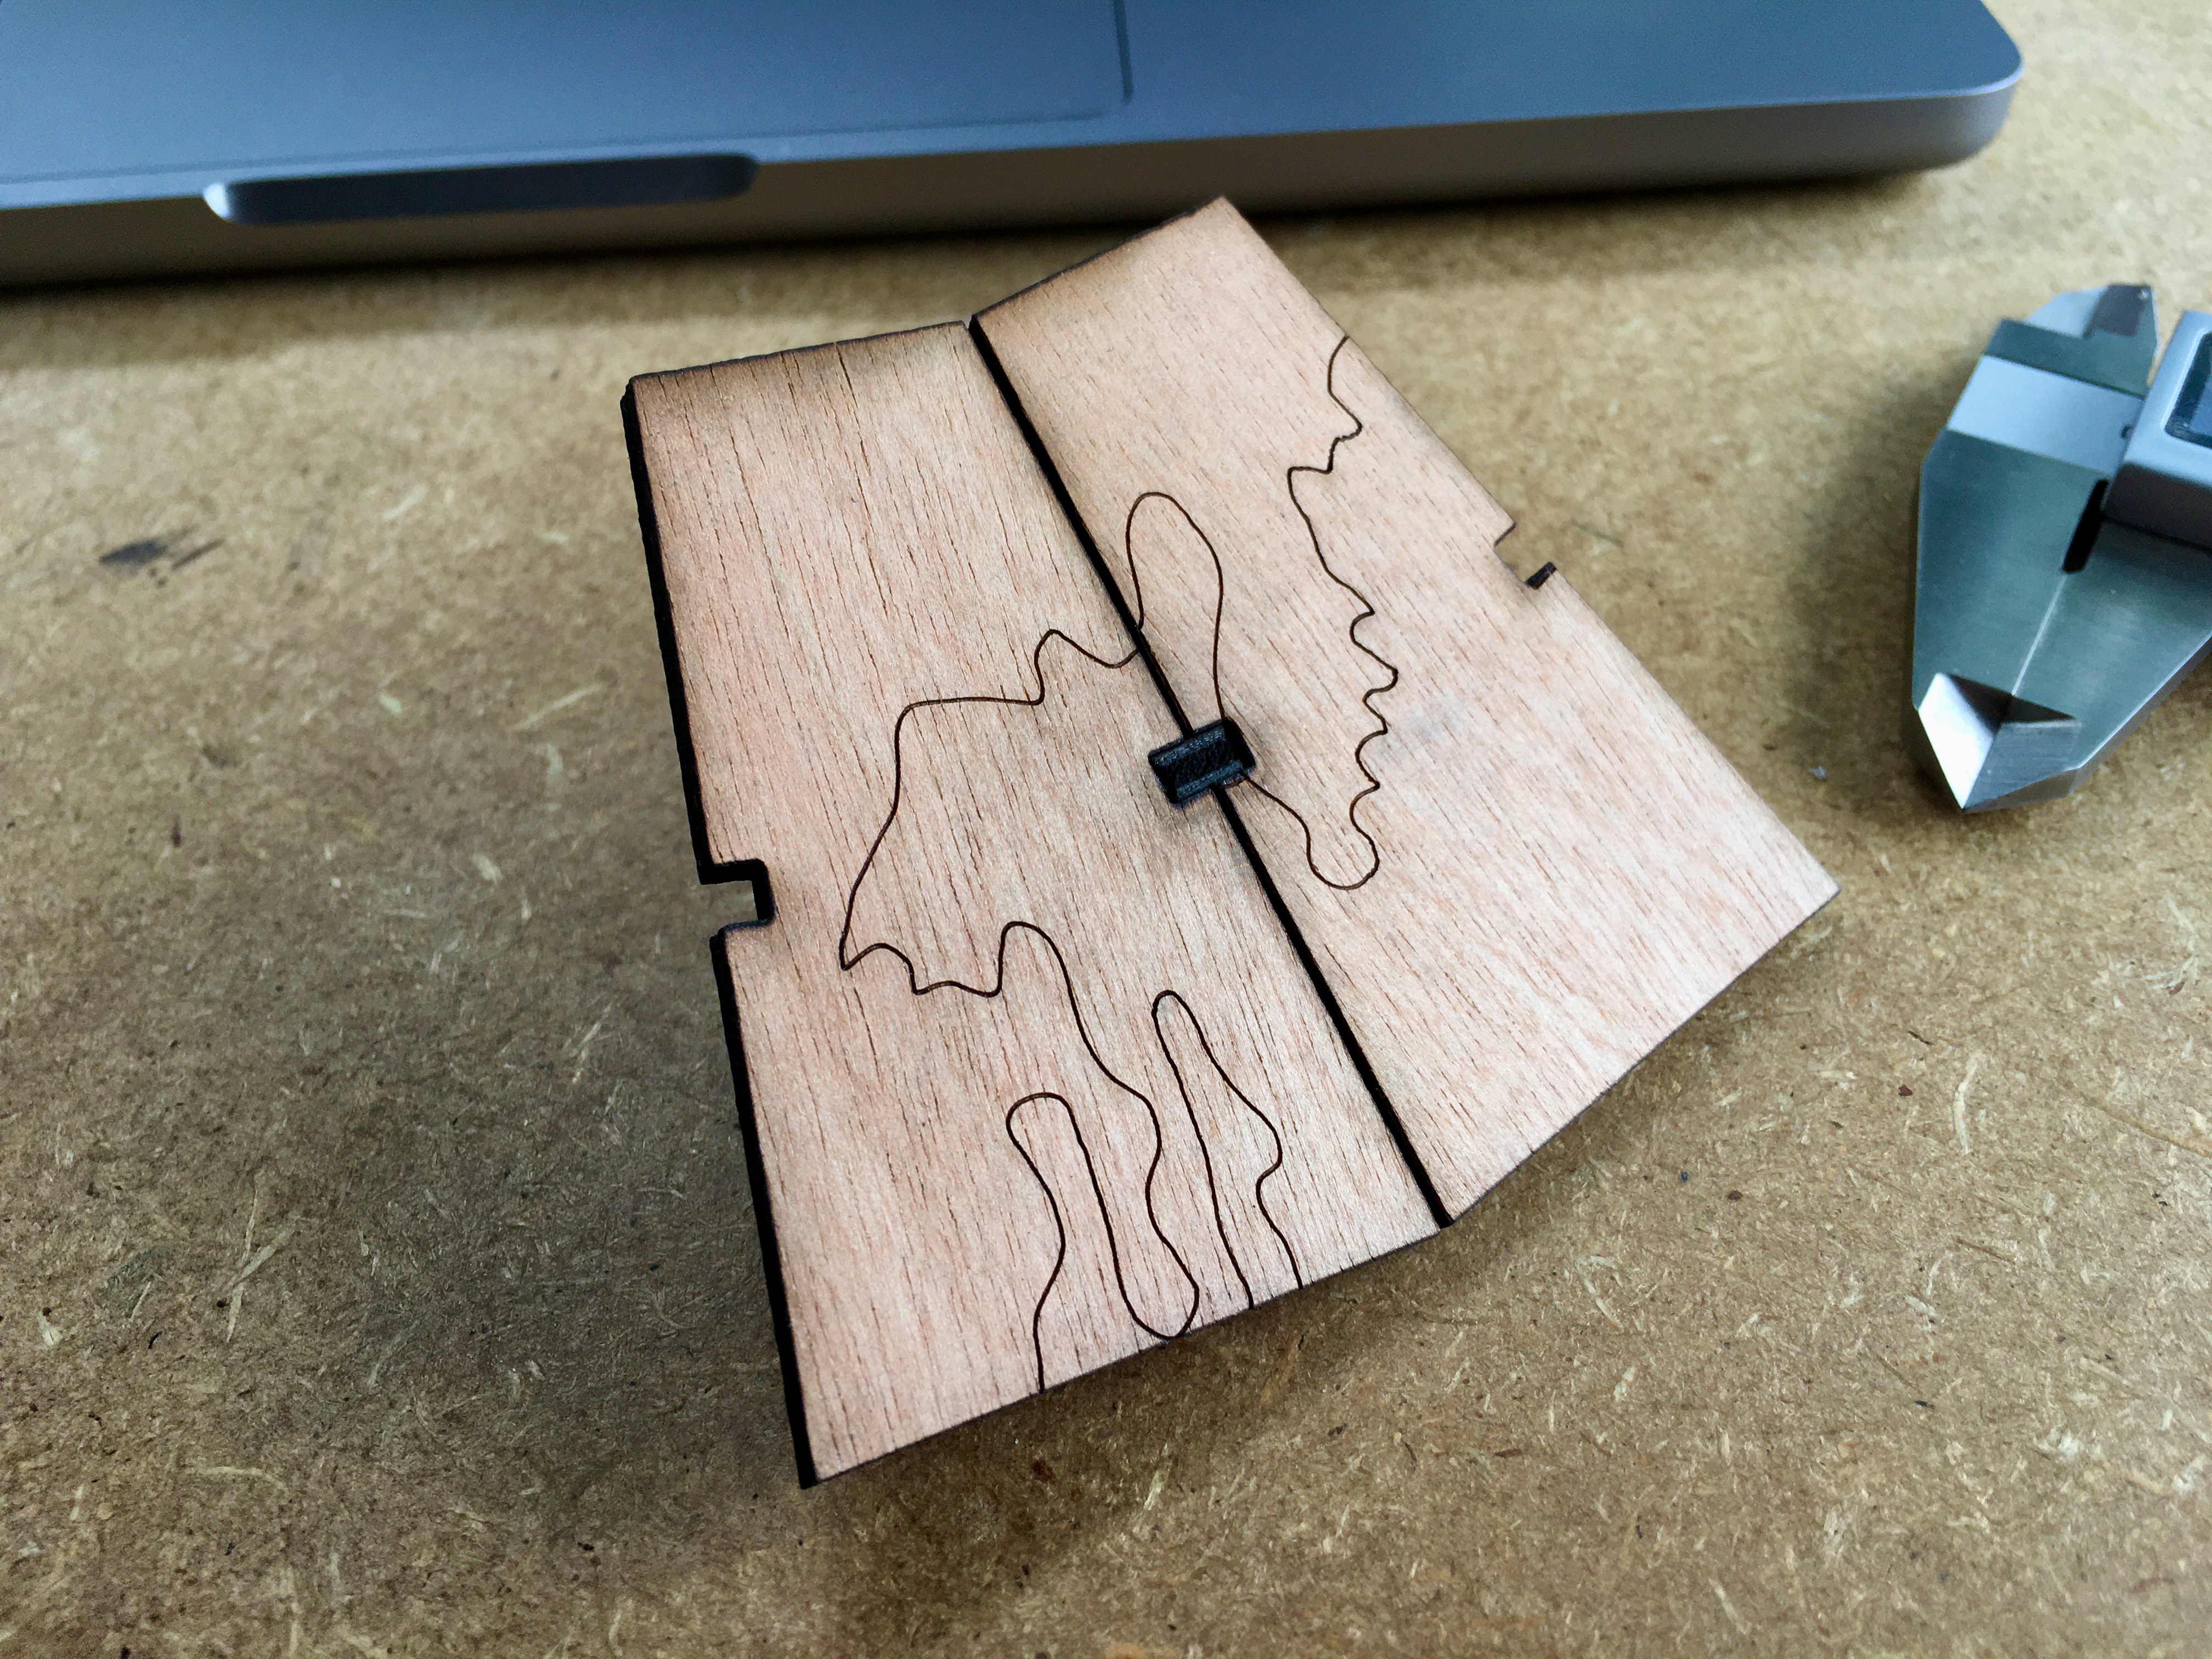
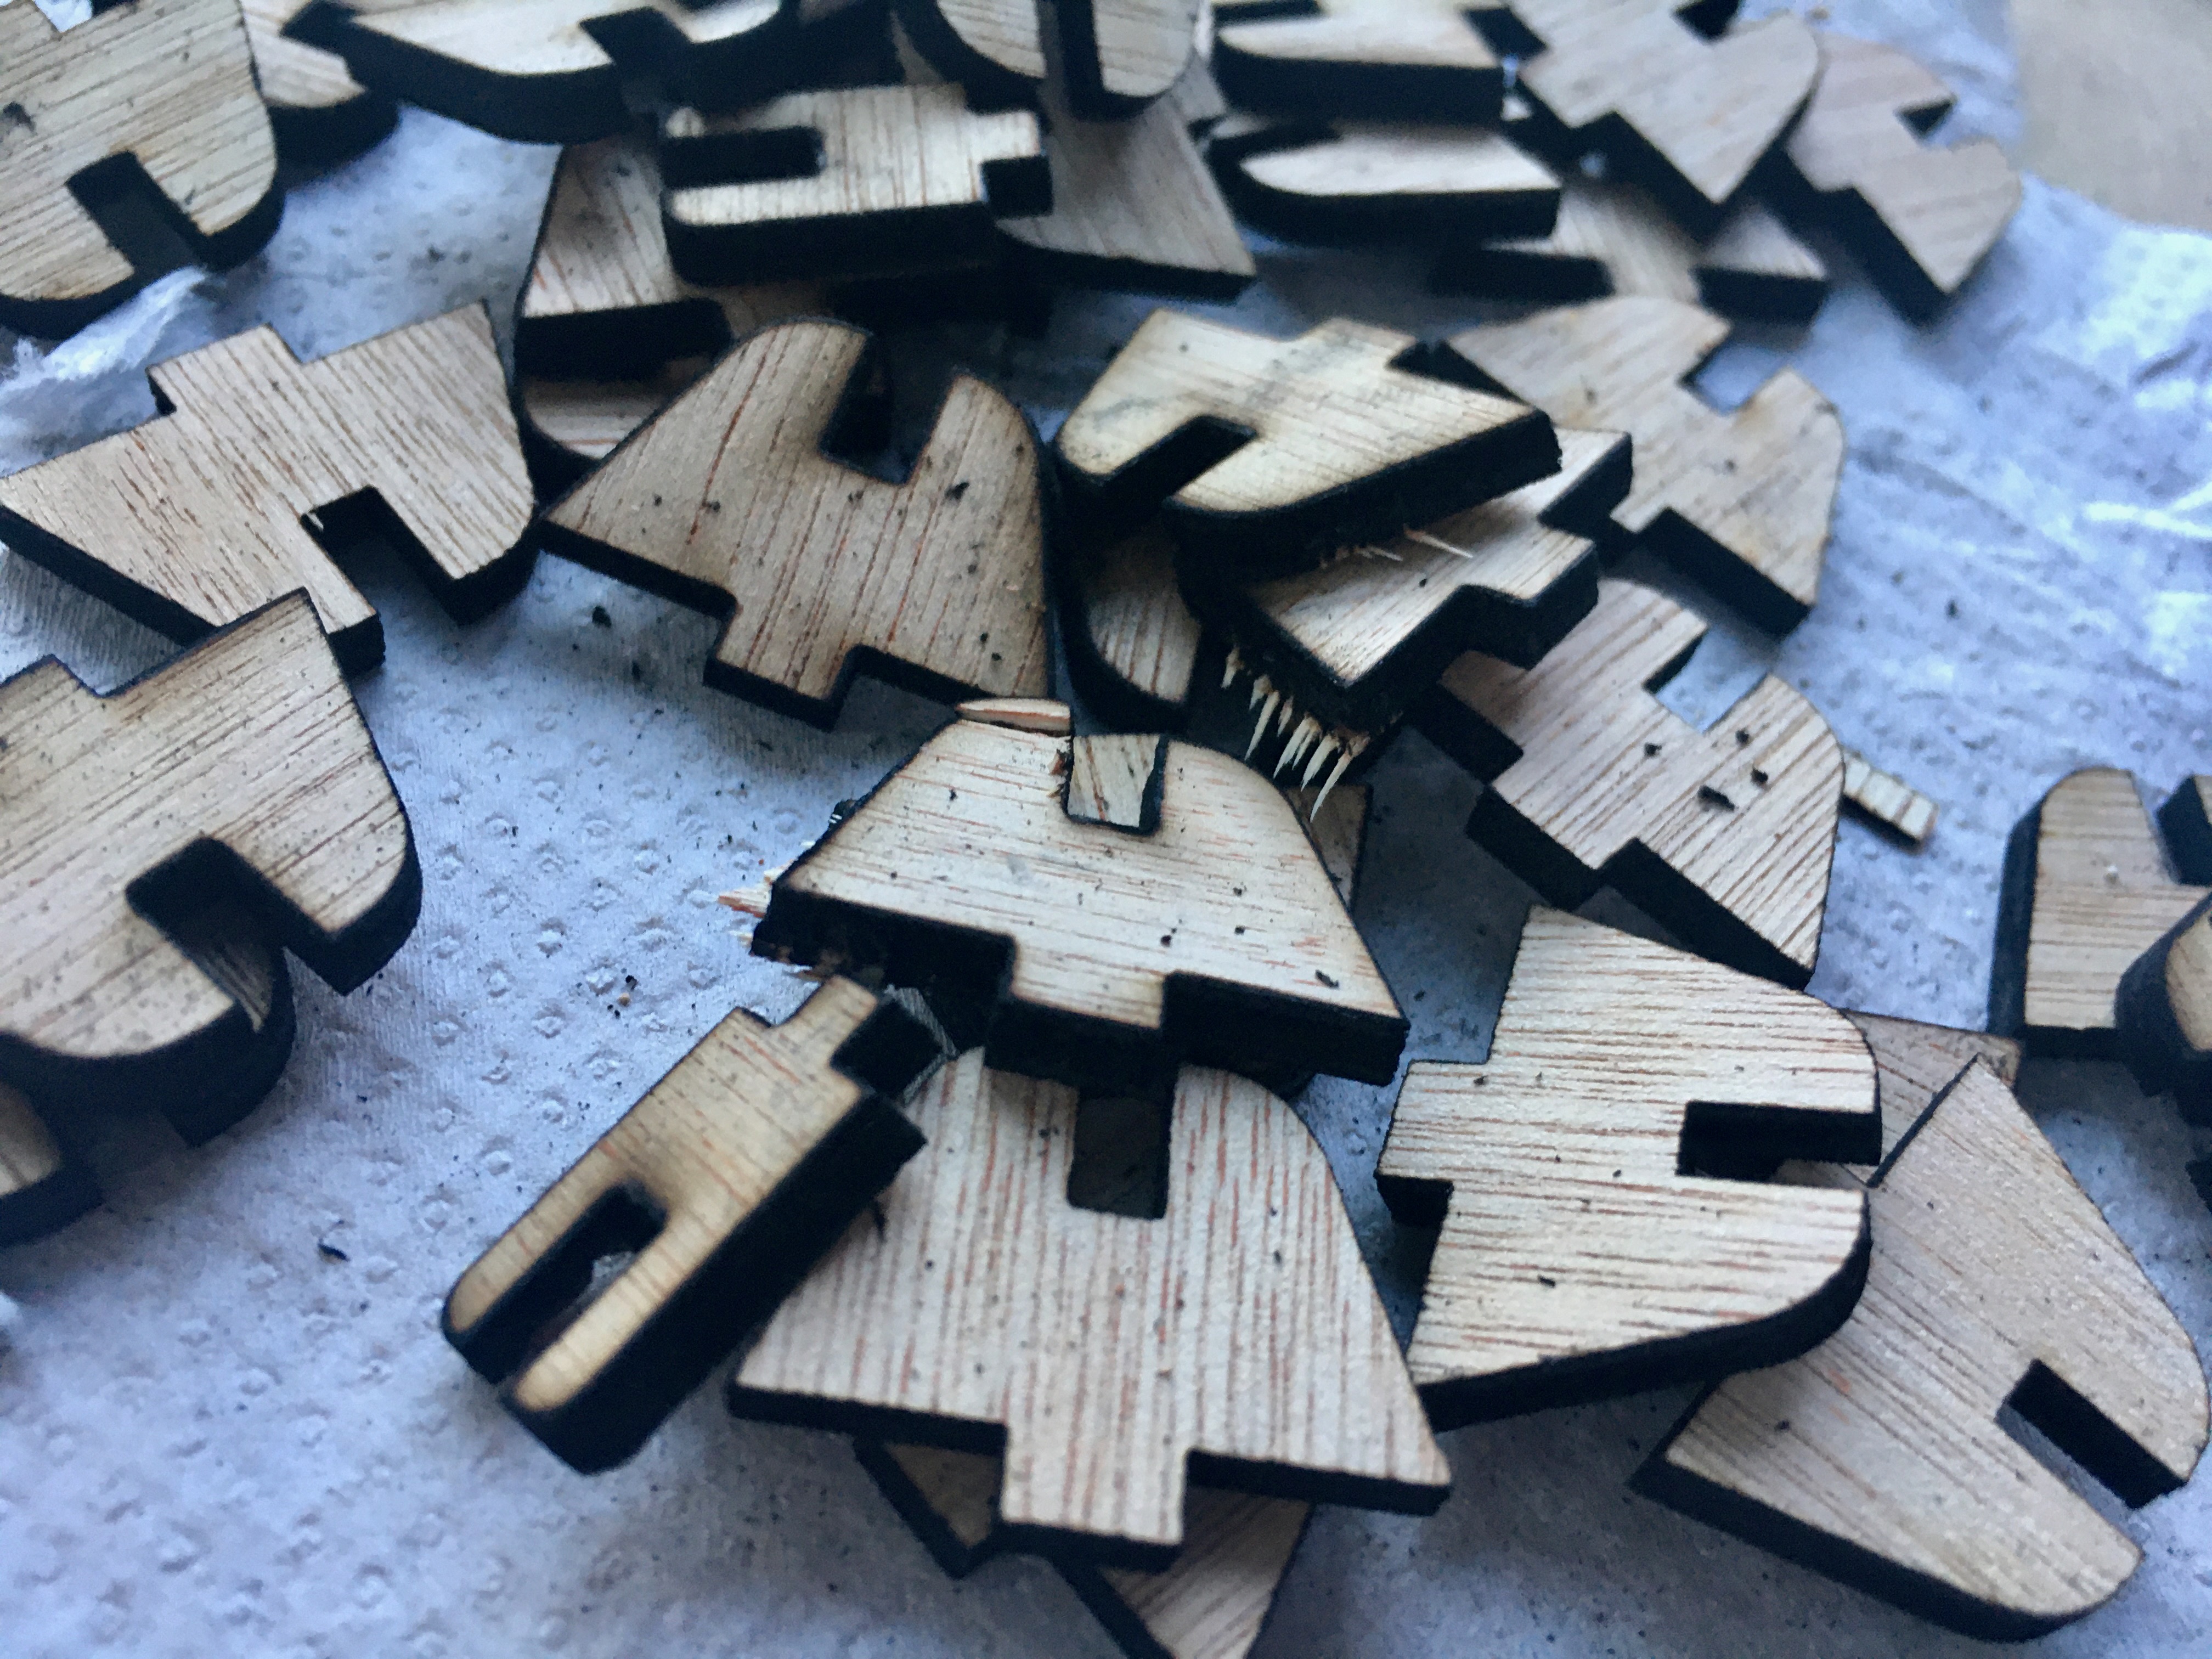
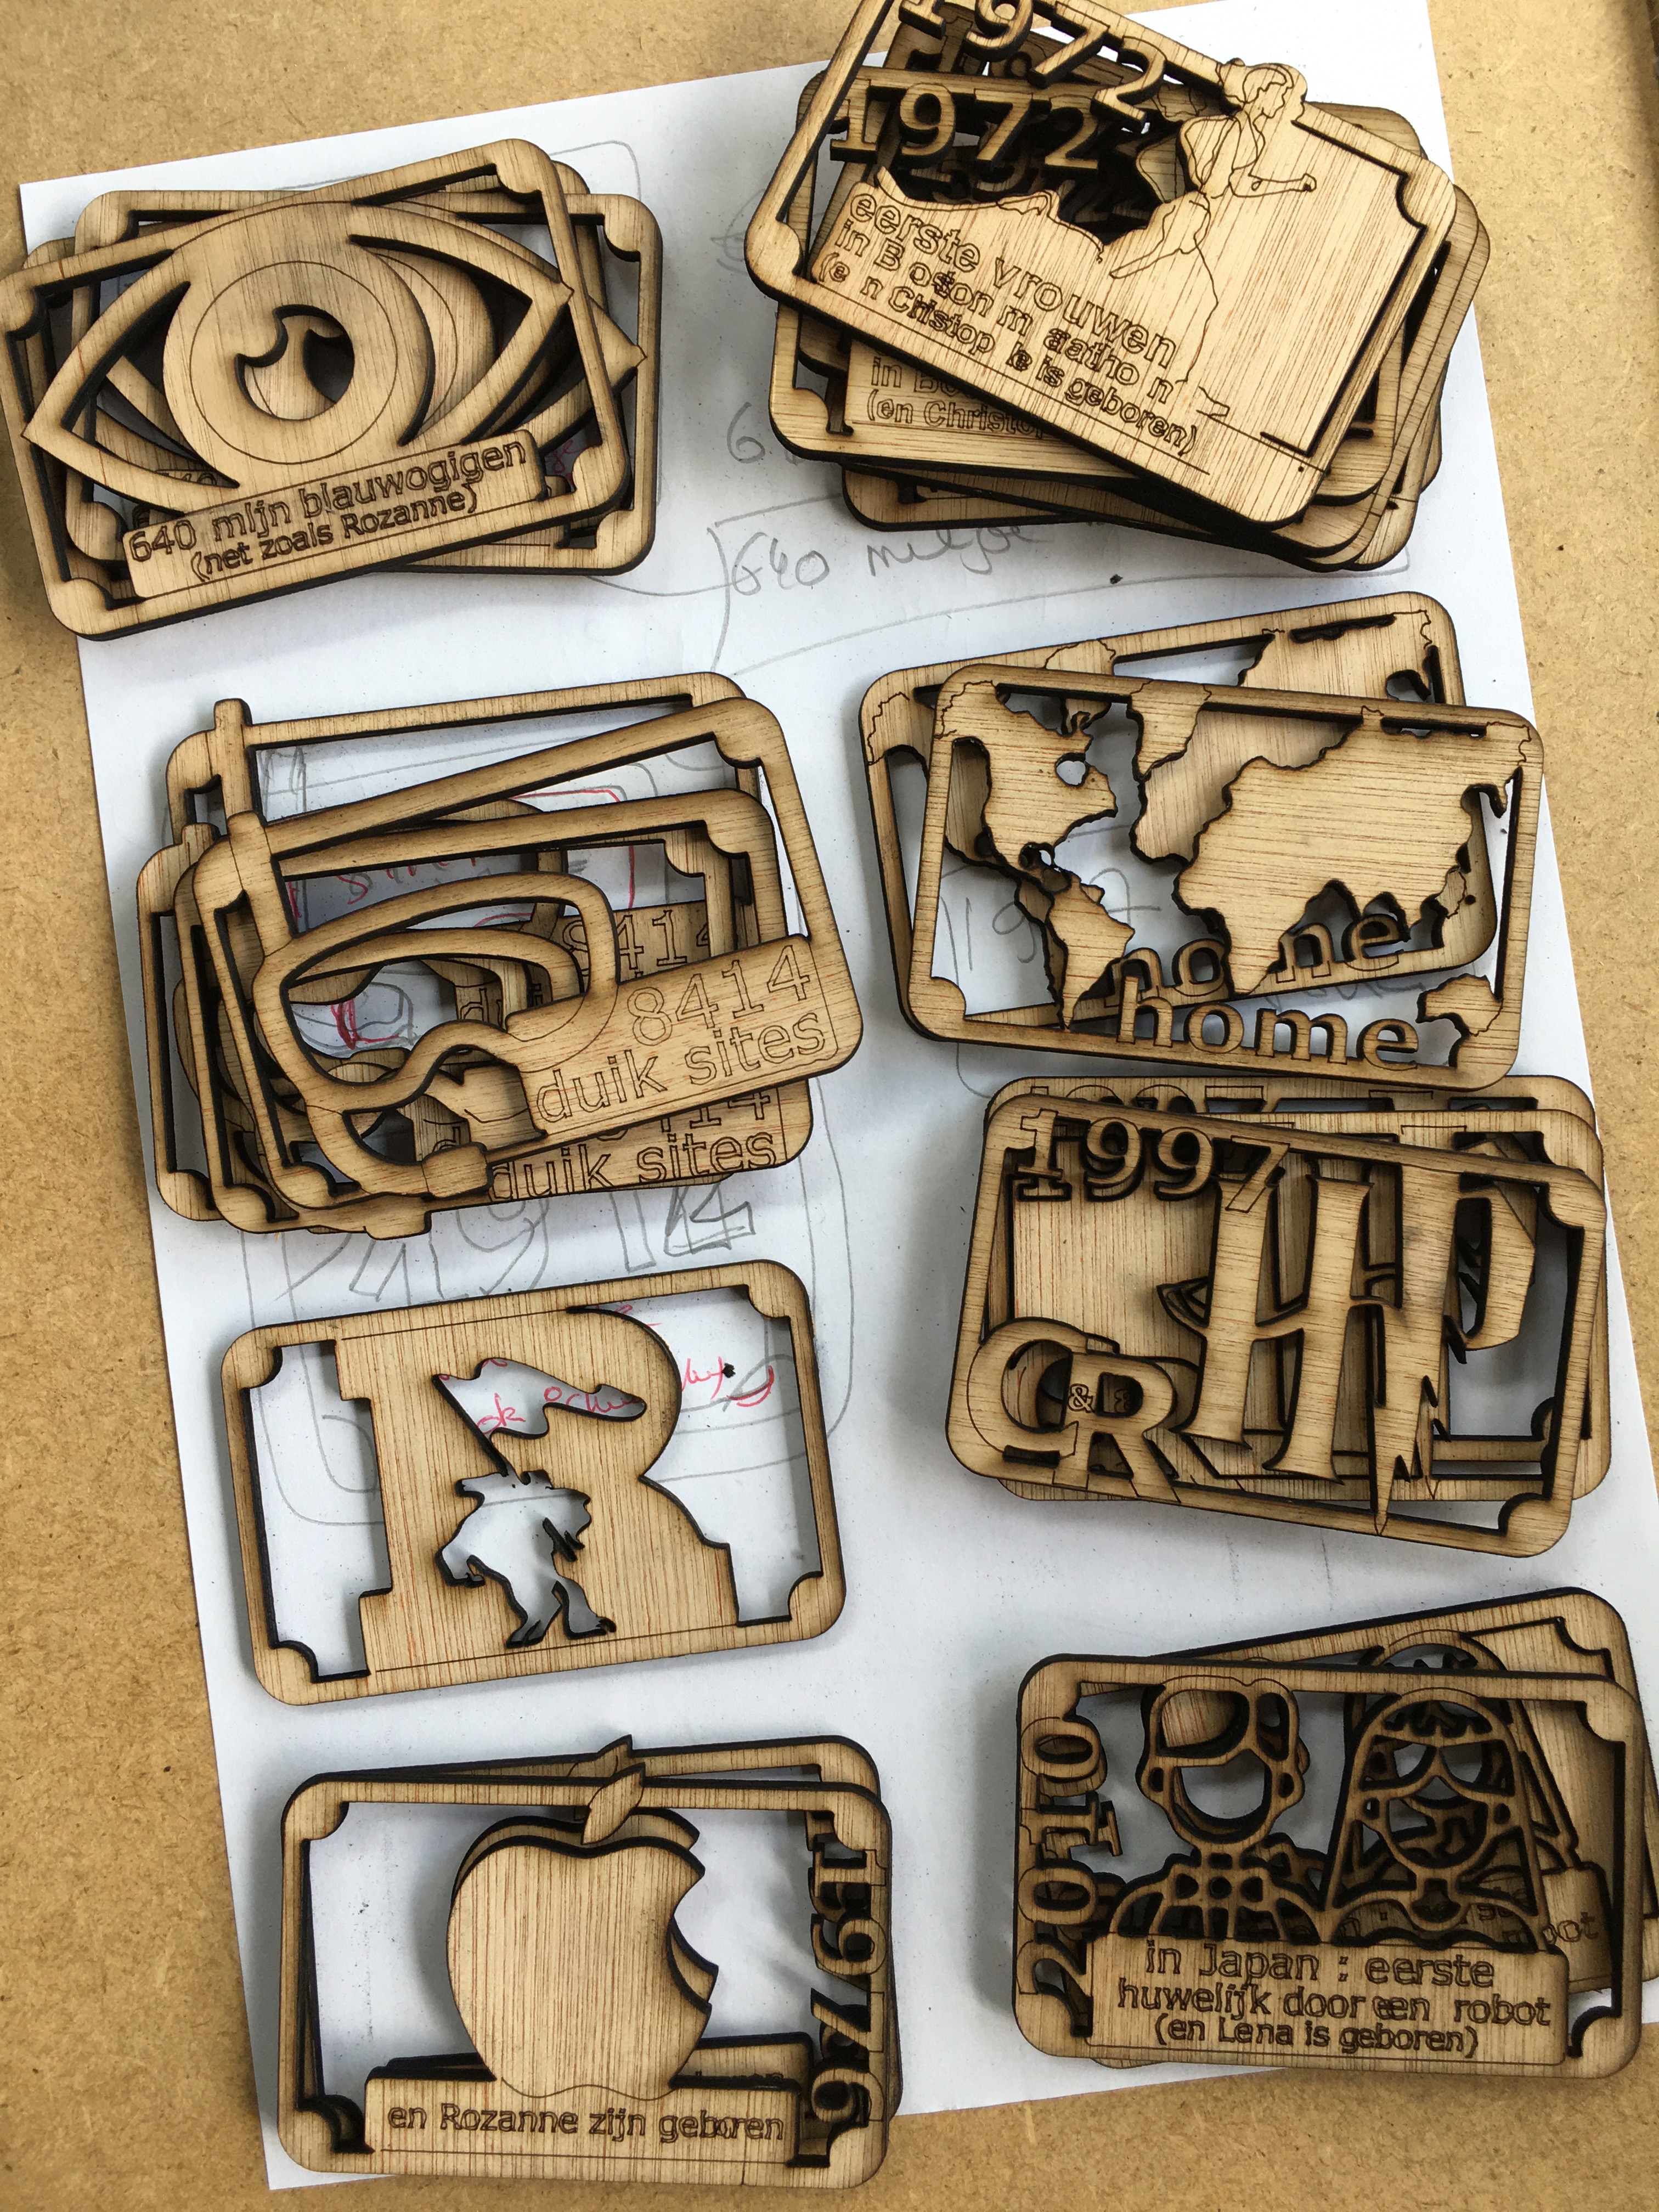
At the bottom of the design was a hidden drawer and we were going to put the money in there. The drawer is part of a octagon-structure with sides that can carry decorations.
I could of course keep the original world-statistics, or I could design 8 custom decorations, each with some fun fact about Christophe & Rozanne… Okay, let’s make a lot work, a lot more work.
I learned a big big lesson trying to lasercut these 8 decorations: engraving fine-line vector-graphics requires the settings to go too fast for the accuracy of my cutter, resulting in soo many failed engravings 🤦♂️
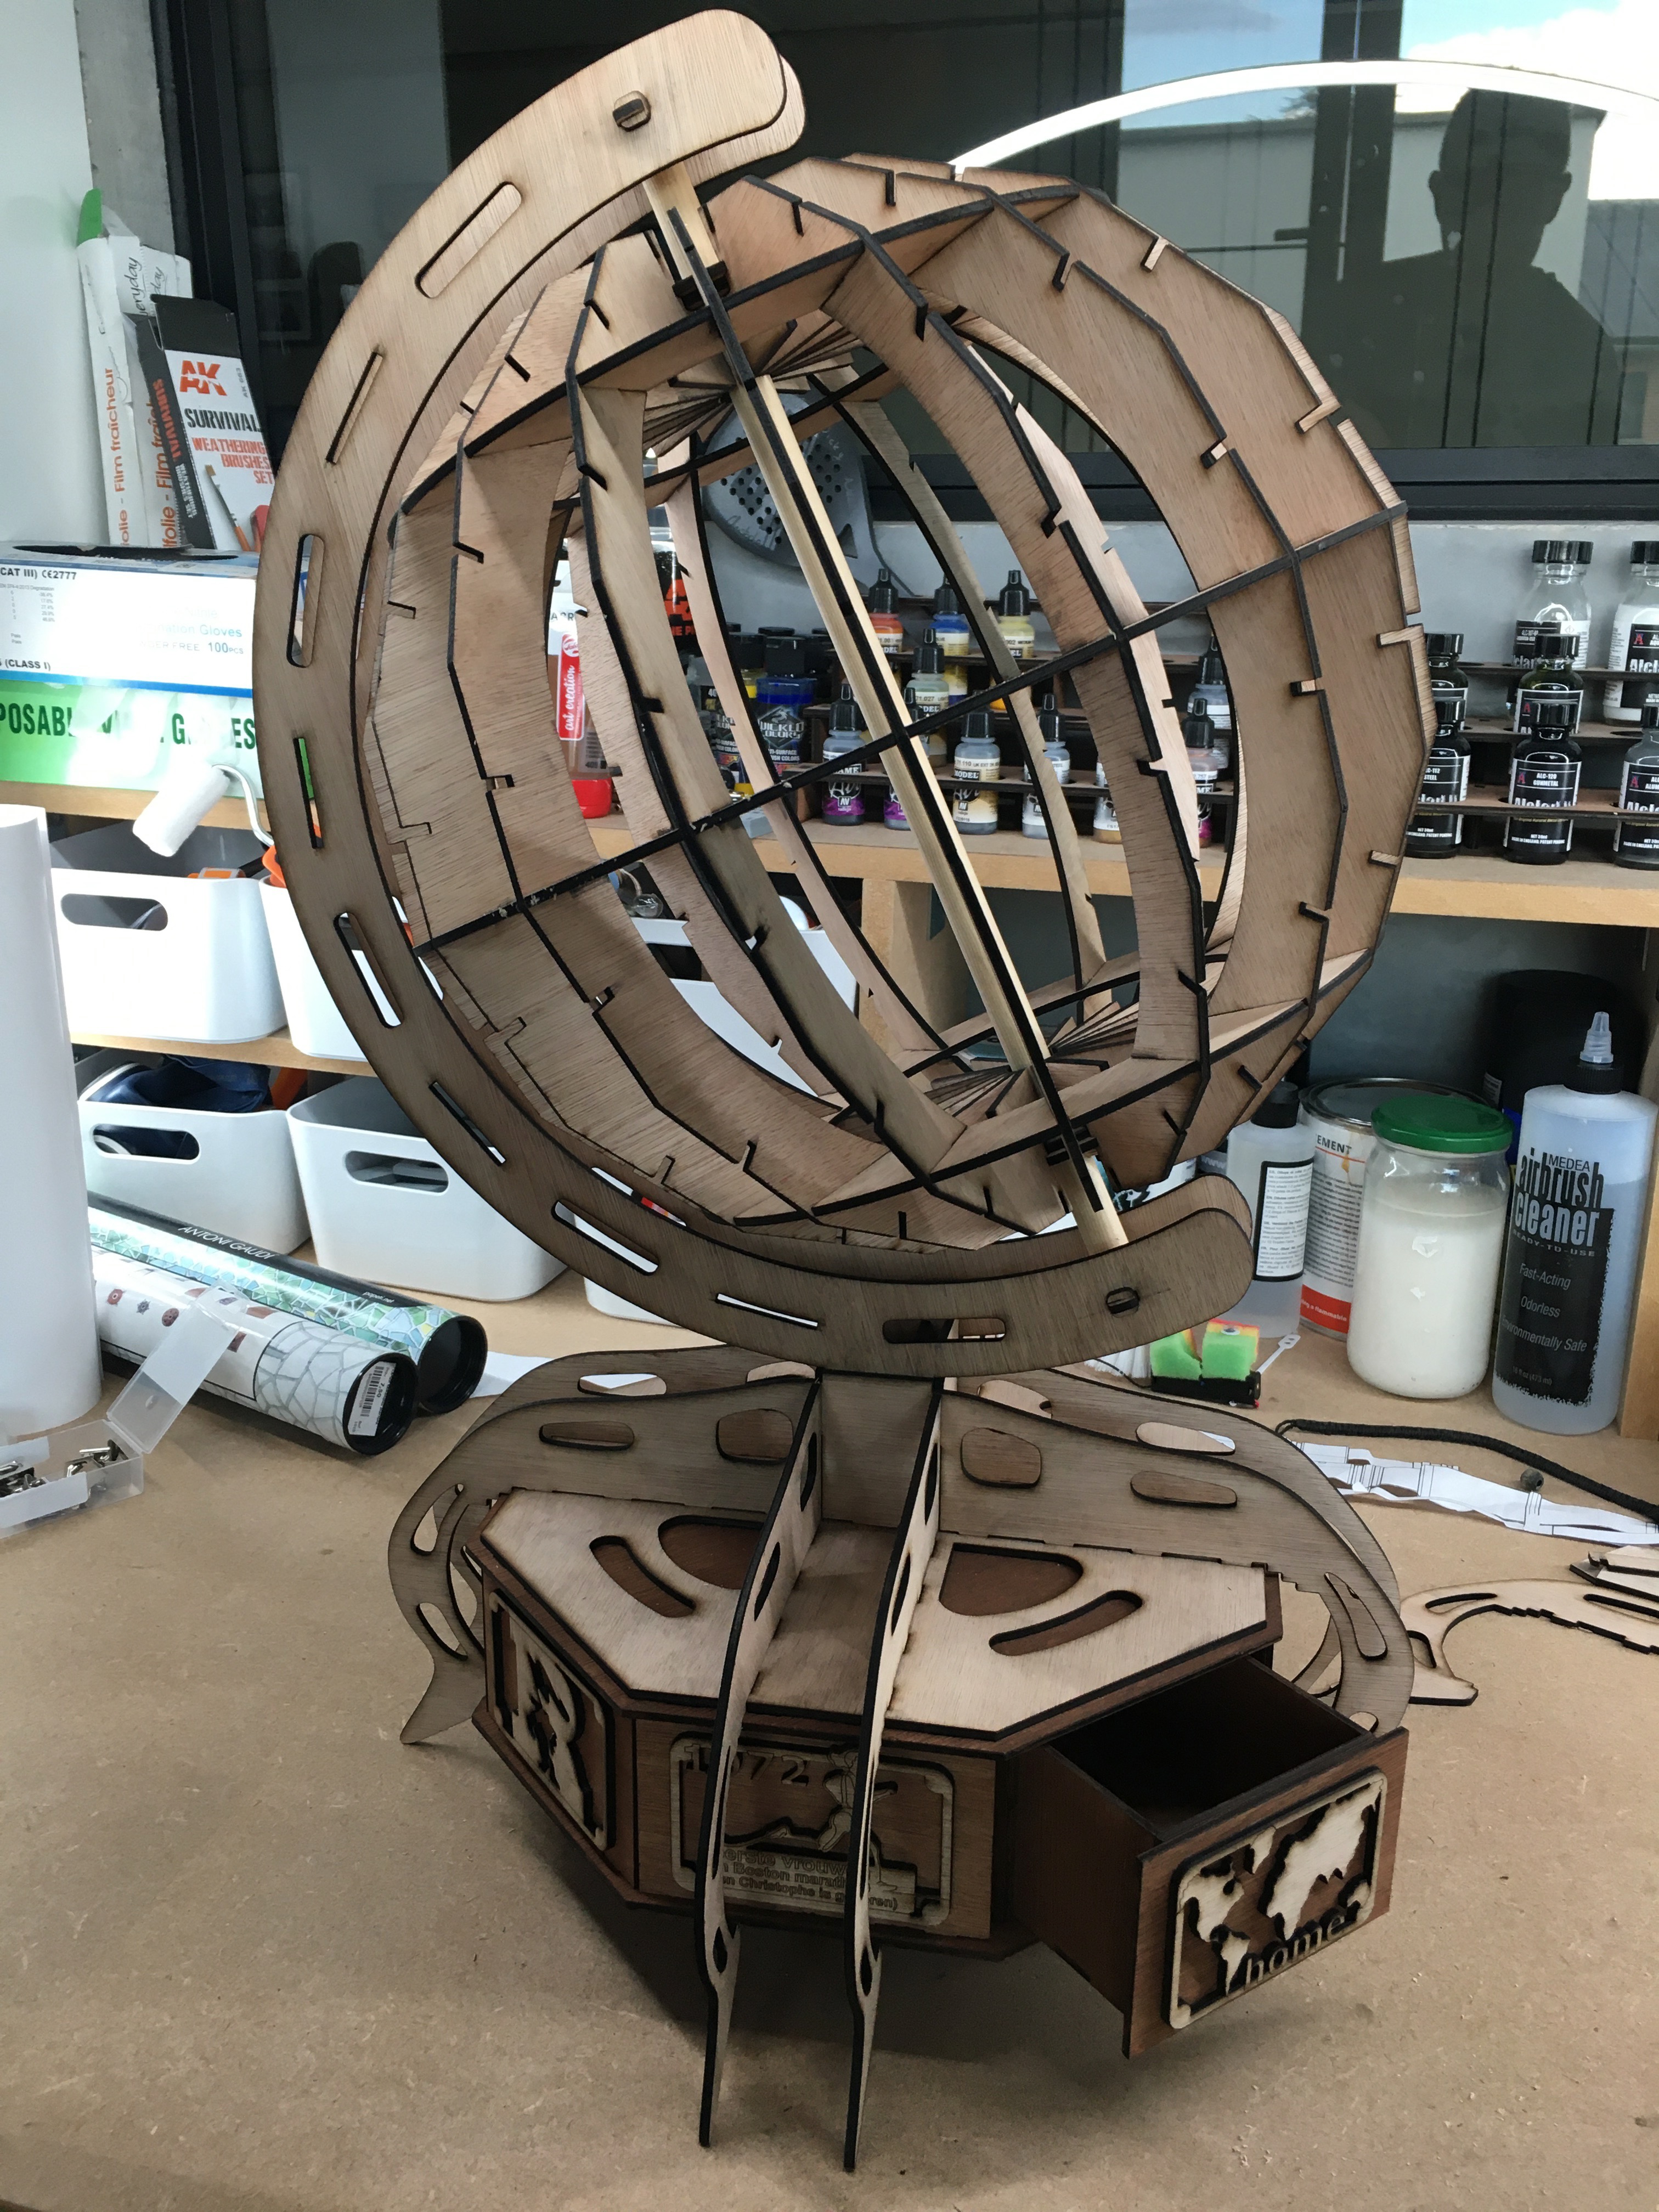
In the end I did have a set of okay-cut decorations and after applying some color to the octagon, the end-result started to look really nice. A wooden rod with a hole and a plug made a nice fully wooden ax-solution for mounting the globe onto the arm.
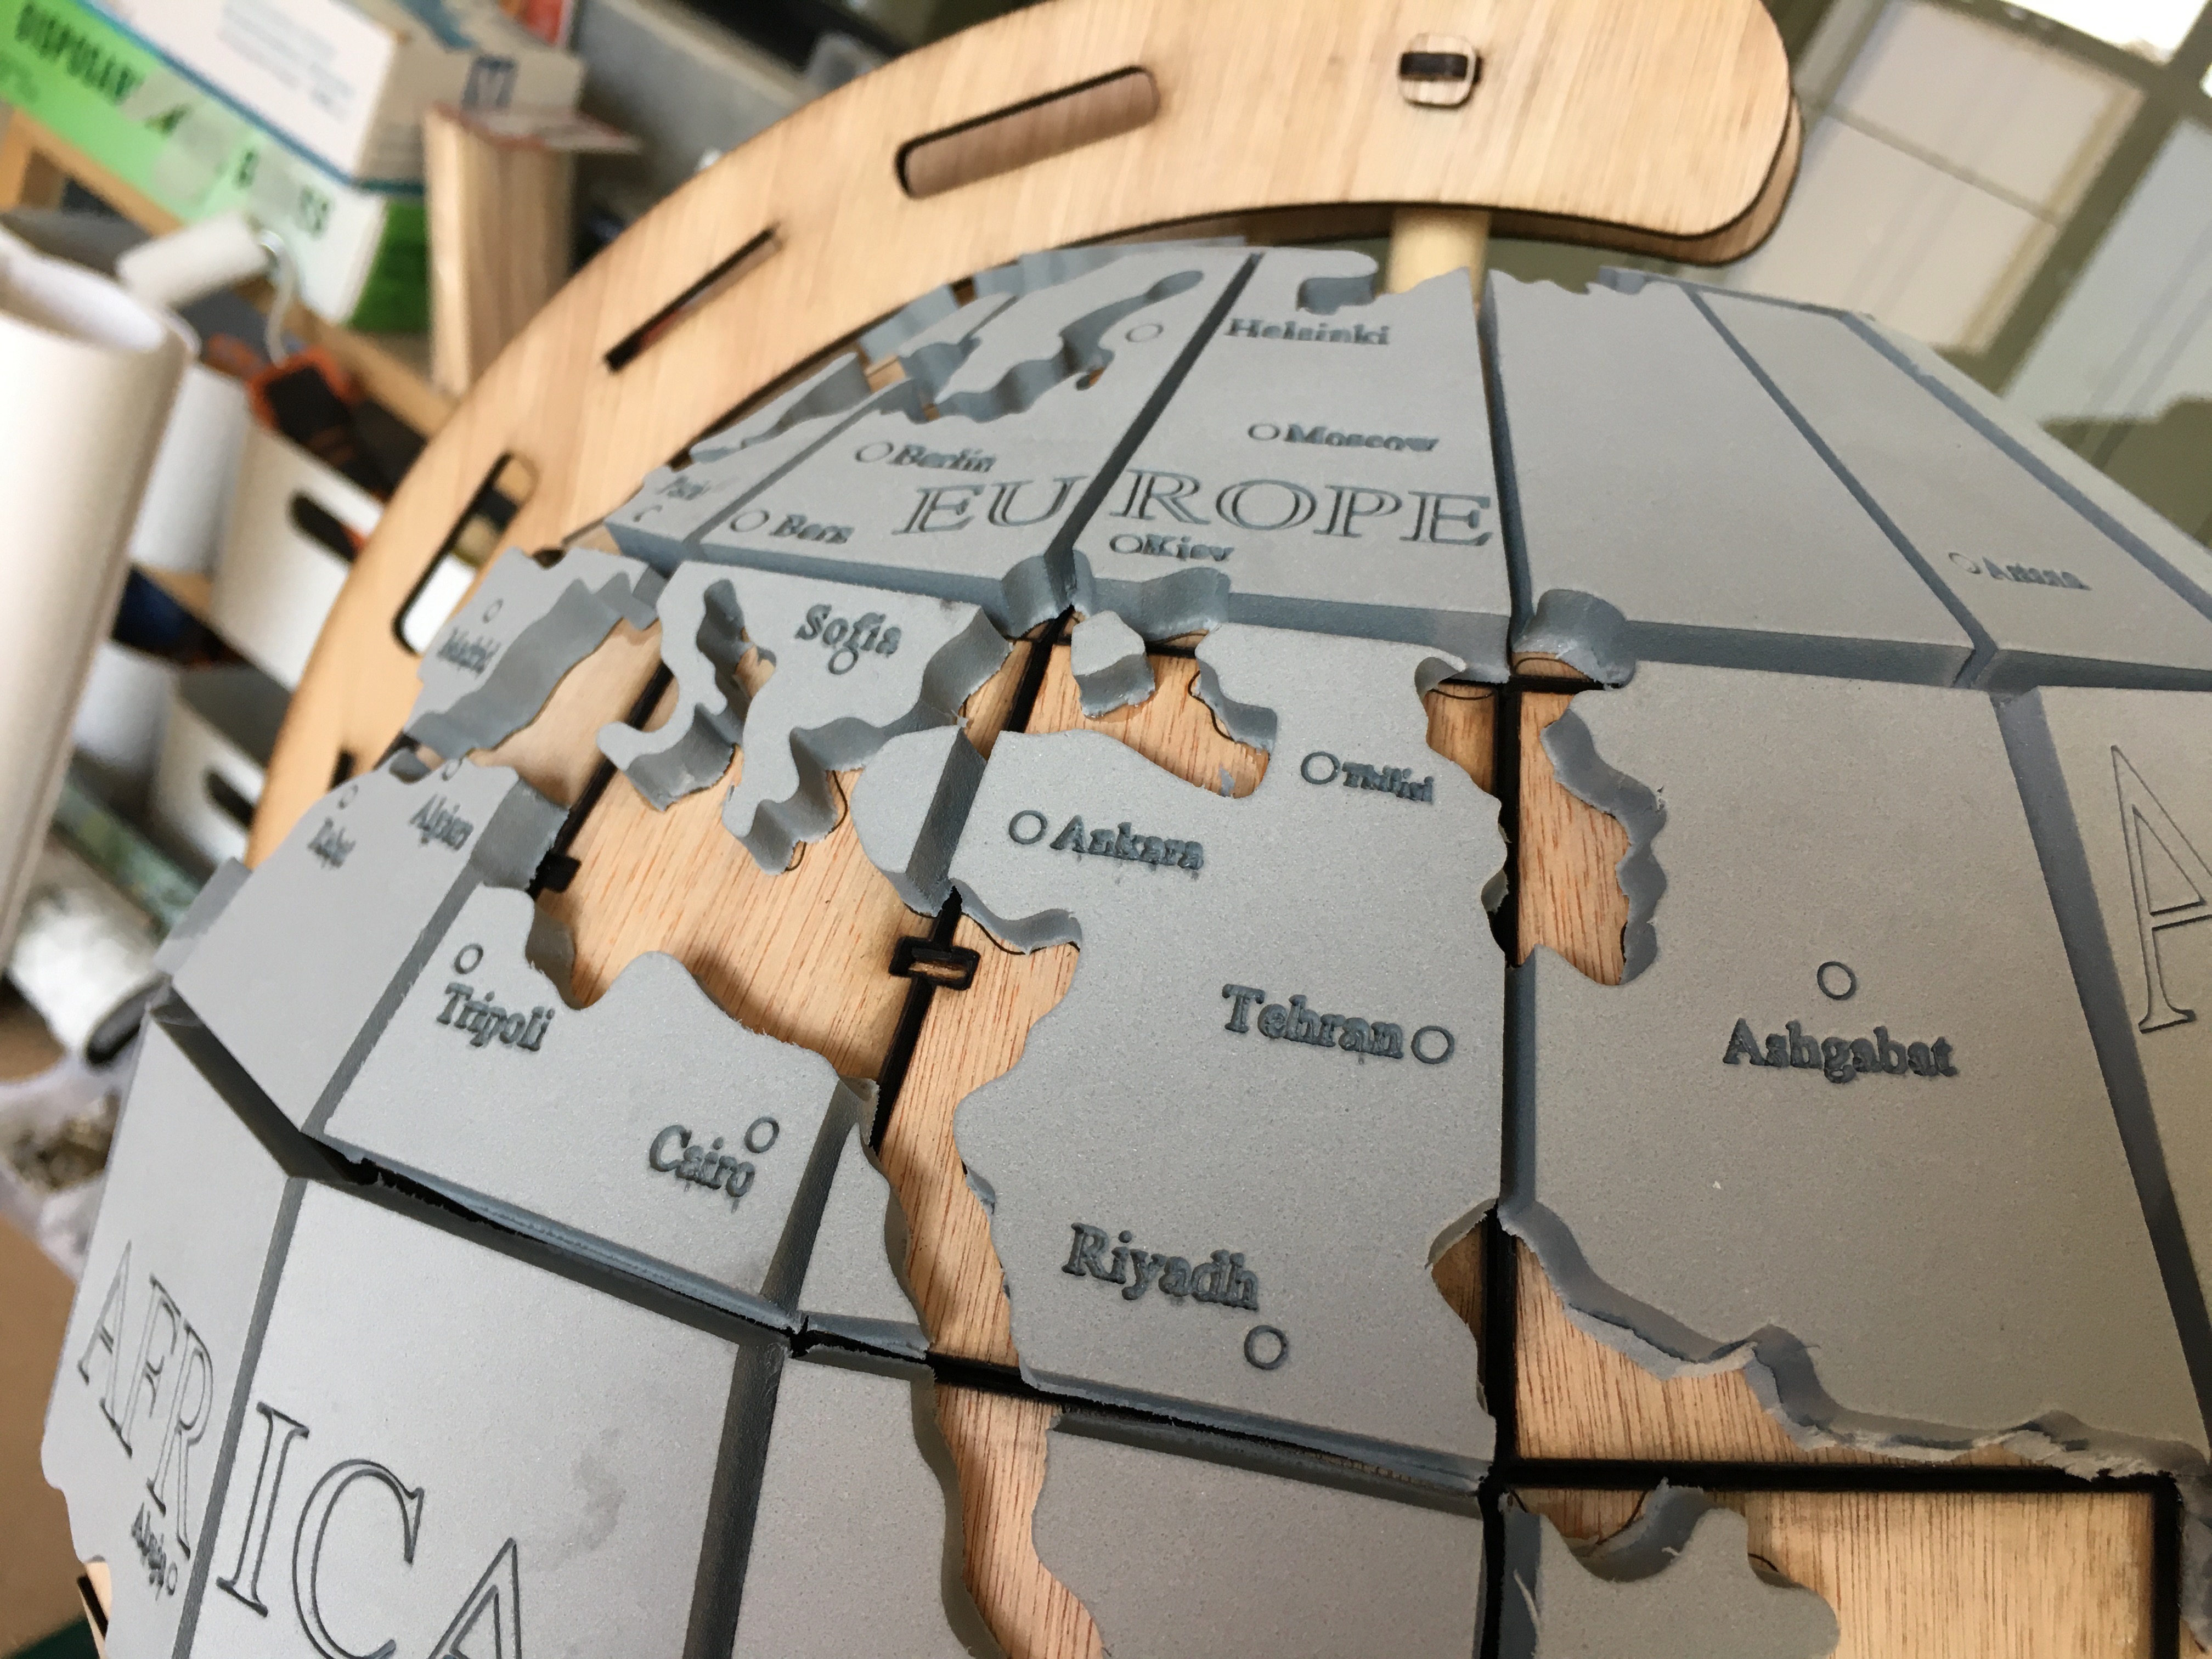
Plating the Globe
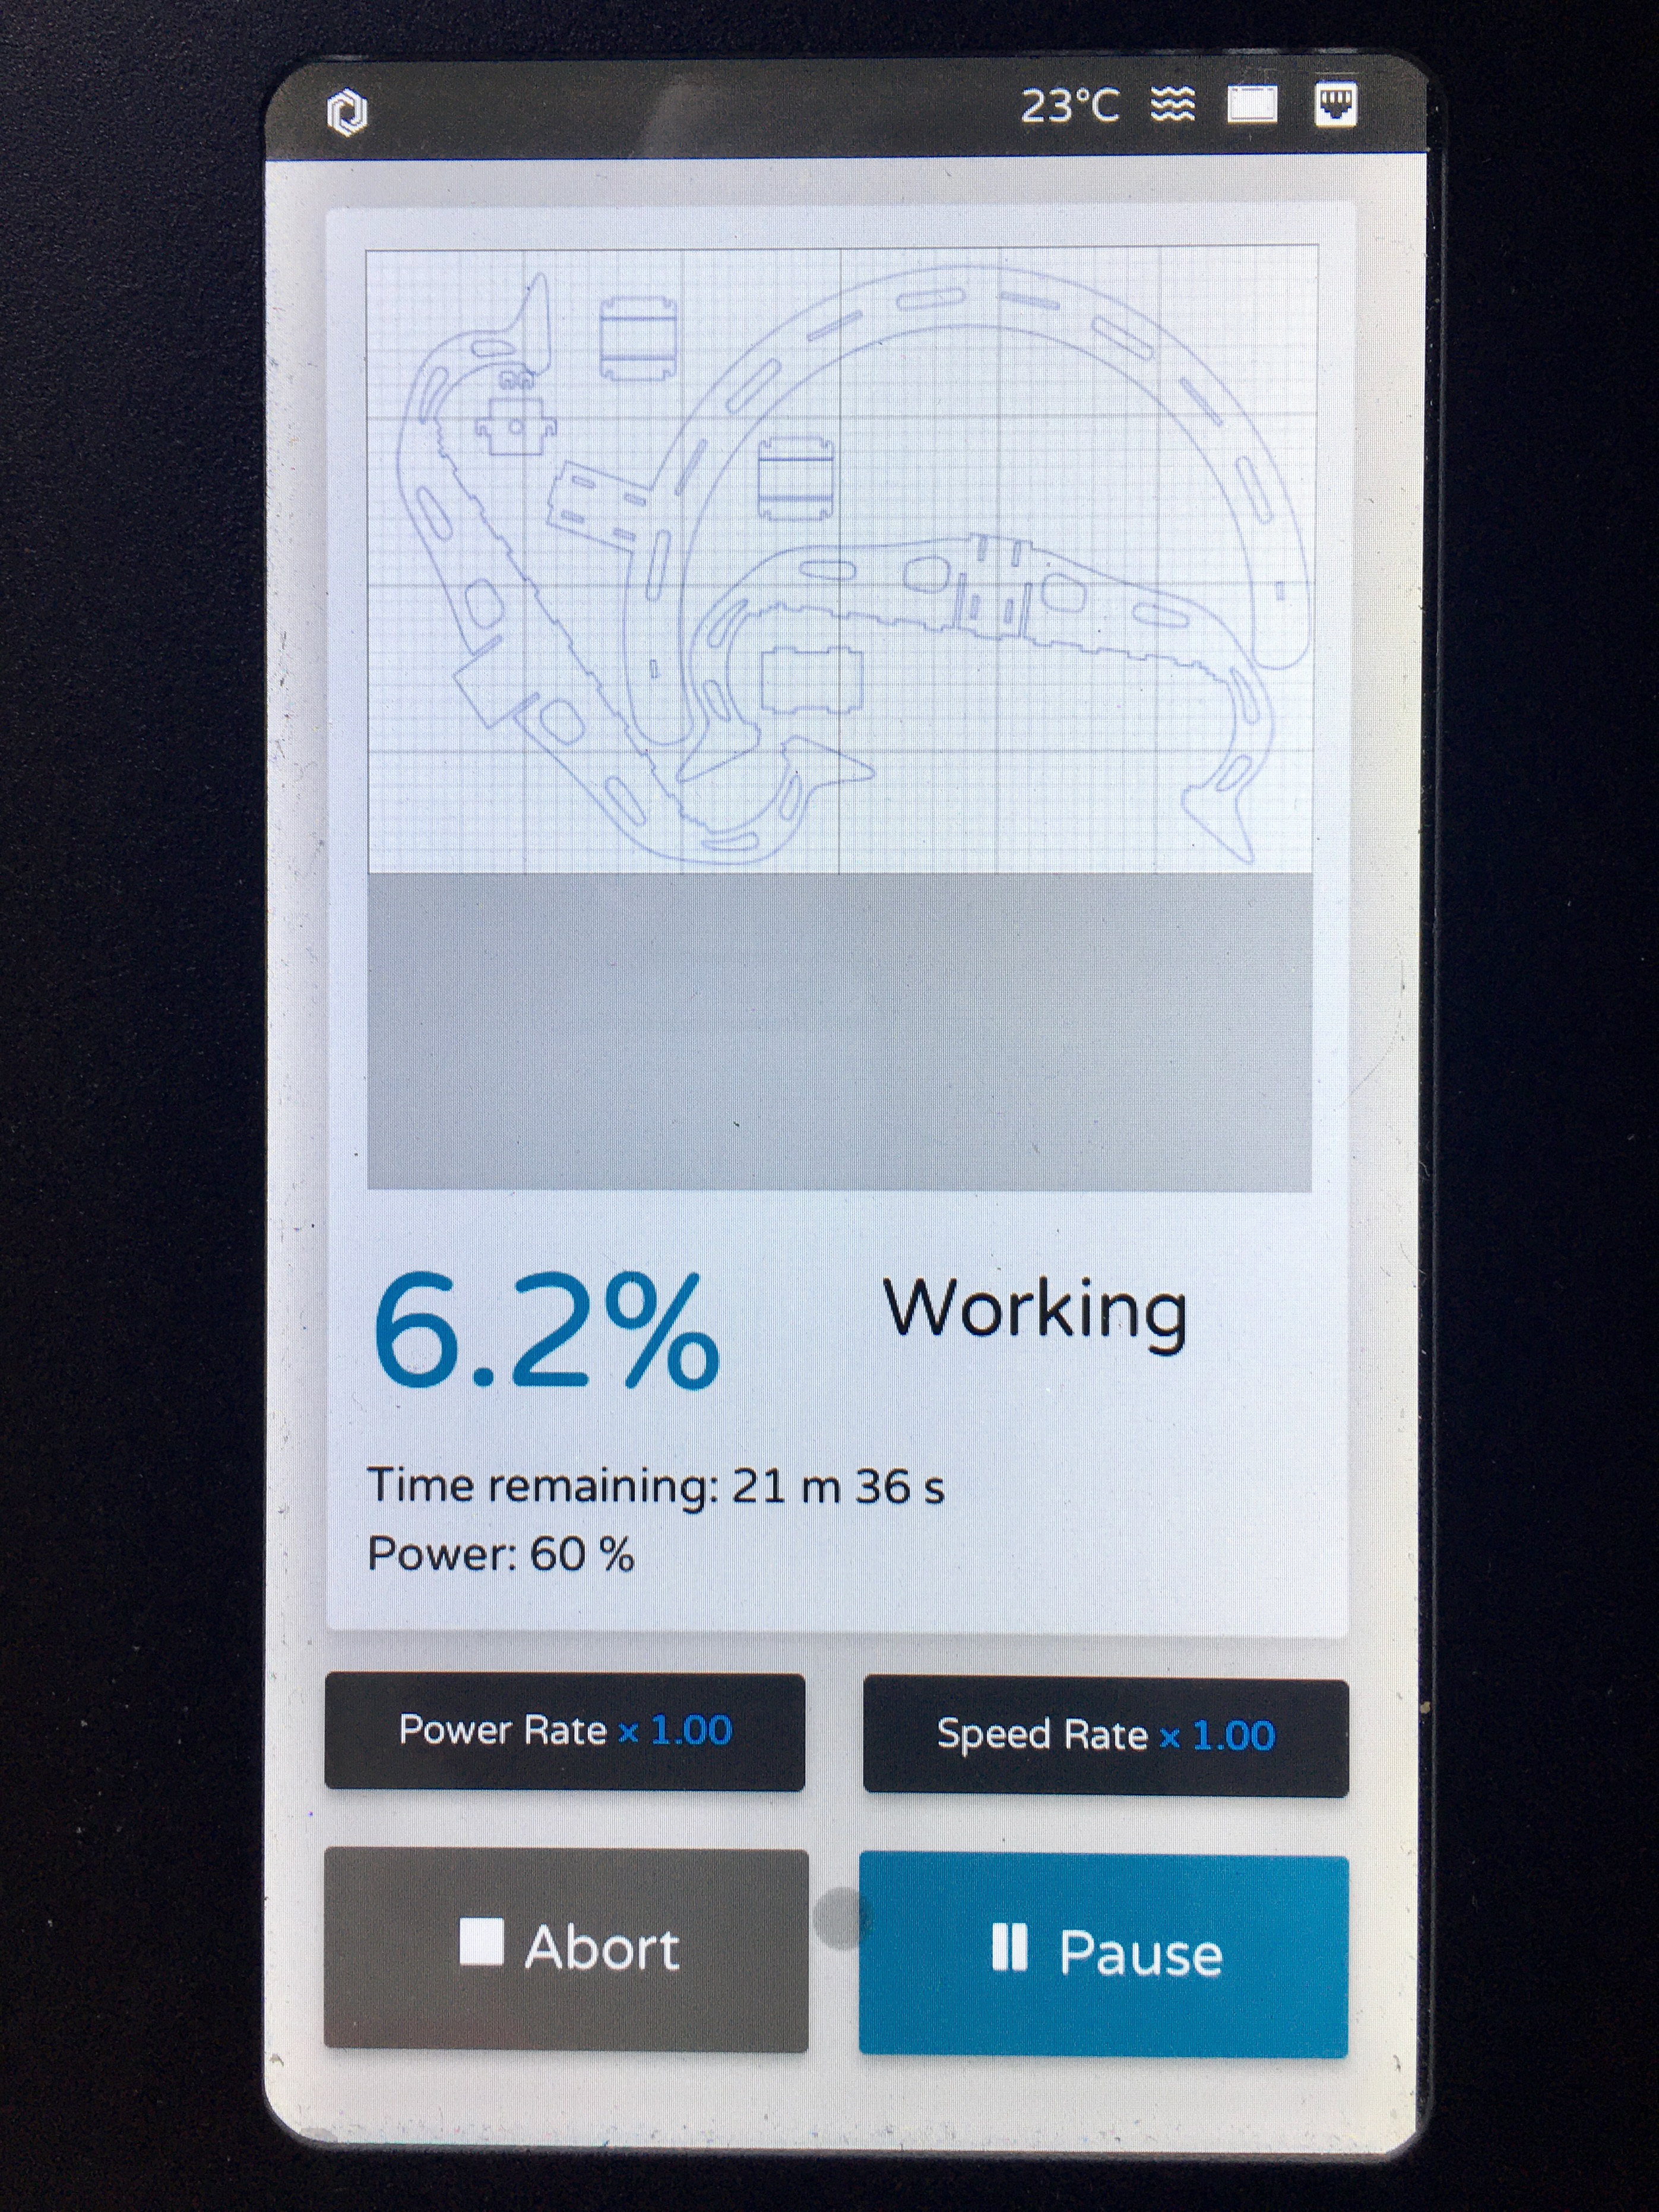
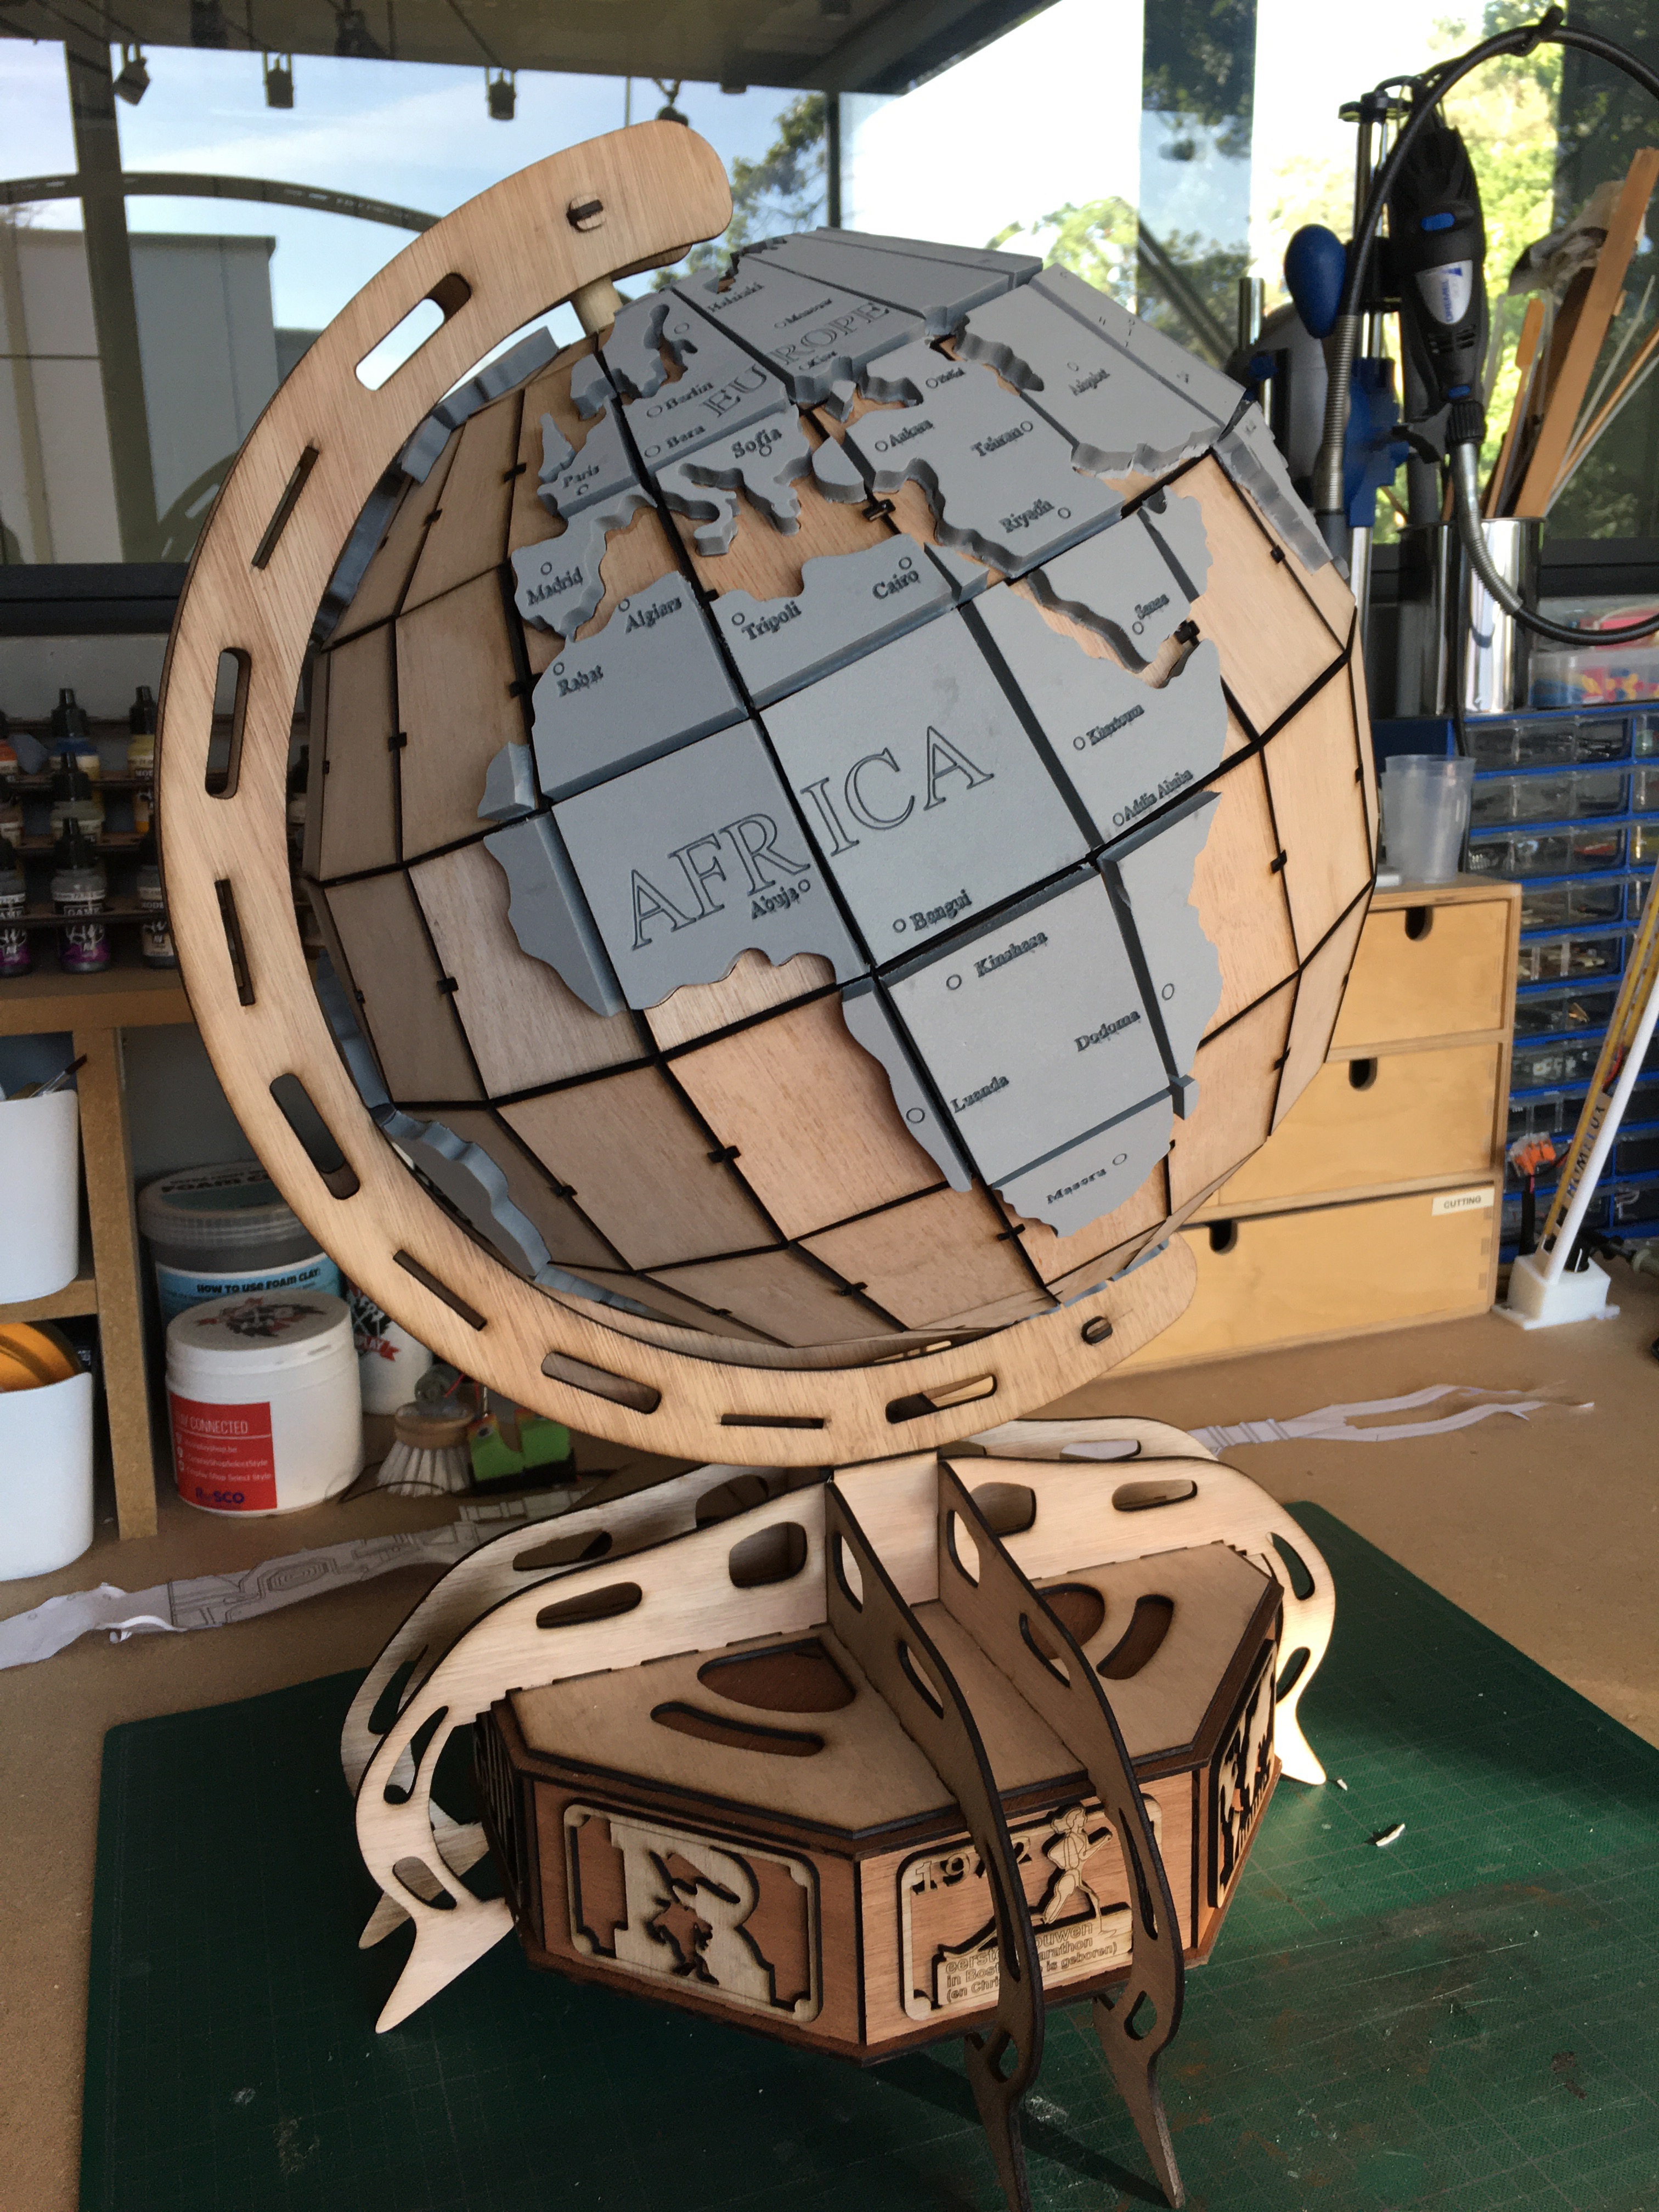
The final phase of this “make” was putting 144 panels on the globe’s inner structure to form the earth surface. On these panels, continents and countries were engraved.
And although I was low on time remaining to finish it in time, I decided to add one more personal touch: a second layer on top of the panels, made of EVA foam, to add some 3D effect to the continents.
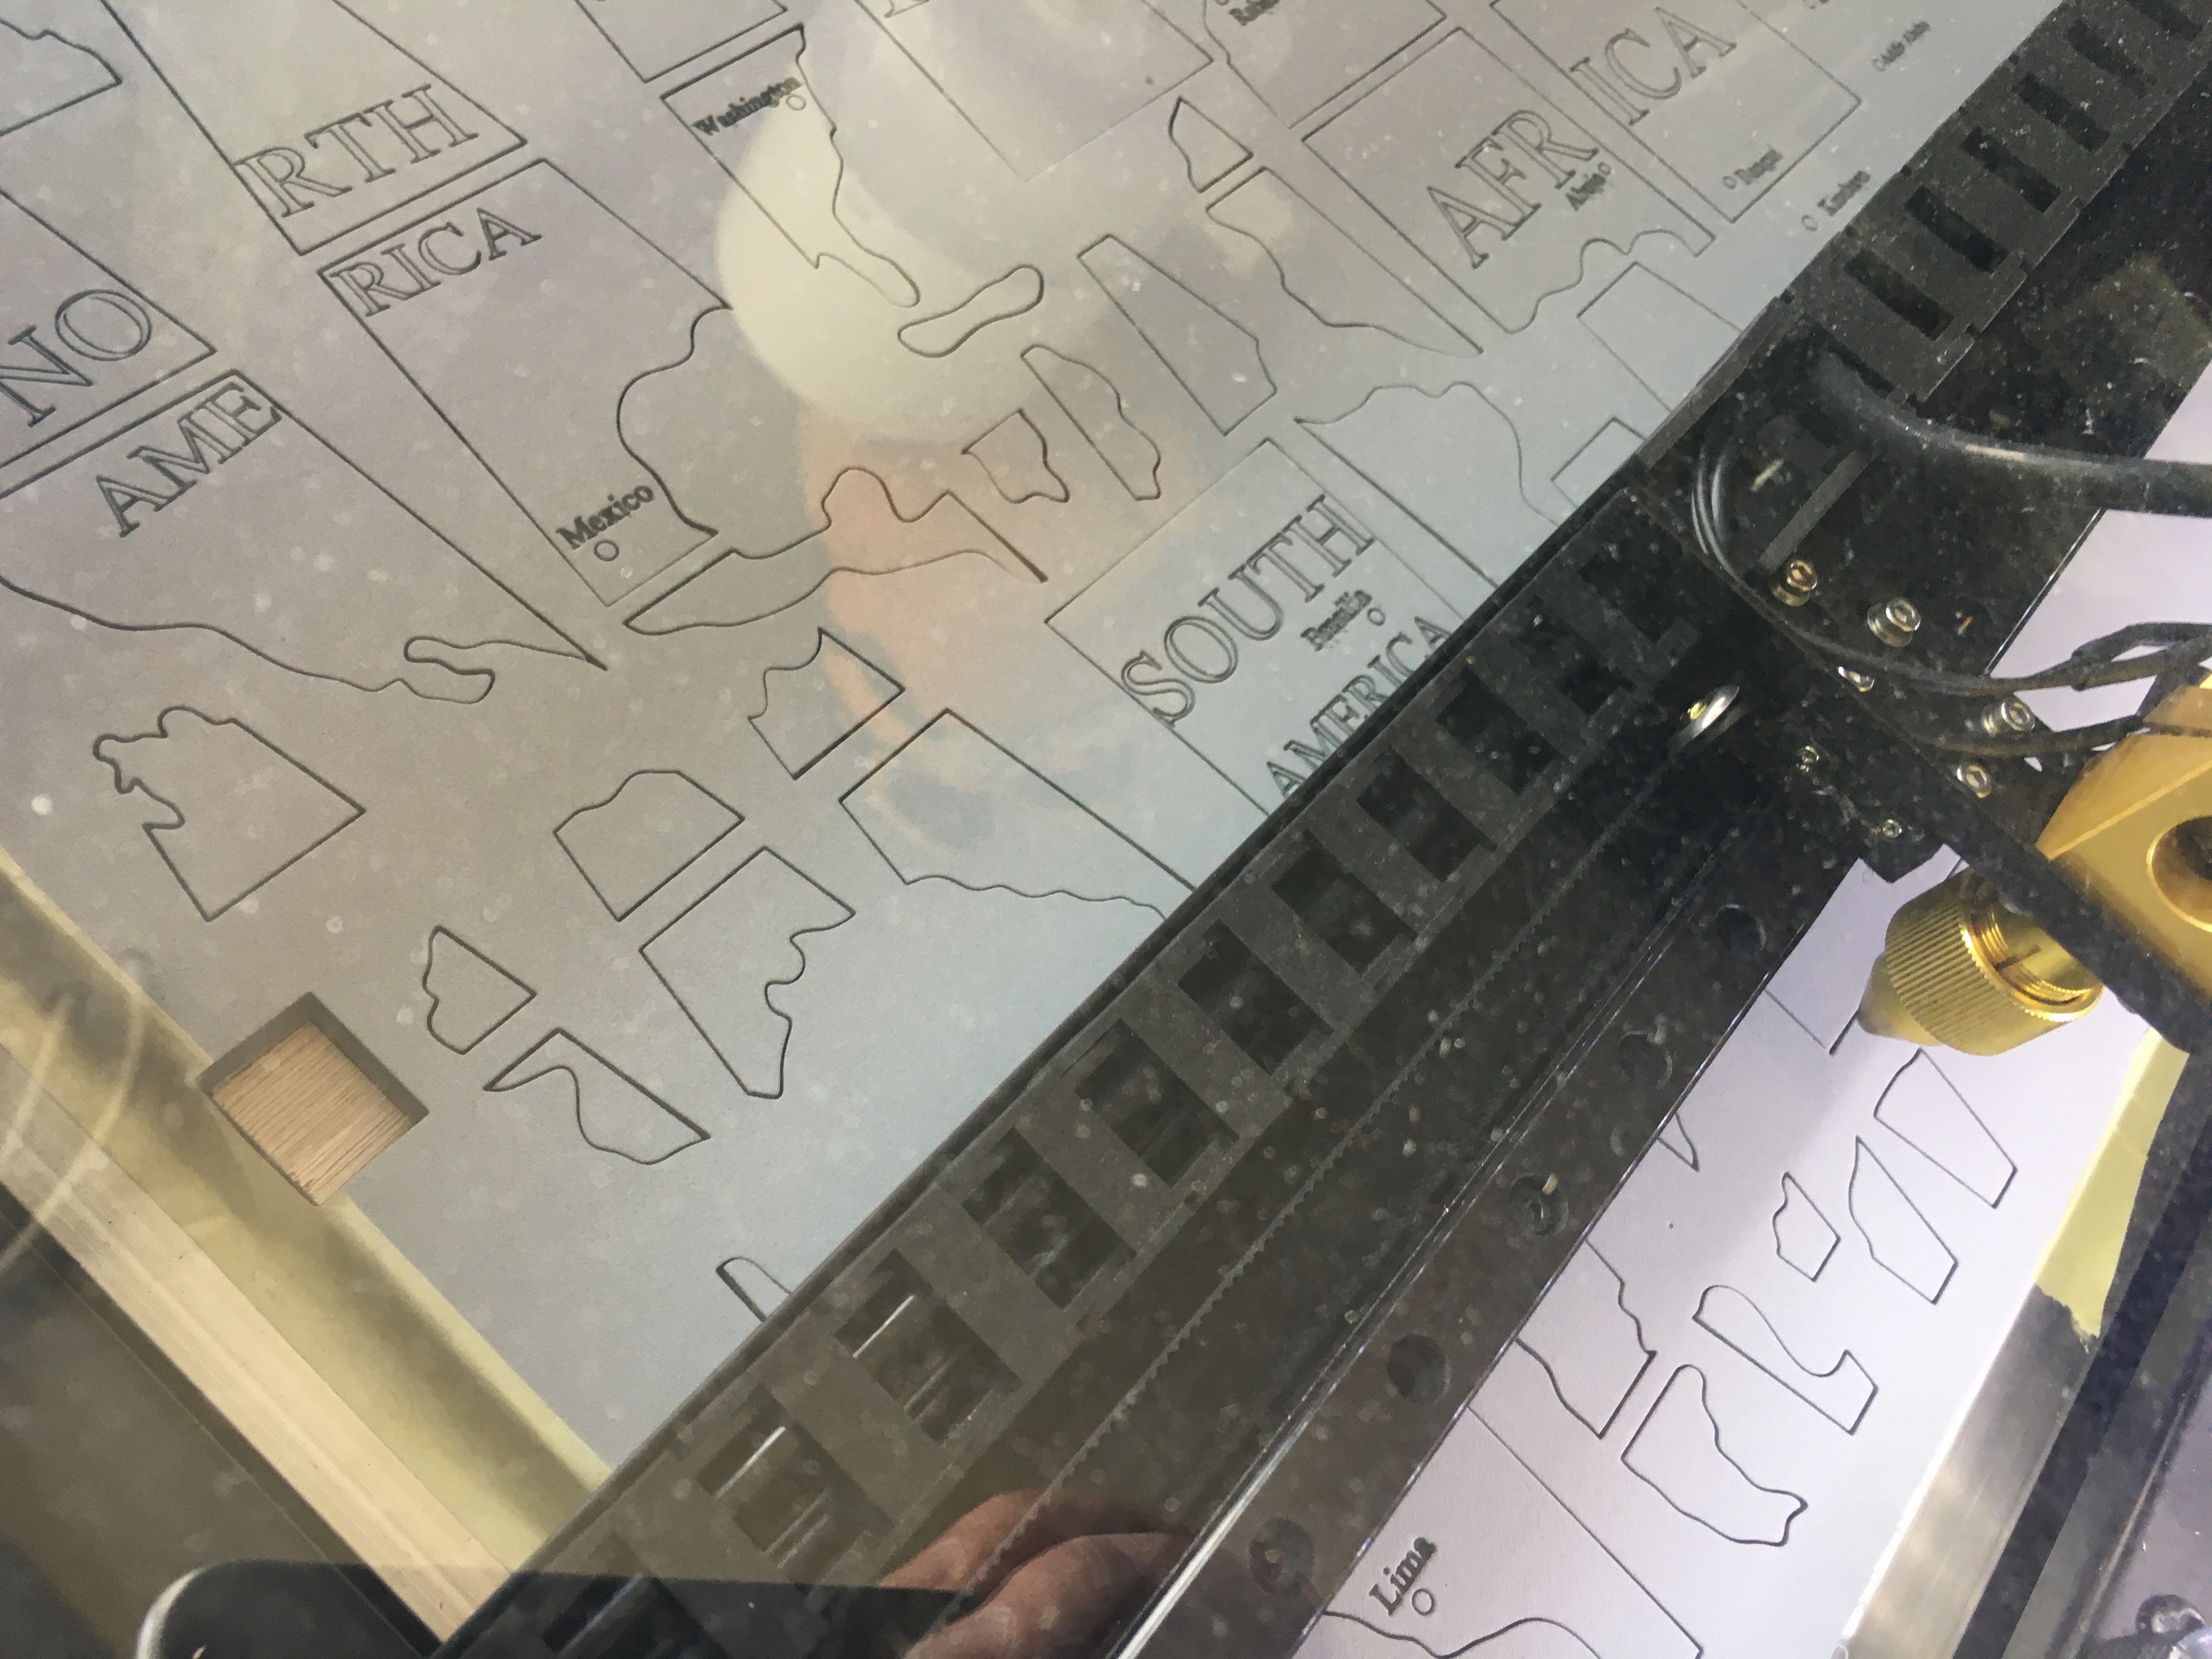
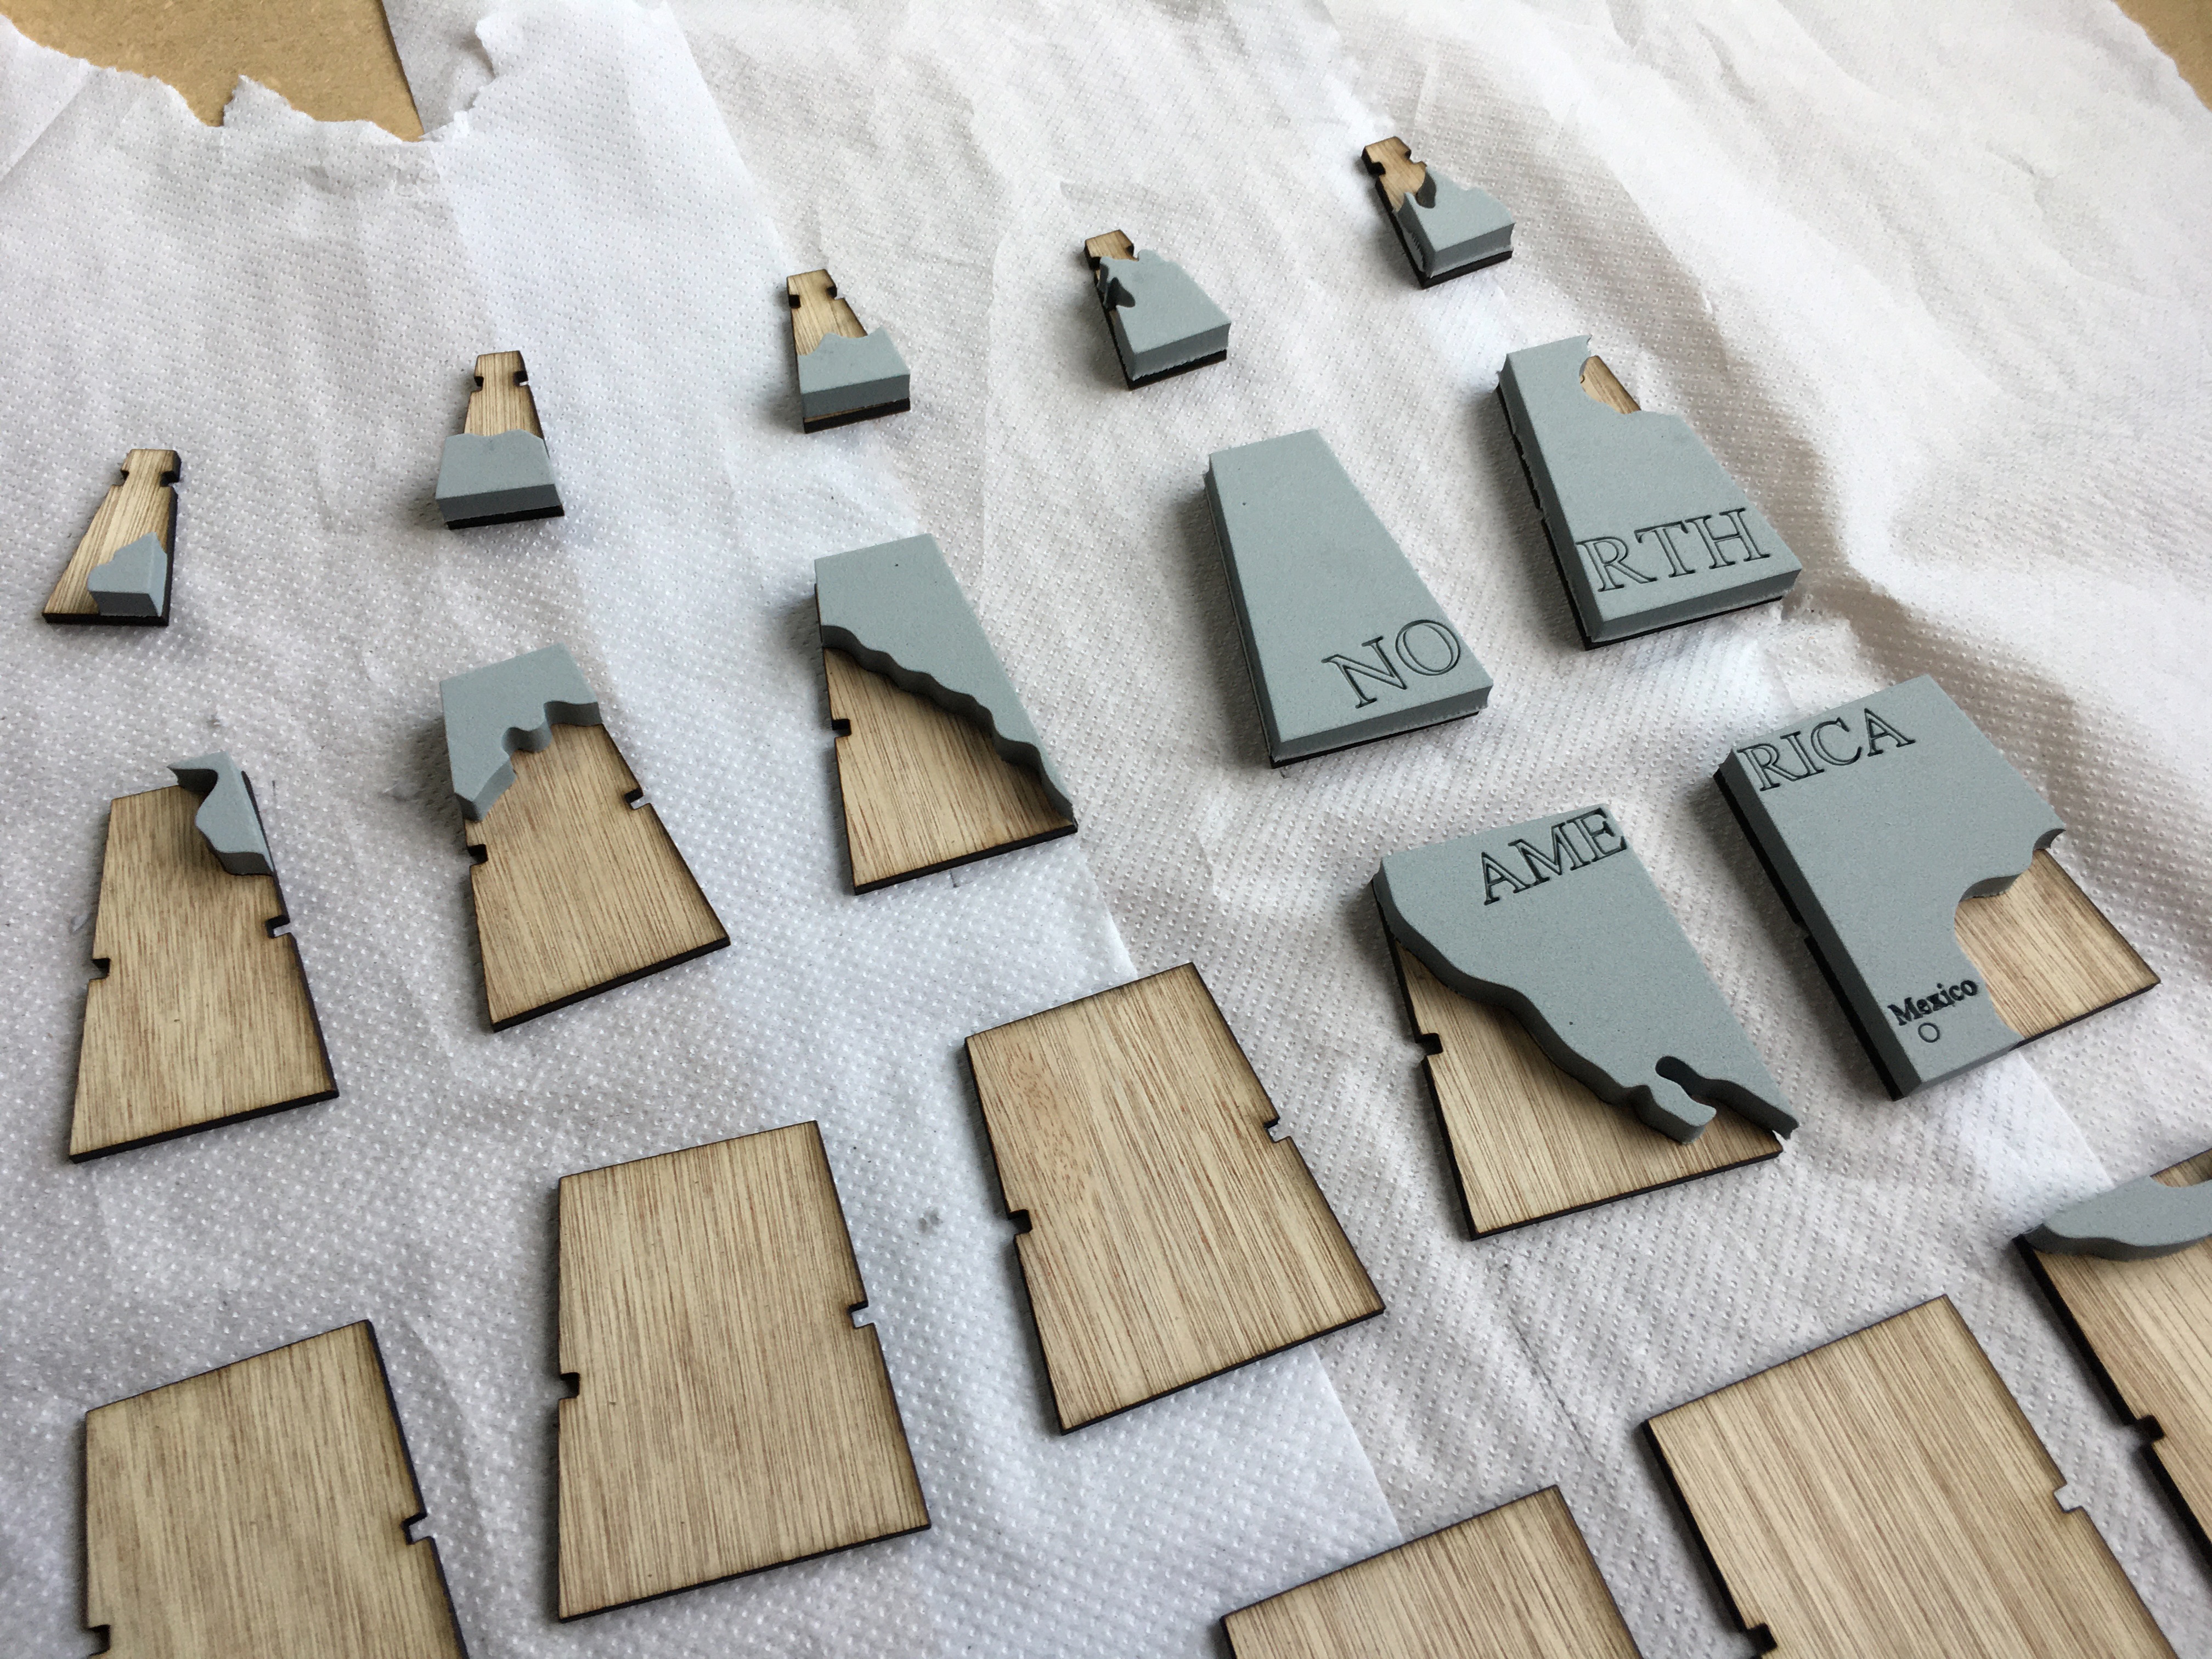
So, after duplicating all outlines of the continents, including the names that came with time, into another set of panels to be cut, I started the factory-like assembly of wooden panels with EVA foam parts glued on top of them, produced in batches, cut, glue, assemble, cut, glue, assemble,…

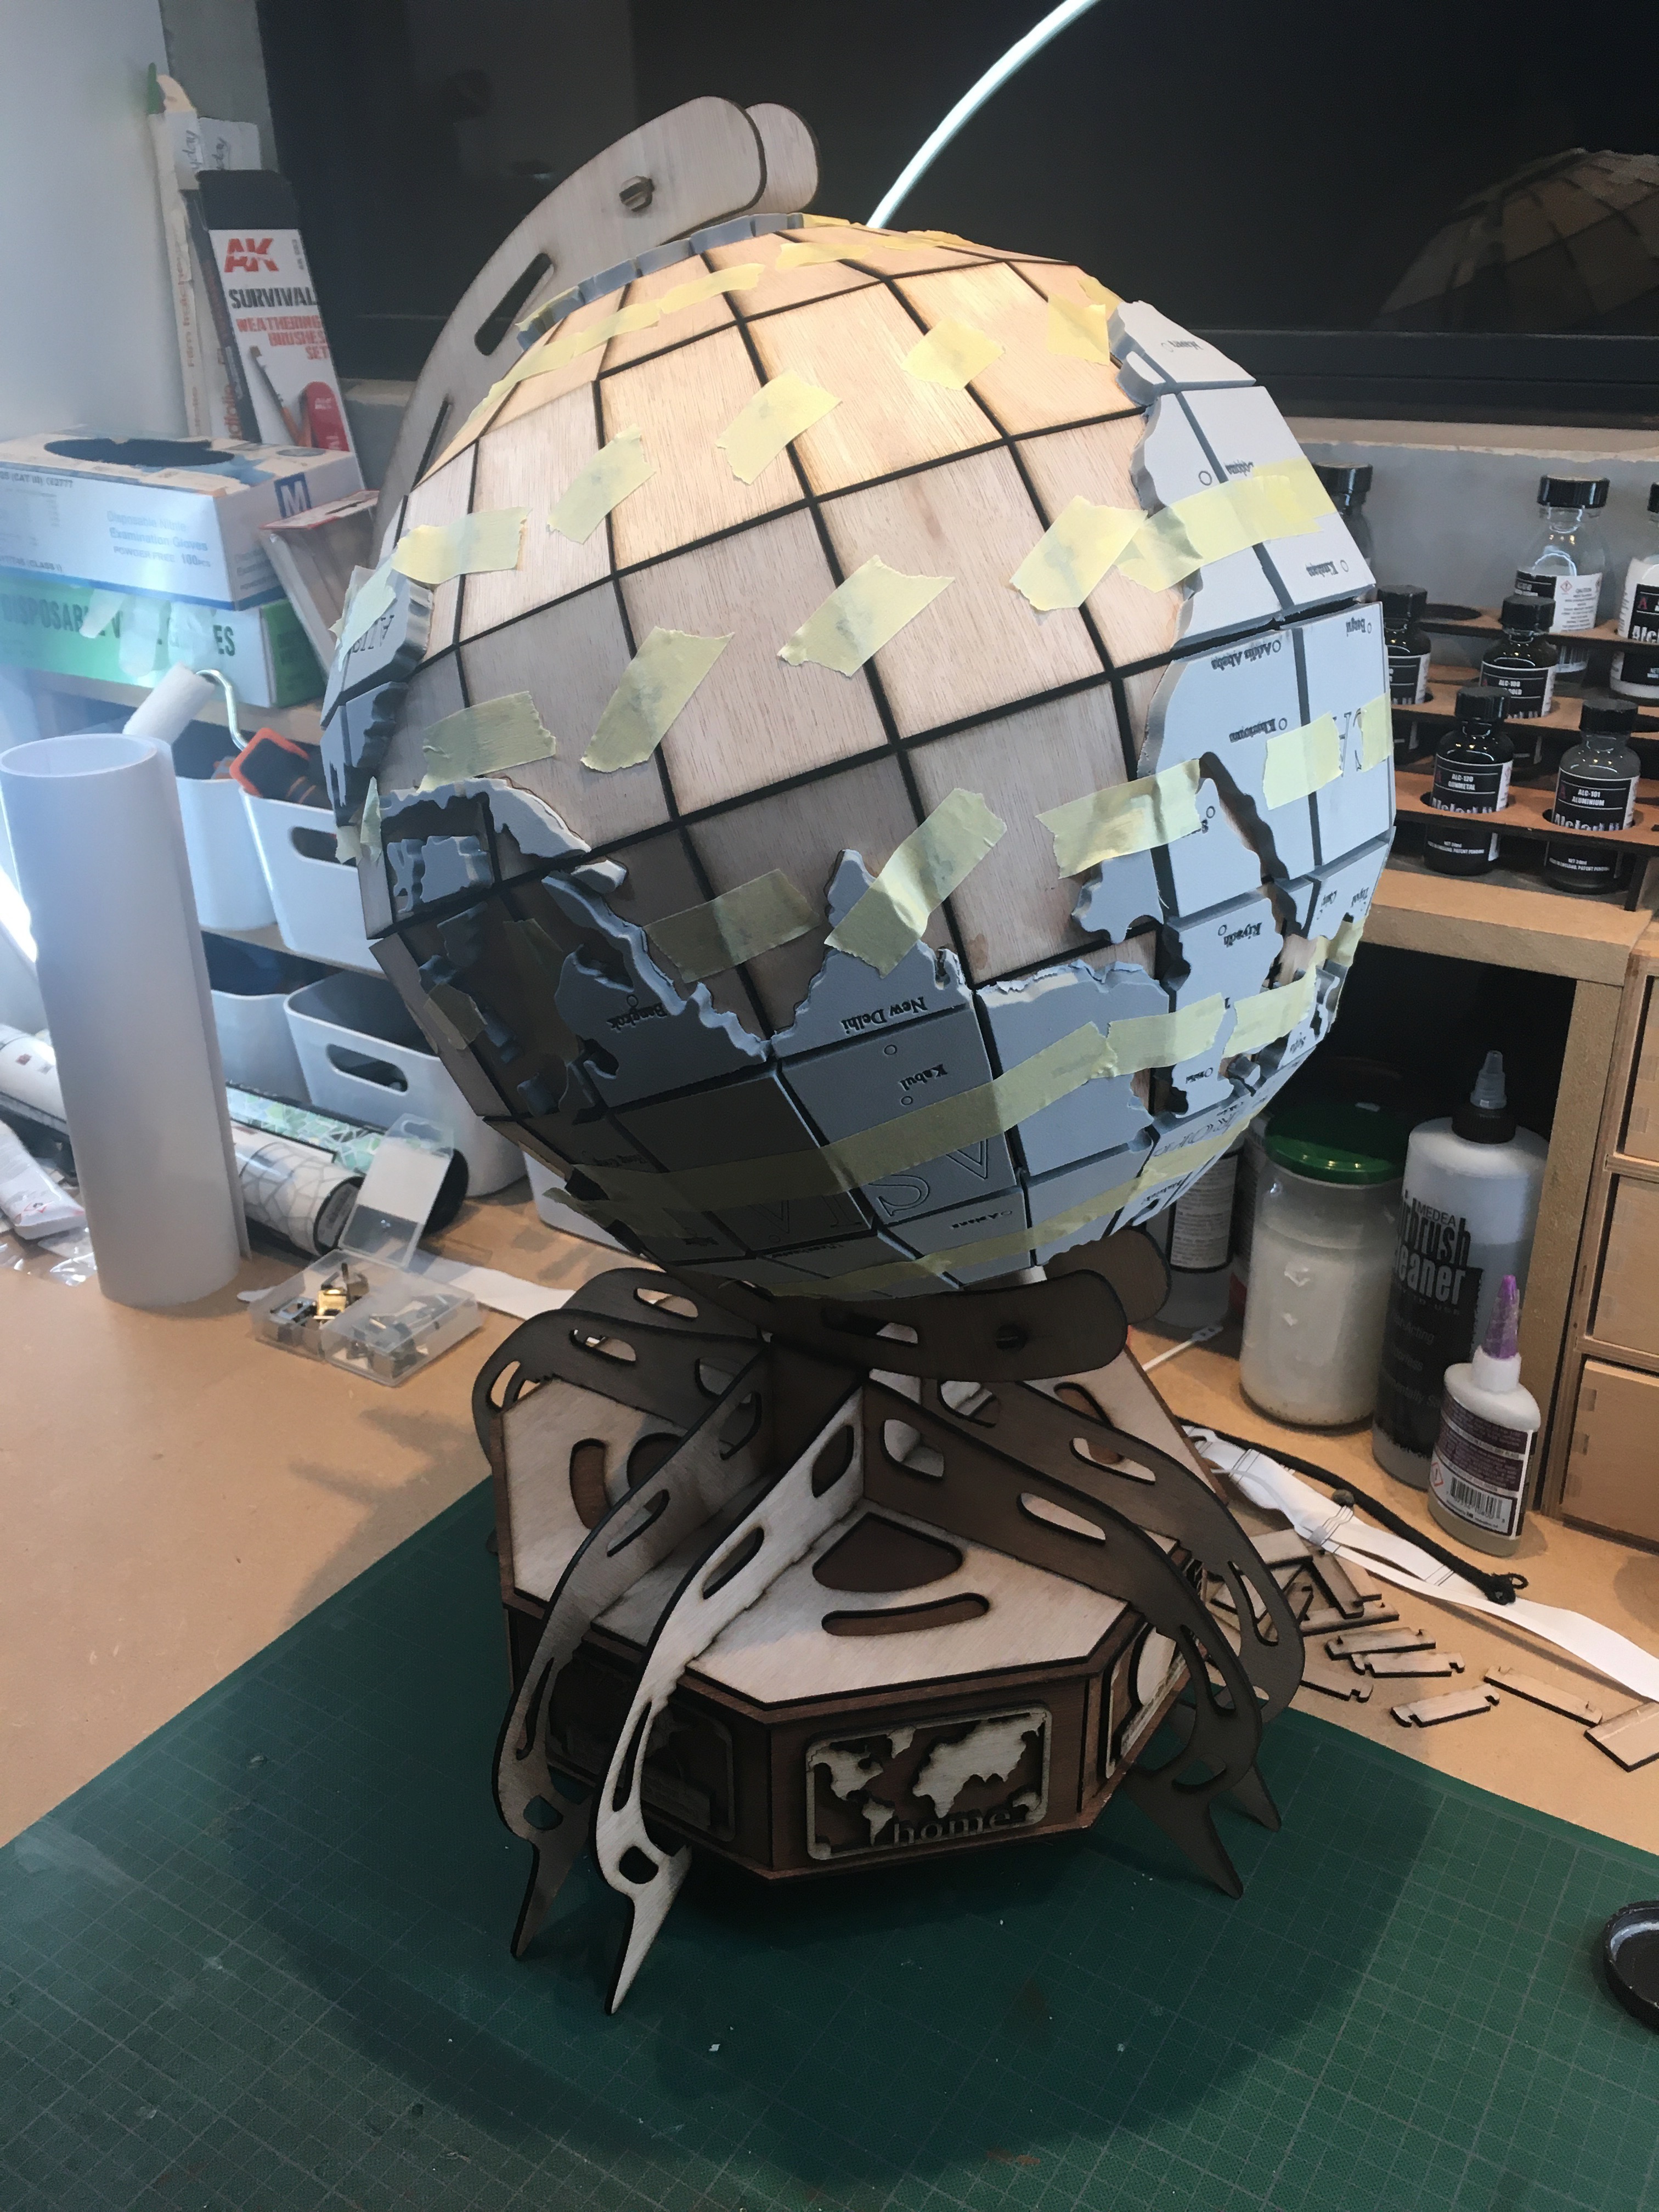
Although the design was a click-together concept, my initial tests already showed that this was a brittle solution. So I ended up glueing together the wooden connectors and panels. And sometimes this required reversie the globe and applying some masking tape to allow the glue to set.
The next morning - actually only a few hours later - the end-result was something I’m still proud of today. Ready, just in time, to make its entrance at the party.
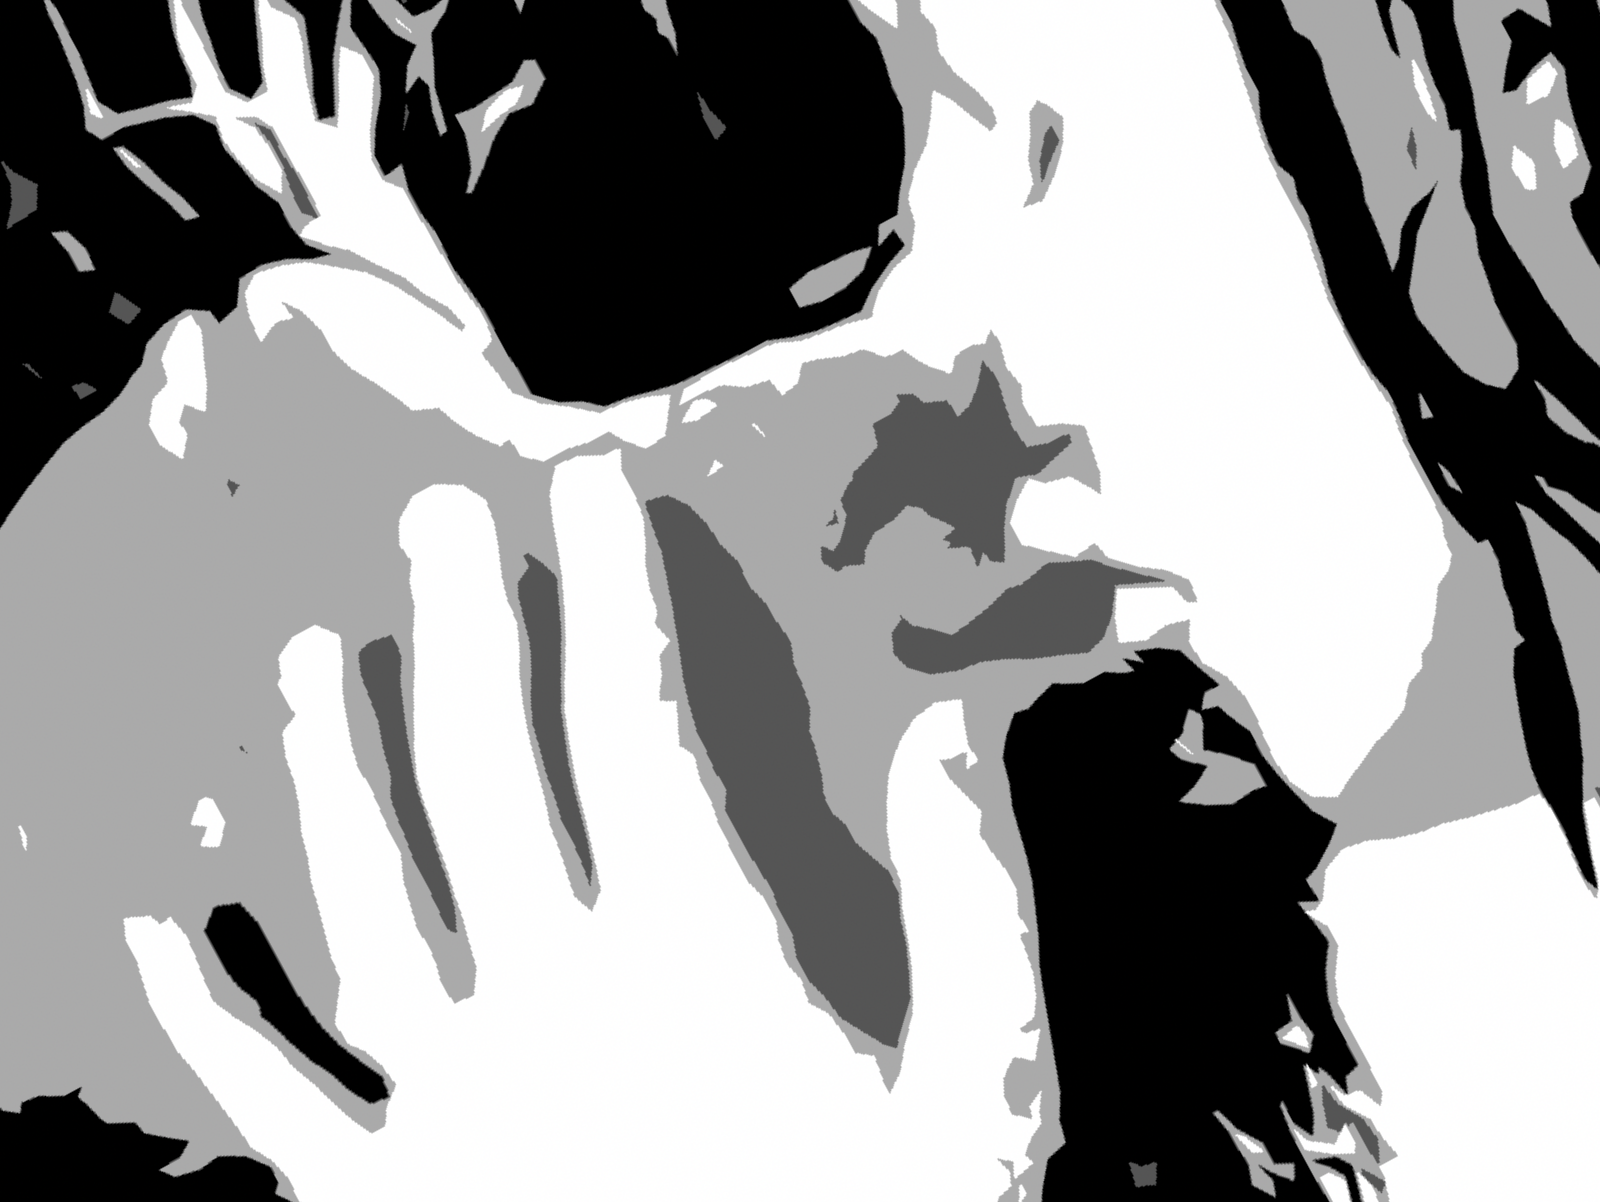
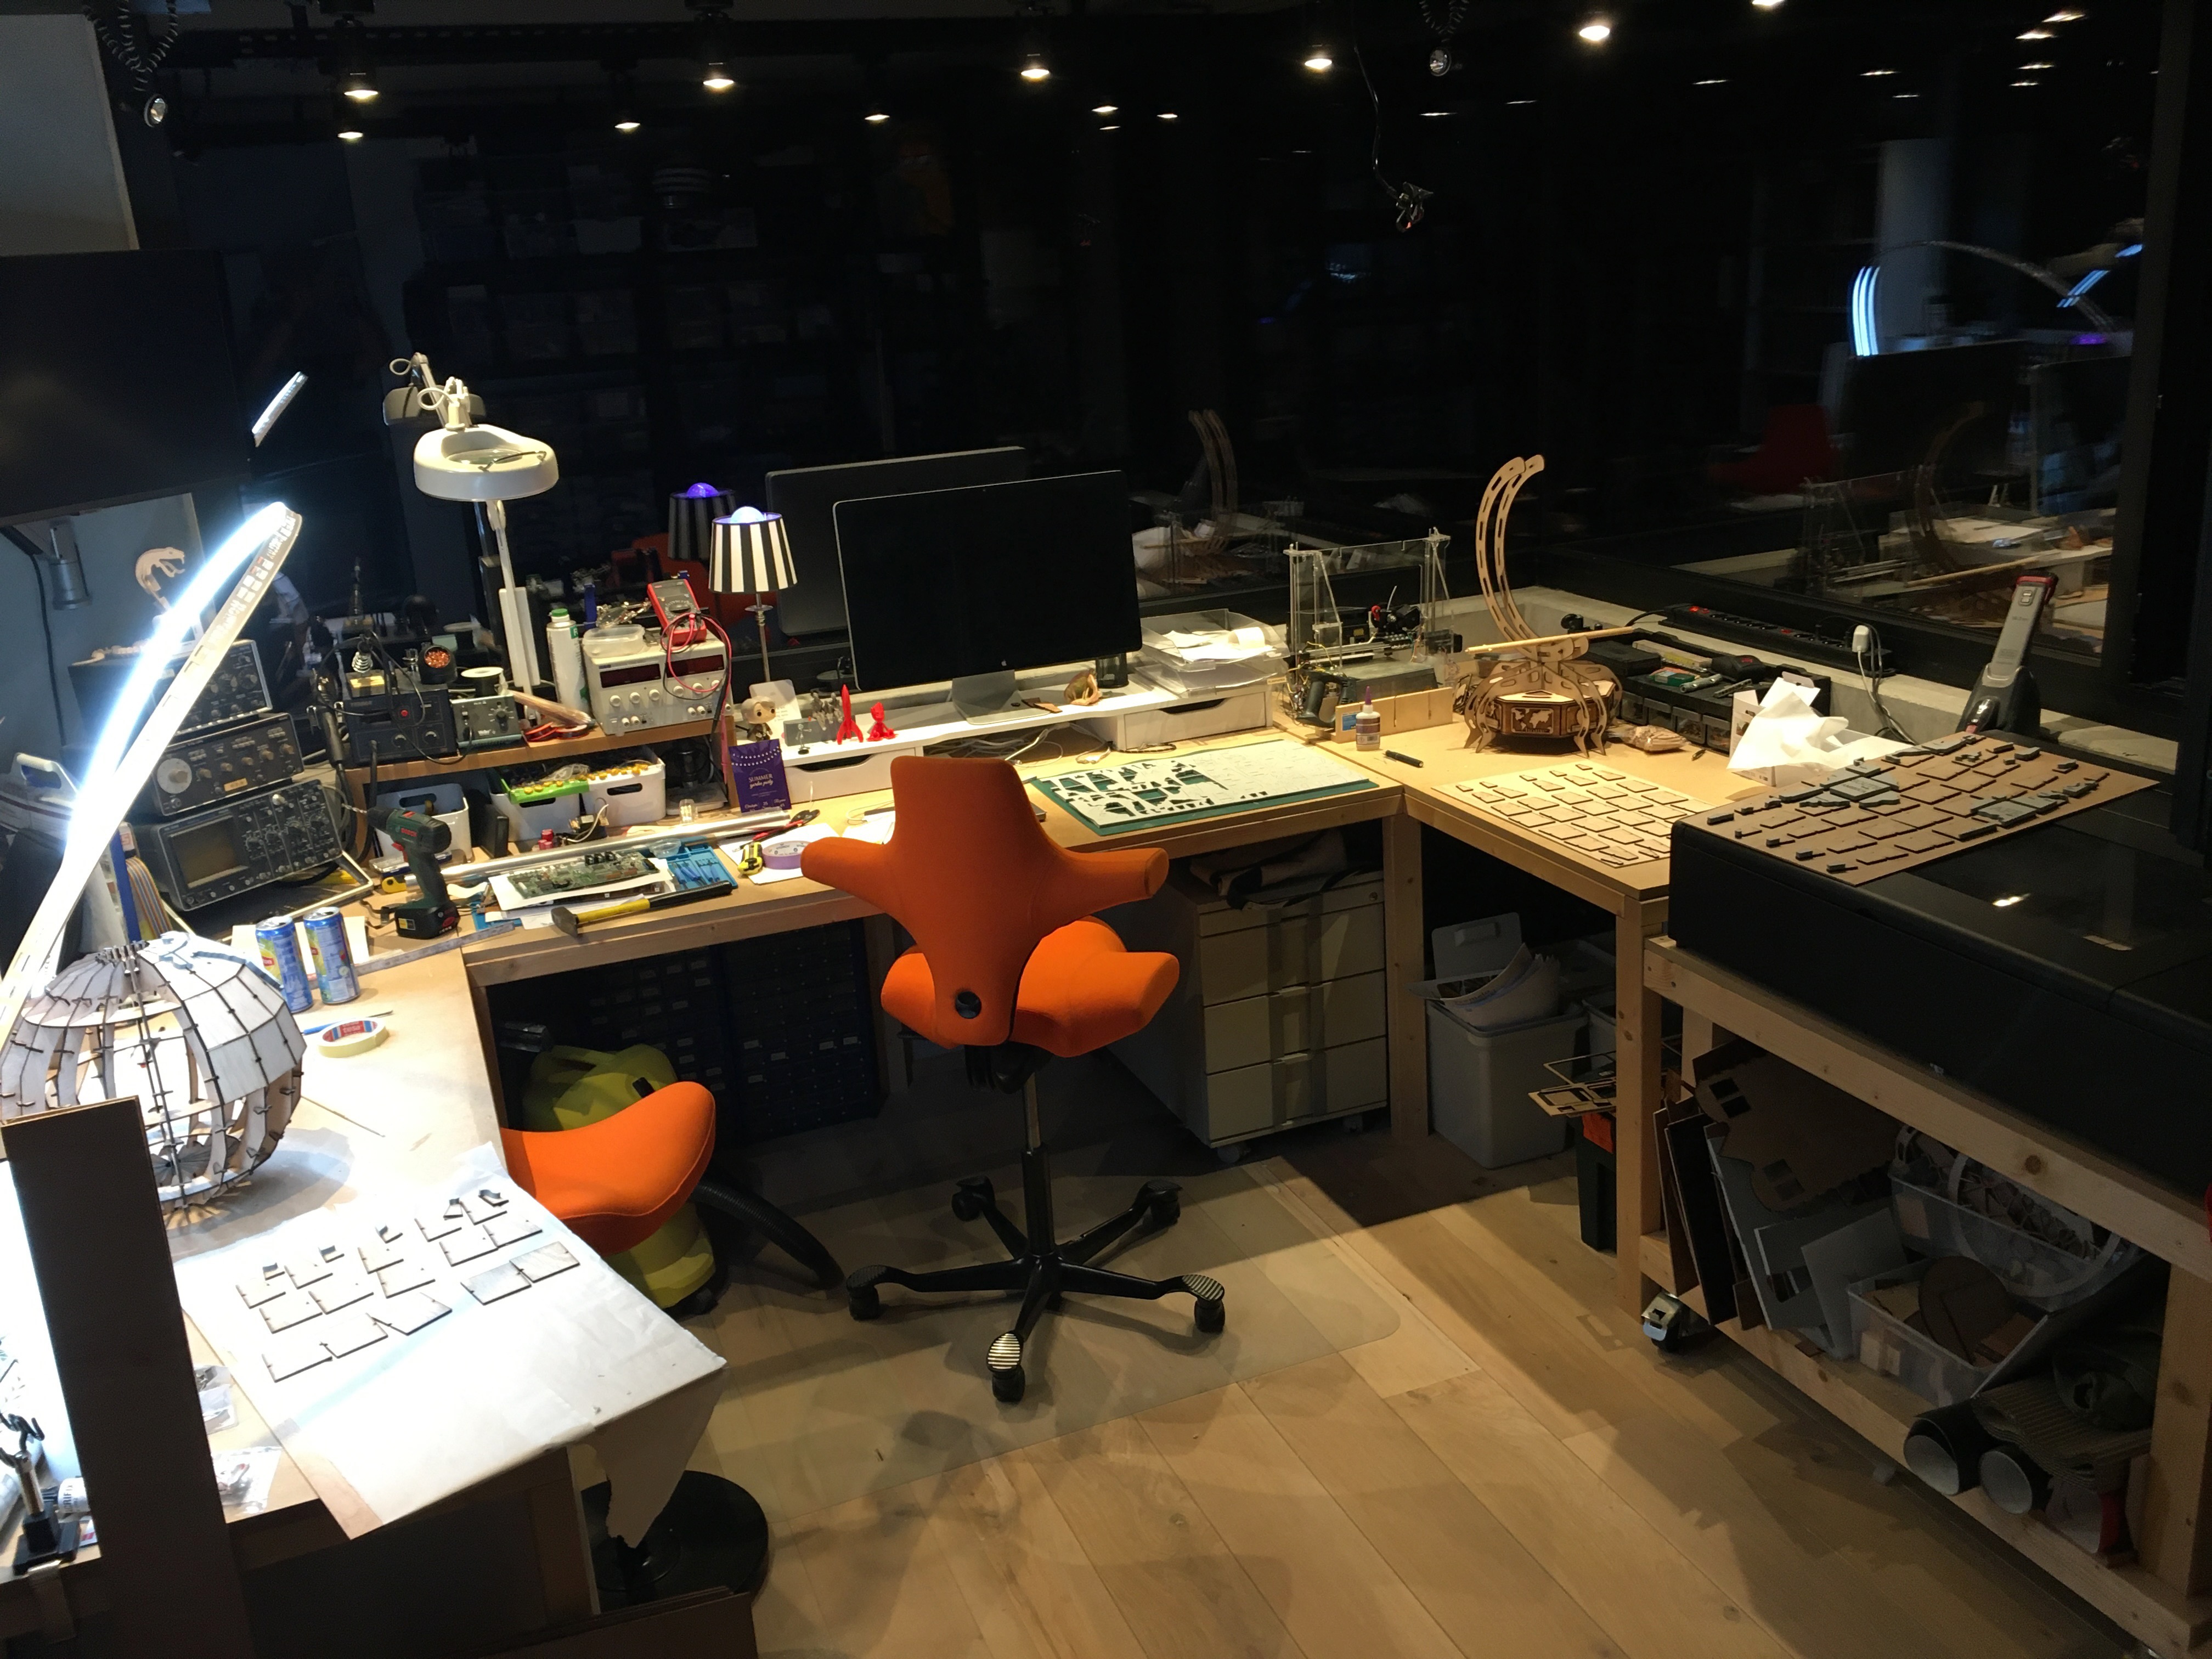
More Build and Result Impressions 😇
Epilogue: 🚗 + 🌍 = ?
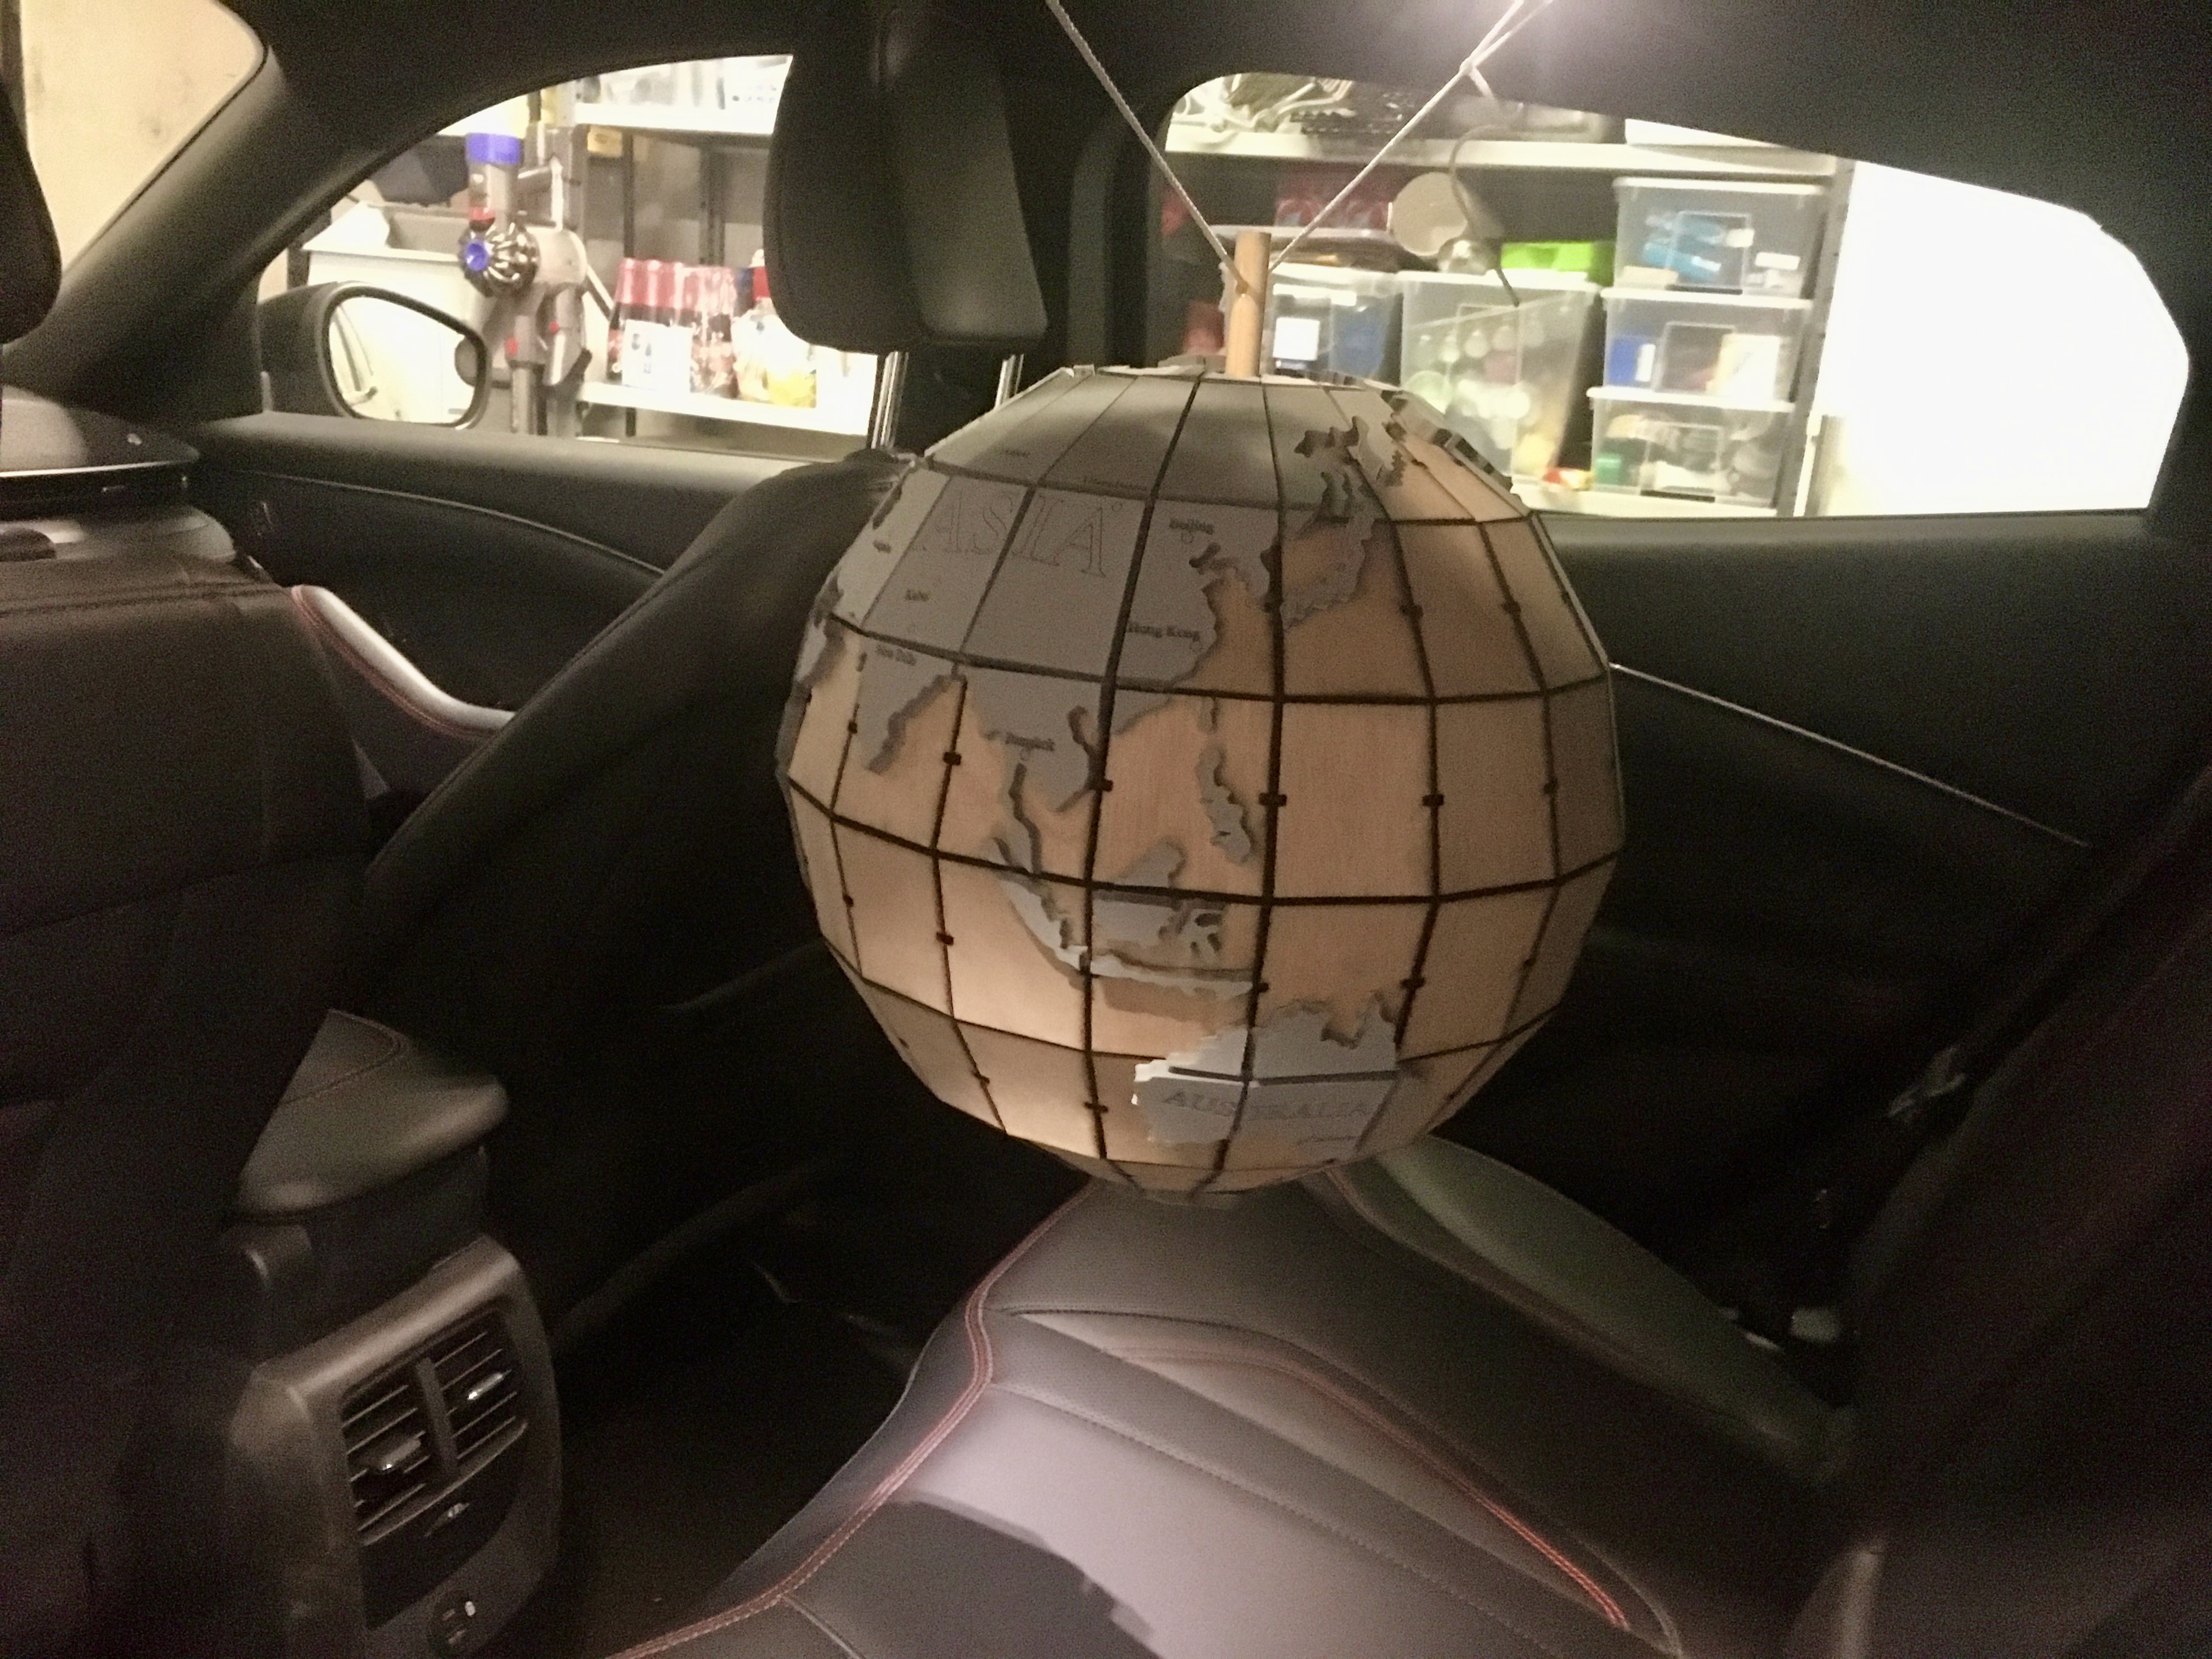
And if that entire “make” wasn’t enough, I still had one problem to solve: how to transport this? Well, let’s say that I had a globe floating in mid-air in my car that day 😉