vCard
vCard
 Homemade by CVG
 My Homemade Apps
 Thingiverse
 Strava
Raspberry Pi Notes
These are my notes on the Raspberry Pi, model 3b.
Why hook up a screen, keyboard and mouse, if all you need is a network connection? ;-)
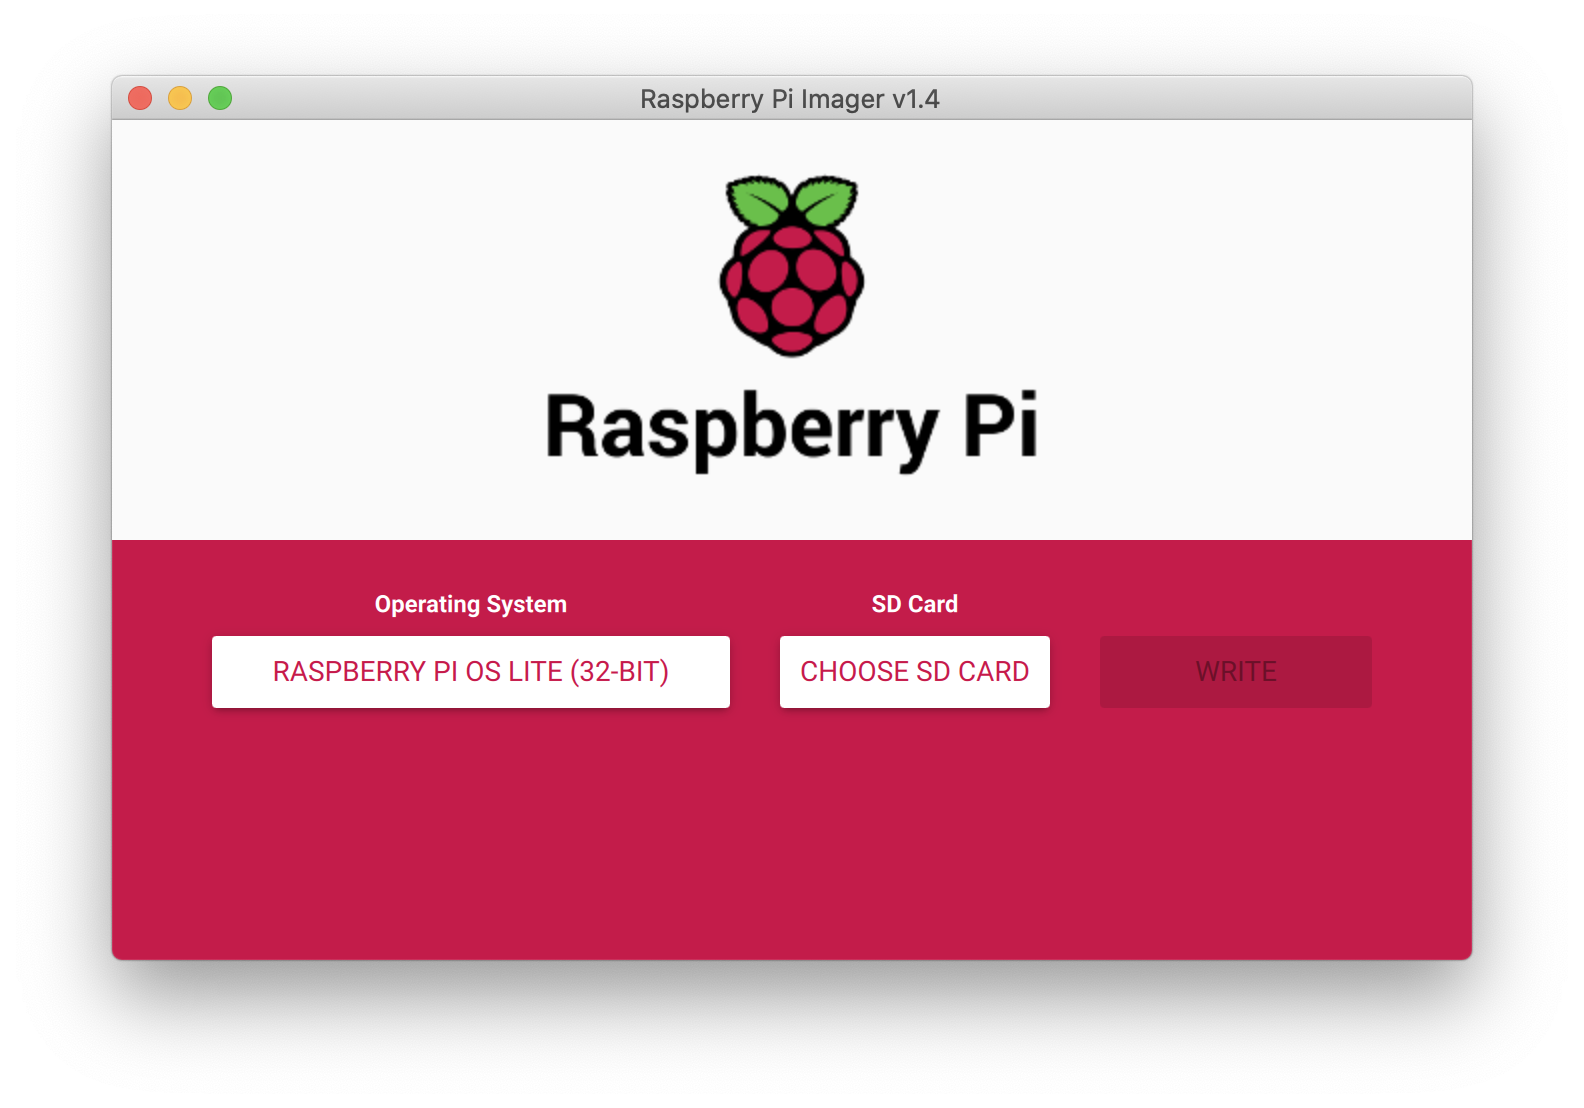
Use Raspberry Pi Imager
Download Raspberry Pi Imager from https://www.raspberrypi.org/software/ ↗ and run it, follow the instructions to download and transfer it onto an SD card.
Before First Boot
Mount the newly created SD card and …
$ touch /Volumes/boot/ssh
to enable SSH on boot and …
$ cat - >> /Volumes/boot/wpa_supplicant.conf
country=BE
ctrl_interface=DIR=/var/run/wpa_supplicant GROUP=netdev
update_config=1

network={
	ssid="Your wireless network's SSID"
	psk="Your wireless network's password"
}
and terminate with Ctl-D.
Now you’re ready to boot and log in to your new Raspberry Pi using…
$ ssh pi@raspberrypi.local
Things to do after First Boot
Change Hostname
Edit /etc/hostname and /etc/hosts, replacing raspberrypi with the new name. Reboot or execute sudo hostname <new name>.
Add SSH public key
Add your public key to ~/.ssh/authorized_keys.
Disable Password-based Access
Edit /etc/ssh/sshd_config and look for Password-related settings and turn them off ;-)
Update
$ sudo apt-get update
Load .bashrc when .bash_profile exists
$ cat - » .bash_profile if [ -f $HOME/.bashrc ]; then . $HOME/.bashrc fi ^D
Install and make Python 3 default
$ sudo apt-get install python3-pip
$ cat - >> .bash_aliases
alias python='/usr/bin/python3'
alias pip=pip3
^D
$ . .bashrc
Freeing UART/console for applications
By default, the Pi uses its UART for its console. This means that you can’t connect external devices. To free it up do the following:
- Go into the configuration tool and disable serial support:
sudo raspi-config, go into5 Interfacing Options, then selectP6 Serialand acknowledge you want to disable serial. - Now, one more step is needed, because else you won’t find any serial ports: edit
/boot/config.txtand addenable_uart=1. - ALSO add
core_freq=250to the same/boot/config.txt, or else the handling of the data with base its baudrate on a variable clock speed ()?!) (See http://raspberrypi.stackexchange.com/questions/45570/ ↗ for some background information). - reboot
Now, after installing e.g. screen, you can access UART using e.g. screen /dev/ttyS0.
Use it…
… to host a mobile uplink, with a Huawei E3372 LTE dongle
Start by disabling the PIN using a “normal” computer.
Currently you need to edit /lib/udev/rules.d/40-usb_modeswitch.rules and change
ATTRS{idVendor}=="12d1", ATTR{bInterfaceNumber}=="00", ATTR{bInterfaceClass}=="08", RUN+="usb_modeswitch '%b/%k'
to read
'%k'
at the end.
Reboot and afterwards, the dongle will have created eth1 with IP address 192.168.8.100 and will act as a NAT router.
… as a WiFi Access Point
$ sudo apt-get install dnsmasq hostapd
Edit /etc/dhcpcd.conf and add
denyinterfaces wlan0
Edit /etc/network/interfaces, edit wlan0 section:
allow-hotplug wlan0
iface wlan0 inet static
    address 172.24.1.1
    netmask 255.255.255.0
    network 172.24.1.0
    broadcast 172.24.1.255
$ sudo service dhcpcd restart
$ sudo ifdown wlan0
$ sudo ifup wlan0
Edit /etc/hostapd/hostapd.conf
interface=wlan0
driver=nl80211
ssid=<YourNetworkName>

hw_mode=g
channel=6
ieee80211n=1
wmm_enabled=1
ht_capab=[HT40][SHORT-GI-20][DSSS_CCK-40]
macaddr_acl=0

auth_algs=1
ignore_broadcast_ssid=0
wpa=2
wpa_key_mgmt=WPA-PSK
wpa_passphrase=<YourNetworkPassword>
rsn_pairwise=CCMP
Edit /etc/default/hostapd
DAEMON_CONF="/etc/hostapd/hostapd.conf"
Edit /etc/dnsmasq.d/dnsmasq.wlan0.conf:
interface=wlan0
listen-address=172.24.1.1
bind-interfaces
server=8.8.8.8
domain-needed
bogus-priv
dhcp-range=172.24.1.50,172.24.1.150,12h
Edit /etc/sysctl.conf:
net.ipv4.ip_forward=1
Setup NAT rules for eth0 and wlan0 to use eth1 uplink:
sudo iptables -t nat -A POSTROUTING -o eth1 -j MASQUERADE
sudo iptables -A FORWARD -i wlan0 -o eth1 -m state --state RELATED,ESTABLISHED -j ACCEPT
sudo iptables -A FORWARD -i eth1 -o wlan0 -j ACCEPT
sudo iptables -A FORWARD -i eth00 -o eth1 -m state --state RELATED,ESTABLISHED -j ACCEPT
sudo iptables -A FORWARD -i eth1 -o eth0 -j ACCEPT
$ sudo sh -c "iptables-save > /etc/iptables.ipv4.nat"
Edit /etc/rc.local and add (before exit 0):
iptables-restore < /etc/iptables.ipv4.nat
$ sudo service hostapd start
$ sudo service dnsmasq start
… as a DHCP Server (for eth0)
Edit /etc/network/interfaces
auto eth0
iface eth0 inet static
    address 192.168.0.1
    netmask 255.255.255.0
Edit /etc/dnsmasq.d/dnsmasq.eth0.conf:
interface=eth0
listen-address=192.168.0.1
bind-interfaces
server=8.8.8.8
domain-needed
bogus-priv
dhcp-range=192.168.0.50,192.168.0.150,12h
Optionally, add to /etc/dnsmasq.d/dnsmasq.eth0.conf
dhcp-option=3
dhcp-option=6
to not have it set default router and DNS resolvement, if e.g. the host has another internet connection.
… as an audio recording + playback device using Sound Blaster Play 2
- use
alsamixerto set audio parameters -
use
sudo alsactl storeto save paramters aplay -D hwplug:1 recoding.wav
To make the Sound Blaster the only and default device:
Edit /etc/asound.conf:
pcm.!default {
    type hw
    card 1
}

ctl.!default {
    type hw
    card 1
}
cardshould be the card number inaplay -landarecord -l
To record use arecord -f cd -vv test.wav
To play use aplay test.wav
References
- https://learn.sparkfun.com/tutorials/python-programming-tutorial-getting-started-with-the-raspberry-pi/configure-your-pi ↗
- https://github.com/RPi-Distro/repo/issues/47 ↗* https://frillip.com/using-your-raspberry-pi-3-as-a-wifi-access-point-with-hostapd/ ↗
- https://www.raspberrypi.org/learning/networking-lessons/lesson-3/plan/ ↗
- https://superuser.com/questions/306121/i-dont-want-my-dhcp-to-be-a-default-gateway ↗
- http://www.g7smy.co.uk/2013/08/recording-sound-on-the-raspberry-pi/ ↗
- https://raspberrypi.stackexchange.com/questions/19705/usb-card-as-my-default-audio-device ↗