vCard
vCard
 Homemade by CVG
 My Homemade Apps
 Thingiverse
 Strava
Pokemon Christmas Lights
Tools
- 3D printer (Zortrax M200)
- Z-Suite slicer
- OpenSCAD
Materials
- Z-Glass transparent filament
- LED string with Christmas balls
In december 2017 I joined in a Secret Santa event ↗ organised by Henk Reickaert ↗, amongst others known for his fun making endeavours in the Koterij ↗.
The idea was to not simply buy a present for a noble stranger, but to make something, as it was also part of the Make in Belgium ↗ group.
The lucky girl, who I was picked for as secret santa, was into cosplay and pokemon. Given that it was nearly Christmas, I came up with the idea to create a set of unique Christmas lights, based on Pokemons.
DISCLAIMER: I really don’t known anything about Pokemon, except for the fact that it are imaginary creatures that love to fight ;-)
My strategy was to 3D print Pokemon figures using transparent filament, Z-Glass ↗, and combine them with a string of LED lights into a unique set of Pokemon Christmas Lights. It doesn’t always have to involve rocket science ;-)
Making on the Shoulders of Giants
Now, I’m nowhere capable of designing a Pokemon figure from scratch, so what does any self-respecting hacker/maker do? … Right, visit Thingiverse ↗ and look for 3D models to remix.
So I found Flowalistik ↗, who has been creating a whole set of low-poly Pokemon models ↗. They were simply perfect for my goal in any possible way - I didn’t even have to scale them.
I selected 4 (+ did a fifth on request by another Thingiverse user) - of which, I must admit, I knew two! How’s that for not knowing anything about Pokemon ;-)
- Bulbasaur ↗
- Pikachu ↗
- Totodile ↗
- Squirtle ↗
- Charmander ↗
Next I looked for a LED string to start from. I found one with 8 (that’s why I selected 4 to start with) Christmas balls at the best Maker store in town: Action ↗. Because the string was already constructed for the same purpose, it had small metal caps that fit on top of the balls.
That left me with simply adding the same mounting head to the Pokemon models… et voila.
It took some experiments to find the right way to add the mounting head, but after some fiddling, all Pokemon Christmas Lights came out just perfectly. And after printing 2 of each, my secret santa present was ready to be shipped.
Sigh … Each print took about 1.5 hours, and at 90% into the 4th print (FYI the second Pikachu) a blackout forced my beloved Zortrax into its very first failed print :-( Luckily I had these Christmas lights to shed some light into the darkness while I waited for the problem to be resolved.

Pictures or it didn’t Happen
Two experiments with Bulbasaur: on the left a version that only had a shell, which resulted in some inferior quality around the eyes and at the top of the head, due to the lack of infill supporting these parts. Also, because I used the shell generating feature of the Z-Suite slicer, I had to cut out the top part of the mounting head. Not a big problem, but it could be improved upon.
On the right the final version, which is printed with medium infill. Here the opening for the LED is modeled using an extraction of a cylinder. I went with this version because it had a nicer glow - which I initially didn’t expect due to the infill pattern. Luckily I tried it afterall.
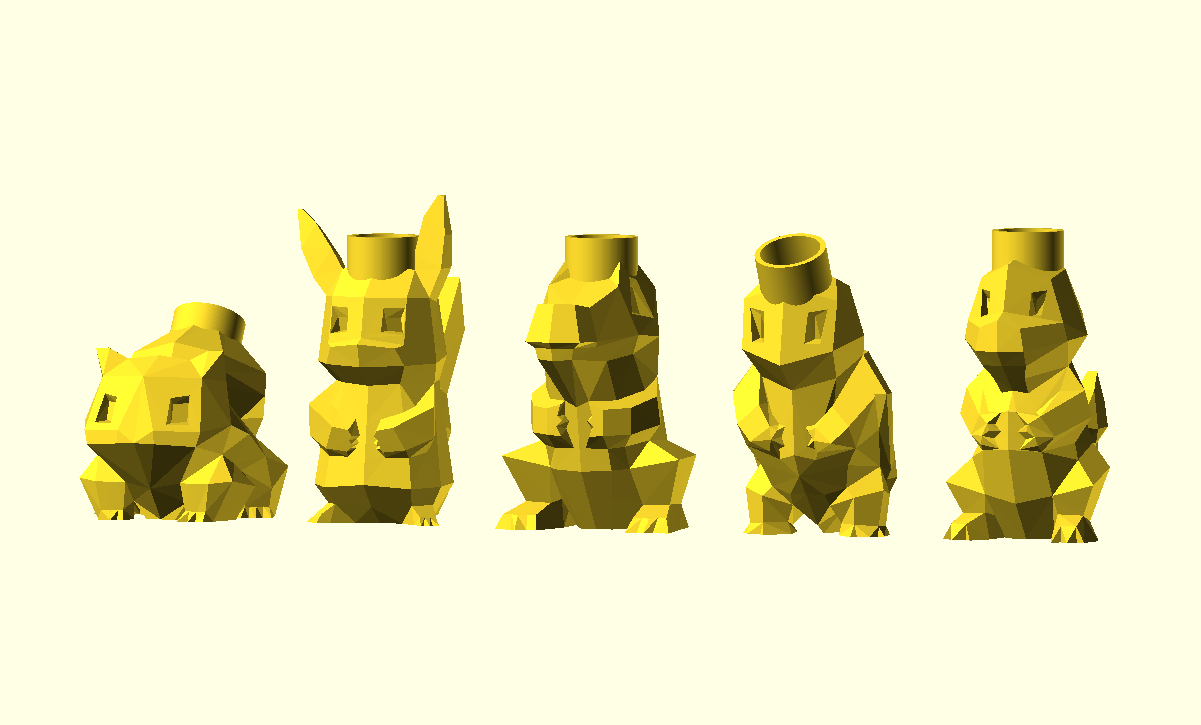
An overview of all Pokemons as 3D models:
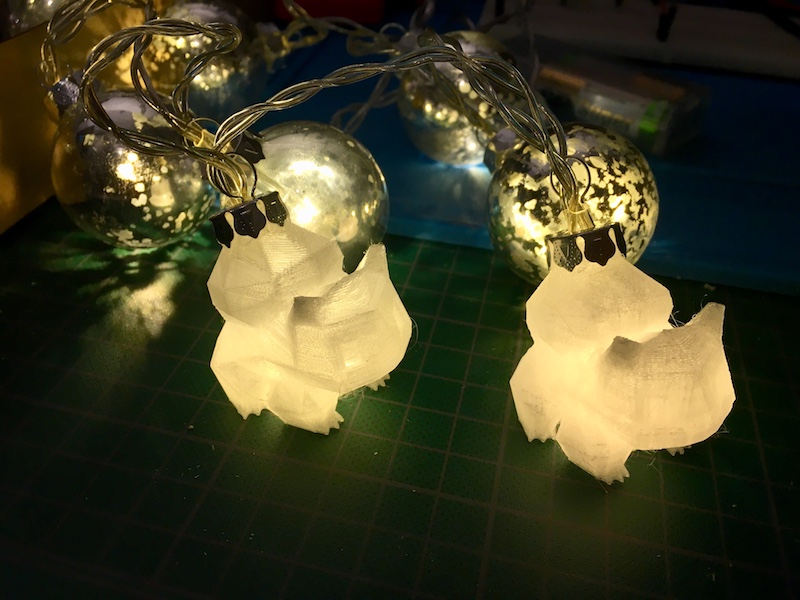
And the final result: a LED string with four times two prints of the different Pokemons, LEDs inserted and looking gorgeous. I think I’m going to make another one for myself ;-)
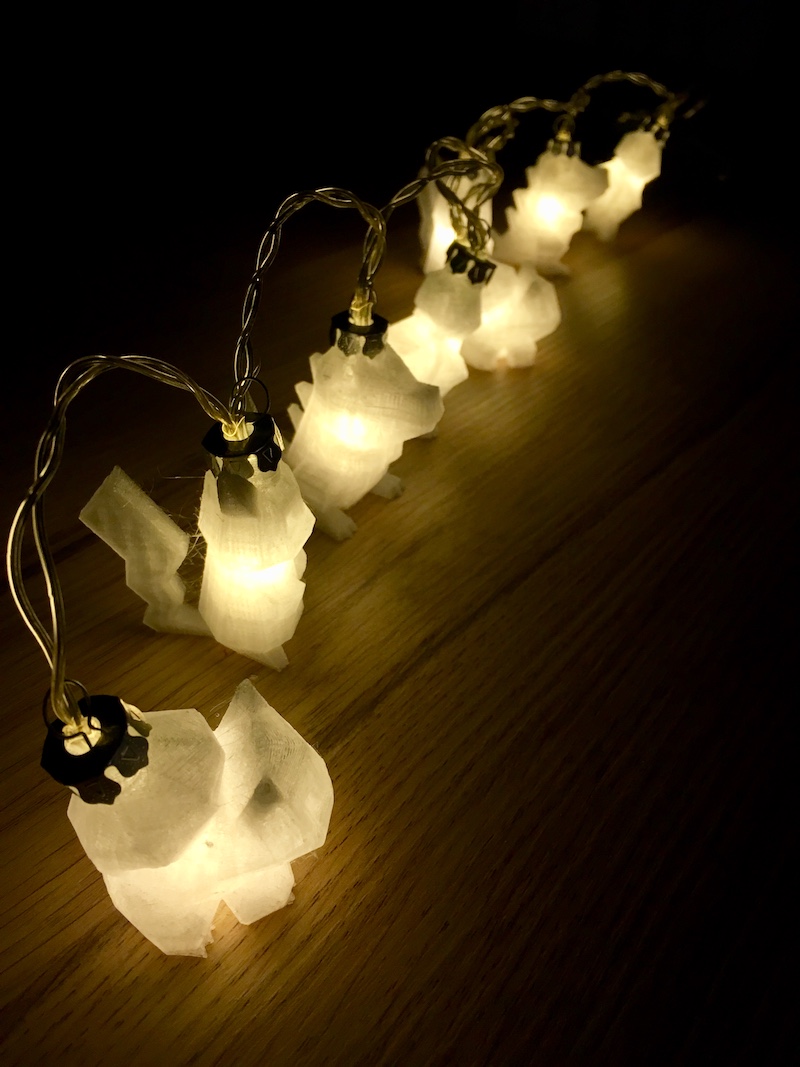
Now let’s hope that at the receiving end that feeling is mutual ;-)
Give it a Try
A GitHub repository ↗ contains everything needed and everything that I created. Using OpenSCAD ↗ I imported the original STL files and added the mounting head on all of them. The code should be self-explanatory.
I’ve also created pages for the remixes on Thingiverse and put them in a collection:
- Bulbasaur ↗
- Pikachu ↗
- Totodile ↗
- Squirtle ↗
- Charmander ↗
- Entire Collection ↗
If you make any, let me know!
Happy Maker Christmas!
Epilogue
Having fun with a material you never printed with before is … fun. But while doing so, also ruining your printer’s hot-end is something else.
Printing the Pokemons for the Secret Santa project was just the beginning of several experiments with Z-Glass ↗. After those, I printed another set for my son and some other things to test the range of possibilities.
When I switched back to Z-ABS after a few weeks, my printer’s extruder servo had problems feeding the filament through the hot-end and made a clicking sound. After cleaning the extruder servo - which did have some Z-Glass particles stuck to it, the problem … didn’t go away.
So, next up was cleaning the nozzle with acetone. The next day, the problem still wasn’t resolved.
Time to check the (wonderful) Zortrax Support ↗ site in more detail. After some digging around I found this ↗:
Immediately after the print, unload Z-GLASS/Z-PETG from the extruder. These materials should not be left loaded as they become more difficult to extrude after some time. In addition, once you finish printing with Z-GLASS/Z-PETG, print a small-sized object using Z-ABS to prevent further problems with extrusion.
If these steps do not help and you still have problems with extrusion, the nozzle or the hotend should be replaced.
Auwch … I had Z-Glass loaded onto my printer for several weeks with daily prints.
As I already had cleaned the nozzle, which now looked spick and span again, I looked into the possibilities to replace the hot-end ↗ and found:
Hotend replacement is necessary when you encounter problems with material extrusion caused by a blockage inside the hotend. If the extruder motor makes a clicking sound or if the material leaks through the top of the hotend (around the two black screws), or if your print is incomplete (there is some material missing in the structure), the hotend needs replacing.
Yep, that’s exactly the problem, that awful clicking sound.
So I contacted 3D & I ↗ where I bought my printer and discussed what could be done. They were very helpful and invited me over to their store to test another hot-end to make sure that it would actually resolve the issue, before buying the €80-something part.
At the store, we swapped the hot-end and did a few tests, but to everyone’s surprise, the problem still occurred. So now, my printer is still at the shop, where they are looking into the actual problem.
So maybe, the Z-Glass wasn’t the culprit, but still … printing with Z-Glass can be dangerous for your hot-end, so take précautions and clean it afterwards with a small ABS print.