vCard
vCard
 Homemade by CVG
 My Homemade Apps
 Thingiverse
 Strava
Connected Lightbulb
Tools
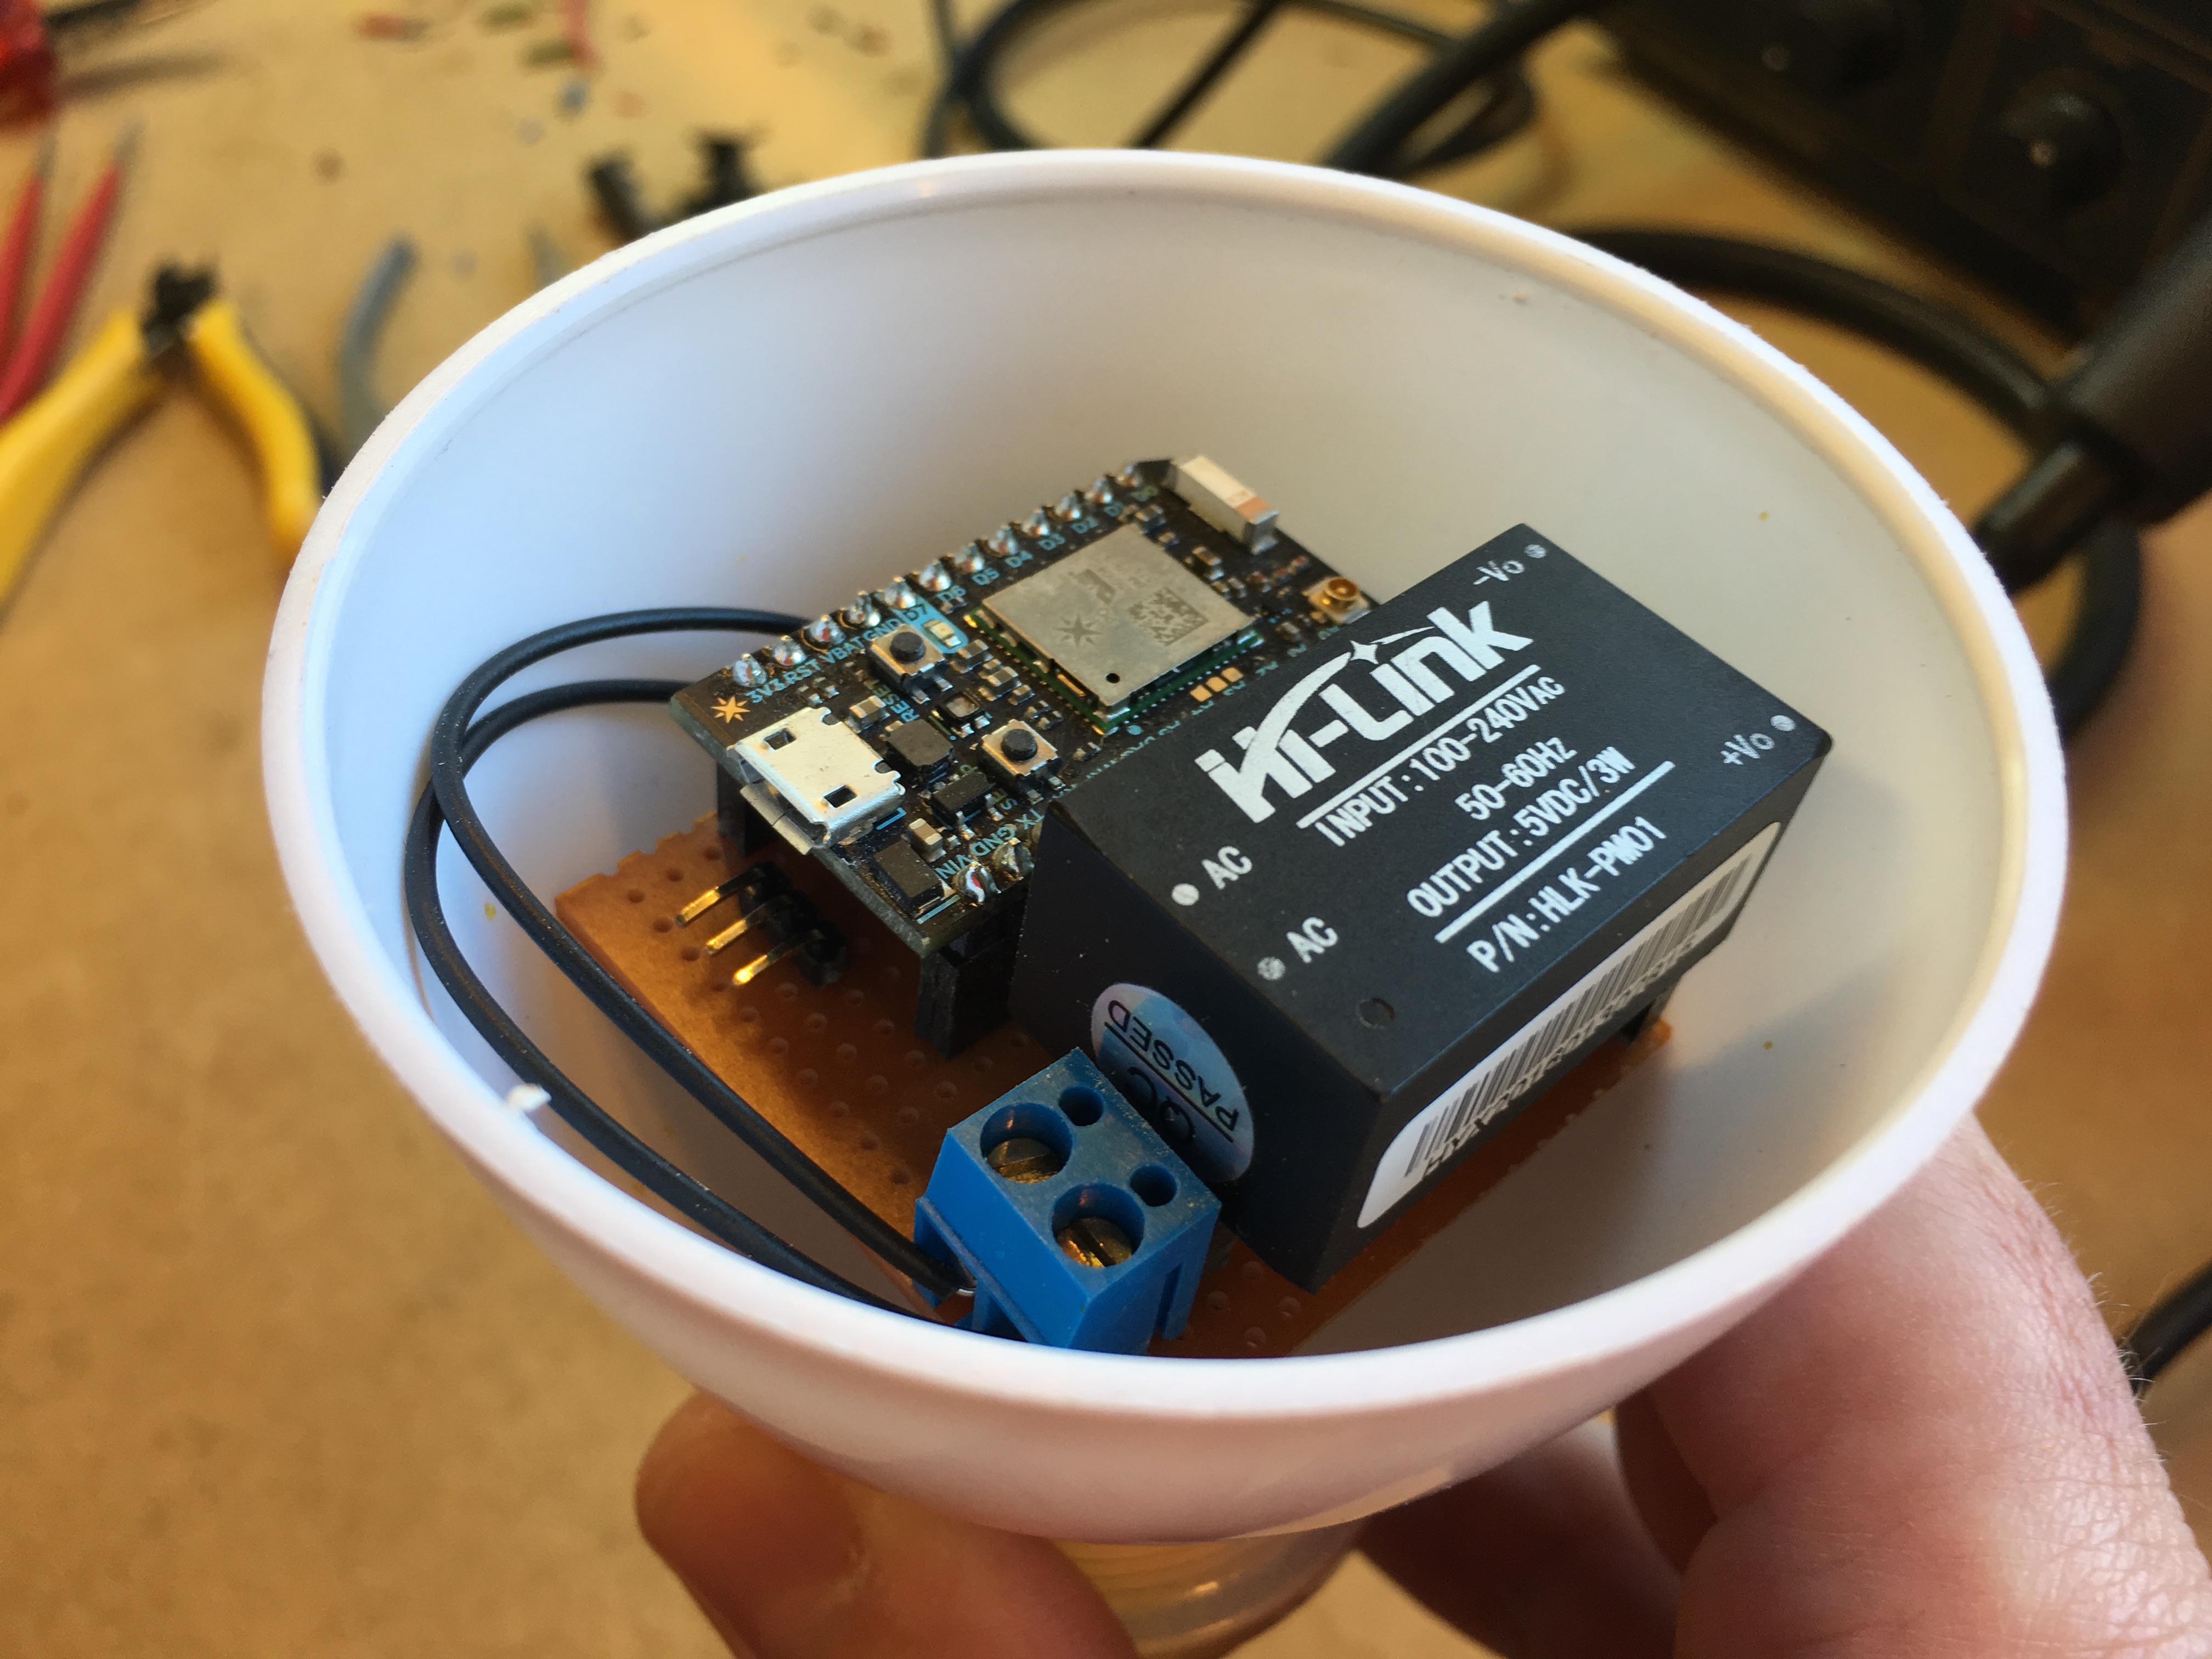
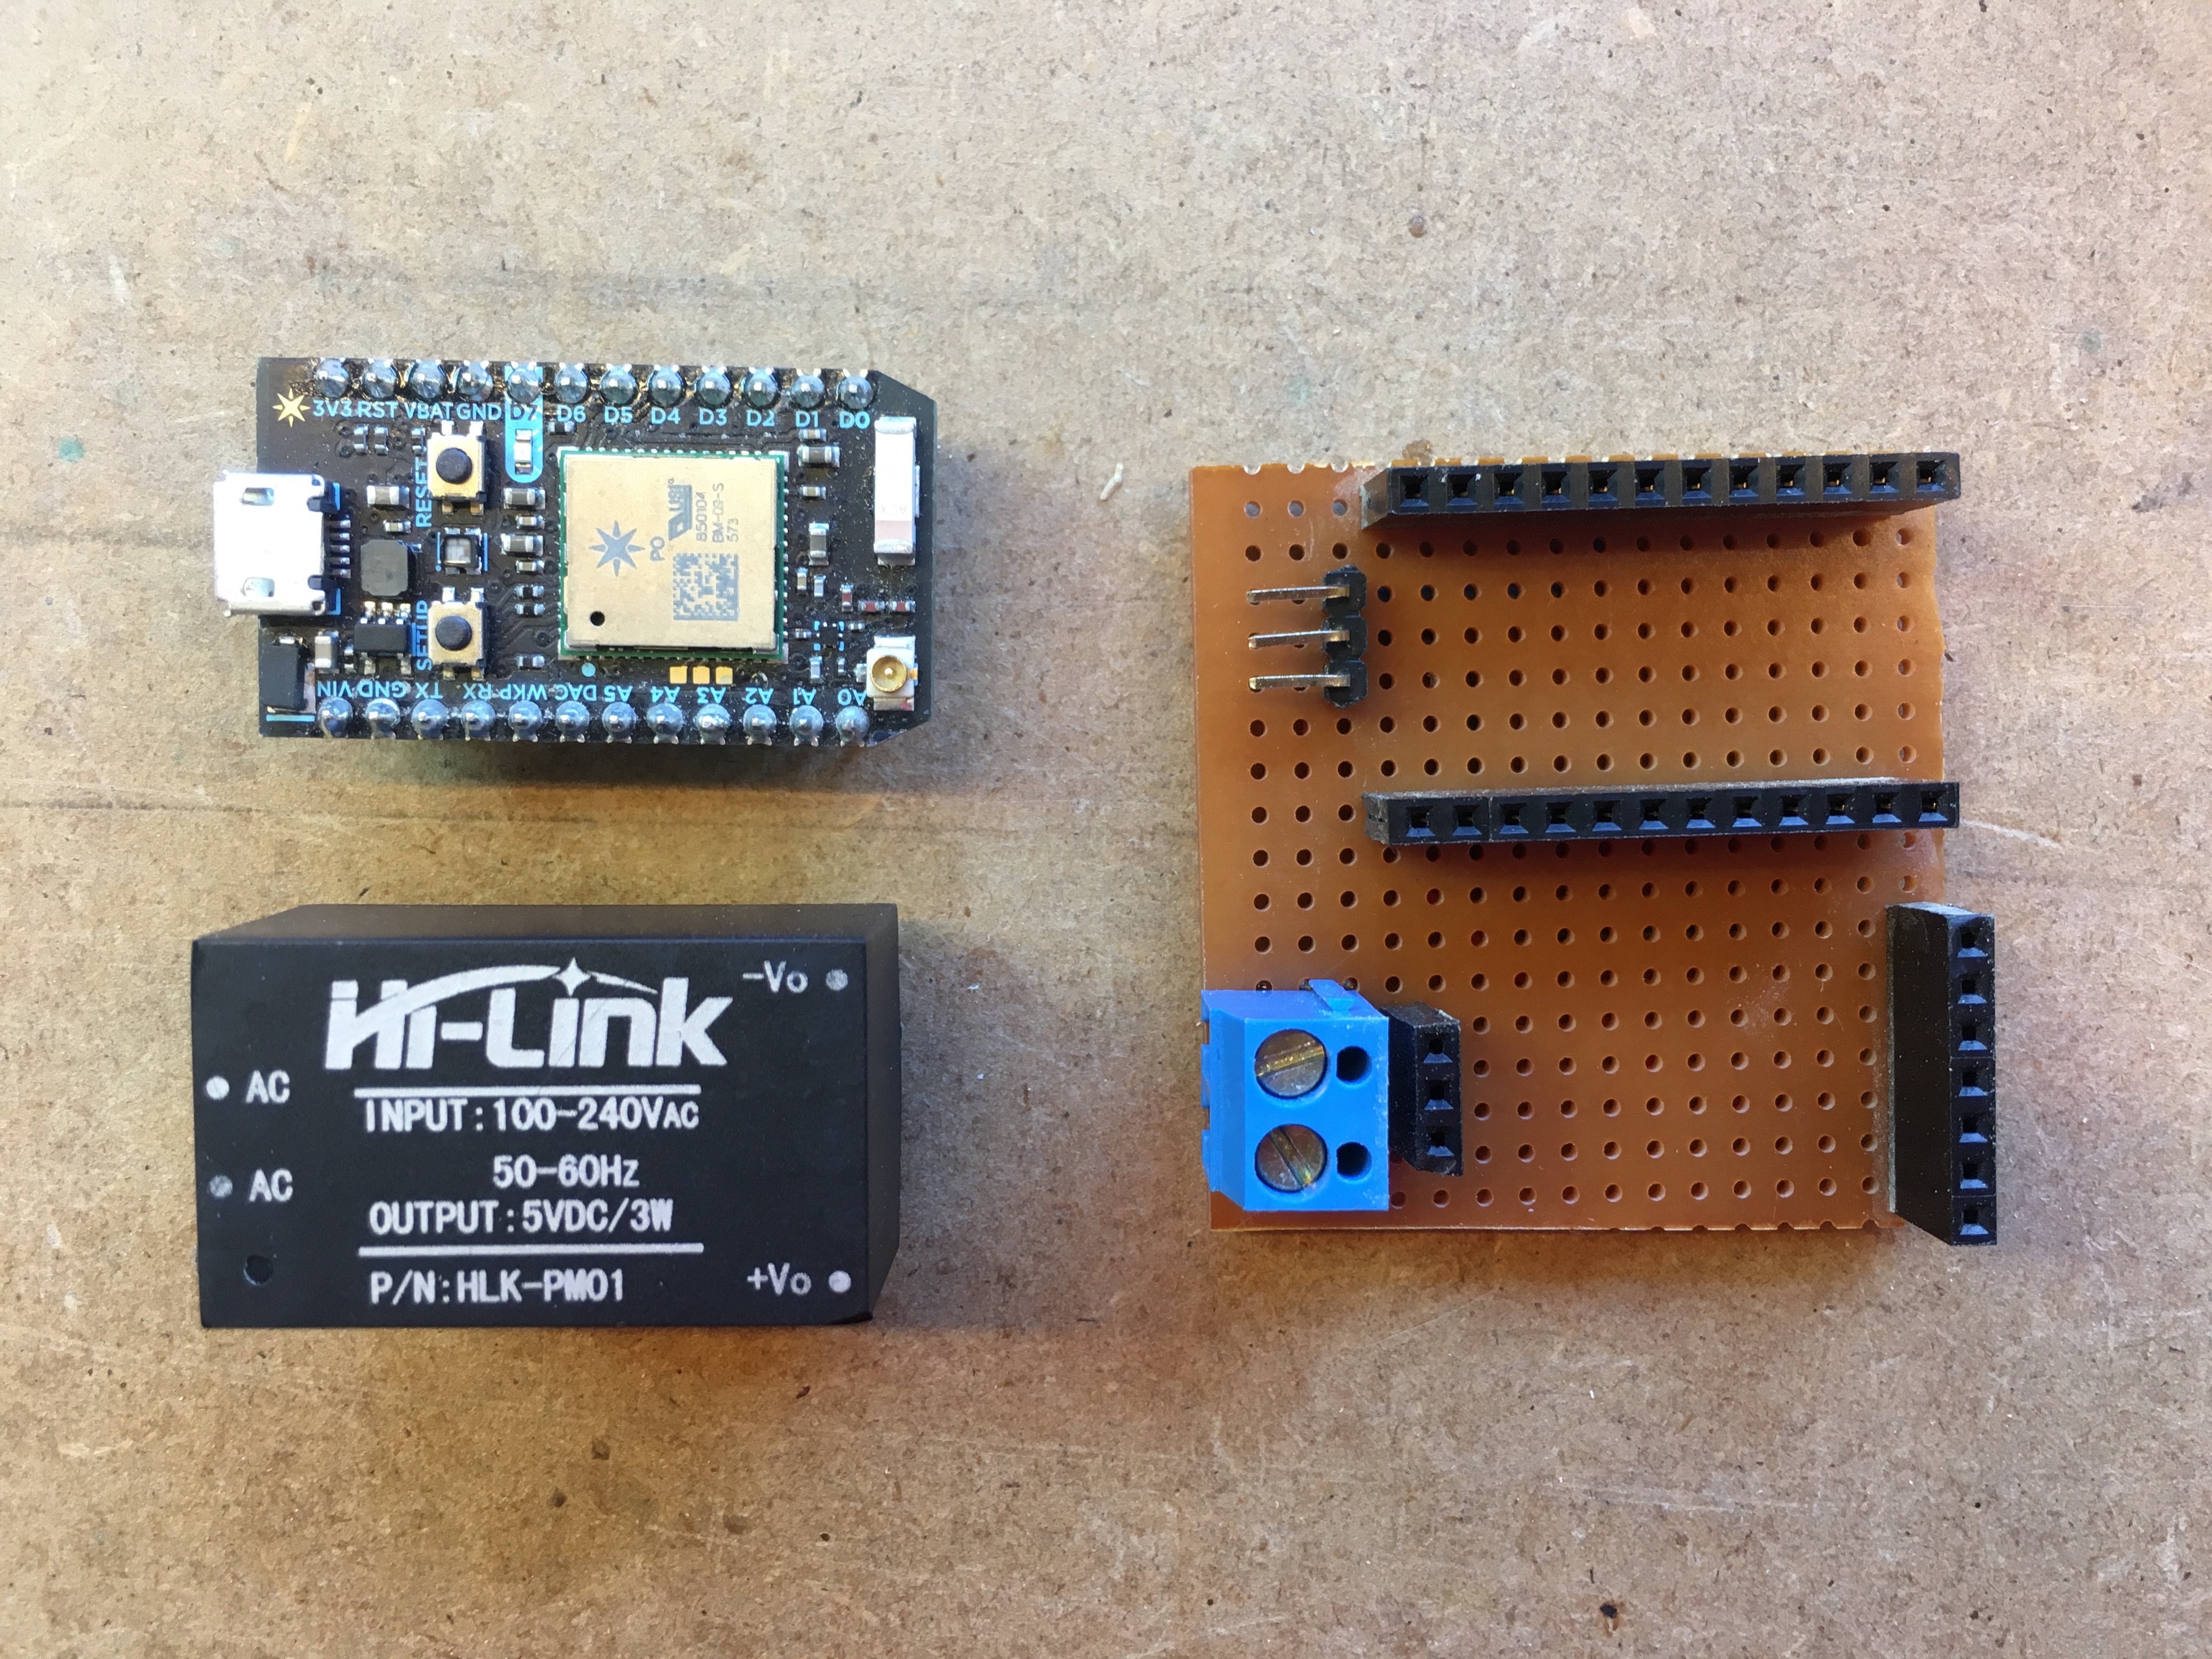
- Particle Photon
- Adafruit Neopixel 24
- HiLink ACDC 5V 3W module
- Soldering iron
Materials
- LED disco light bulb enclosure
- Apple USB charger (or similar 5V supply)
- Dupont connectors
Not everything has to be all work and no play. Sometimes, we just play. My good friend Anthony ↗ sometimes hosts team building events. His current topic of choice is the Internet of Things. To illustrate the core idea of the IoT, he uses the case of the connected lightbulb.
Enter: The Internet of Things
The Internet of Things is basically an economy of scale: computers today are so small that it becomes possible to put them into “things”, which makes them cheaper by the dozen, triggering even further miniaturisation, and so on and on.
So computers no longer need humans and can now also be useful to things … that in their turn are useful to humans, who communicate with these things using … computers. So in the end nothing has changed, just the scale and the number of applications. That’s (probably - because I haven’t had the luck to attend one of Anthony’s team building events) the story Anthony tells the team that needs building.
Next up: the actual building: Everybody, divided into groups, gets an internet connected lightbulb. Using the wonderfully simple If This Then That ↗ all groups are soon working as teams, making sure that the lightbulb turns red when a new email arrives. Yeah, team!
So to host these team building events, he needed internet-connected lightbulbs. Philips Hue ↗ I hear you say? Yeah right… a single lamp costs about €60 and you still need a “starter kit” first, which apparently starts somewhere around the same price. The latter comes with a “bridge”, so internet-connected … naah.
Version 1 - The Mock-up
Having been playing with Particle Photons ↗ he thought that combining that with an Adafruit Neopixel 24 ↗ would basically provide him with an actual, basic “internet-connected light(bulb)”. Even more, the Photon costs about €20 and the Neopixel ring about €17. Which together is even way below the price of a single Hue lamp. With about €23 to spare on a bulb-like enclosure and converter from 220V to 5V, even a single production item would be cheaper than the existing sort-of-solution.
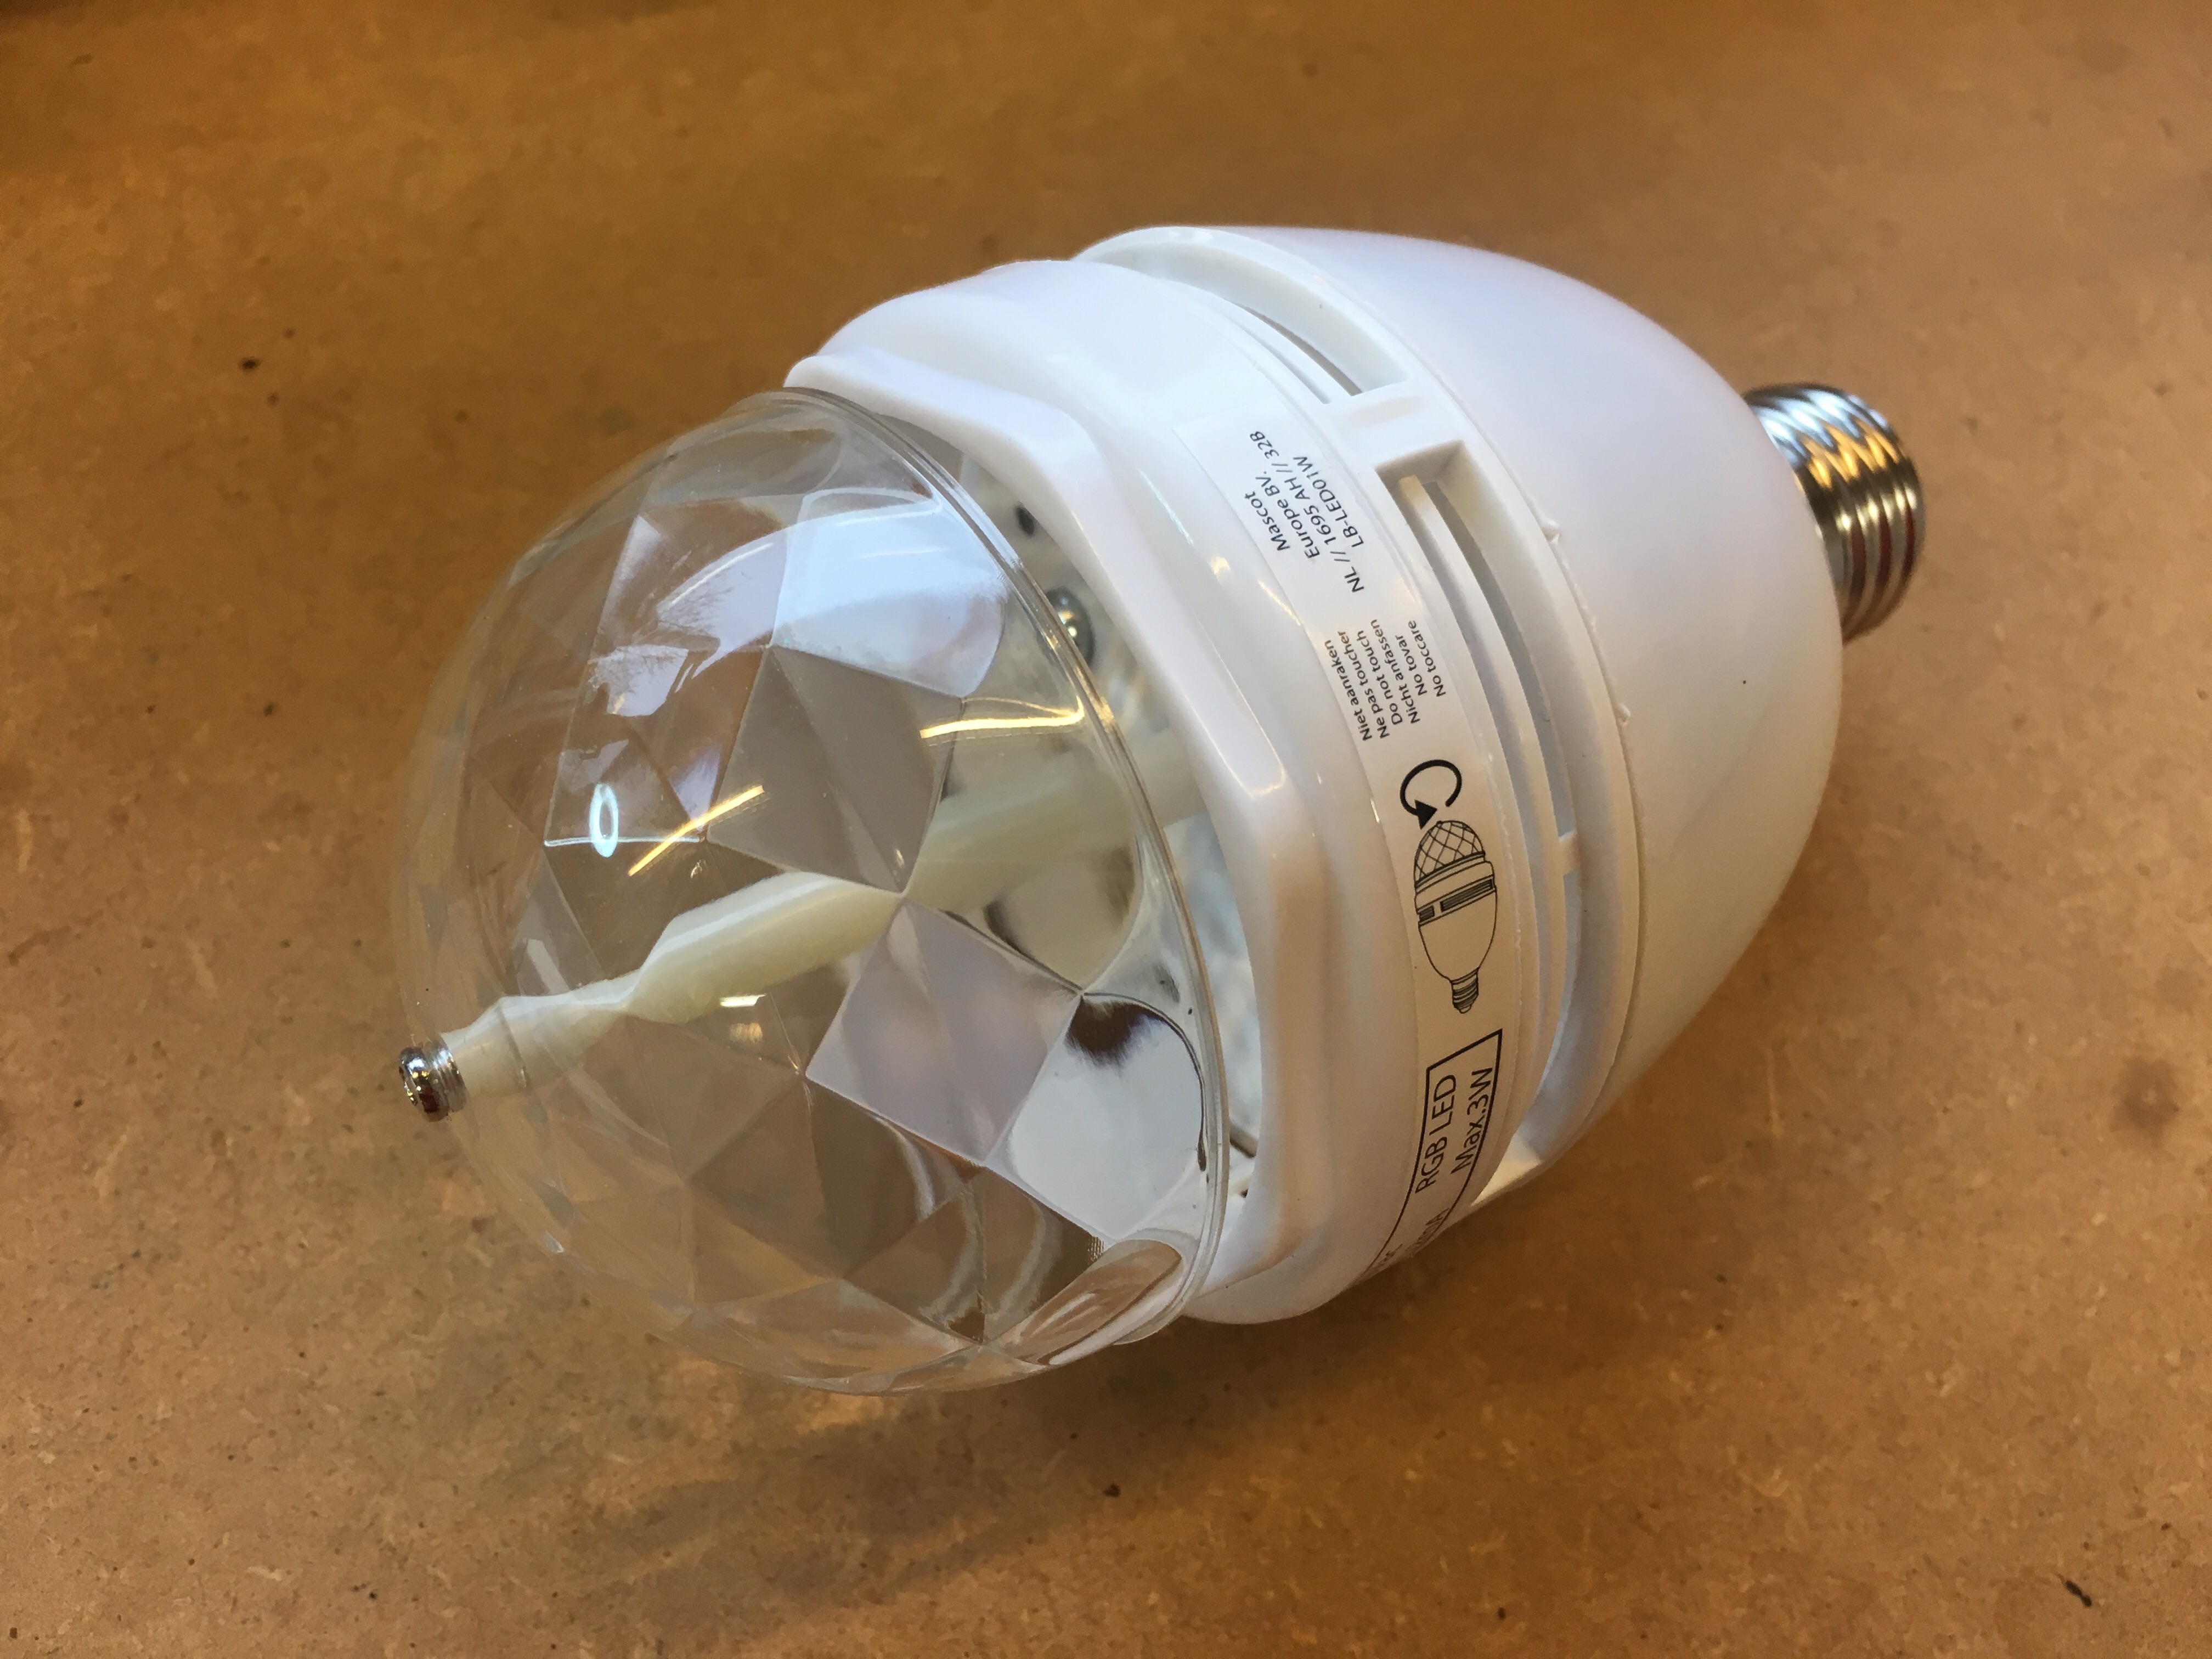
In Belgium, our country, we have this wonderful store, Action ↗. They sell all sort of cheap-ass things, thus often a dream-come true for makers. One of the items they offer is a LED disco light bulb. It’s basically 3 LEDs in series, powered by a converter bringing down 220V to around 8V and a small motor to make the facet-dome rotate. They sell this at about €3! (I kid you not.) So open it and throw everything out, just keeping the enclosure.
As a quick solution to the power conversion, Anthony took an Apple USB charger and ripped it apart, to fit it in the bulb, using USB connectors to wire it to the Photon, and the Neopixel ring.
Done!
Version 2 - The Prototype
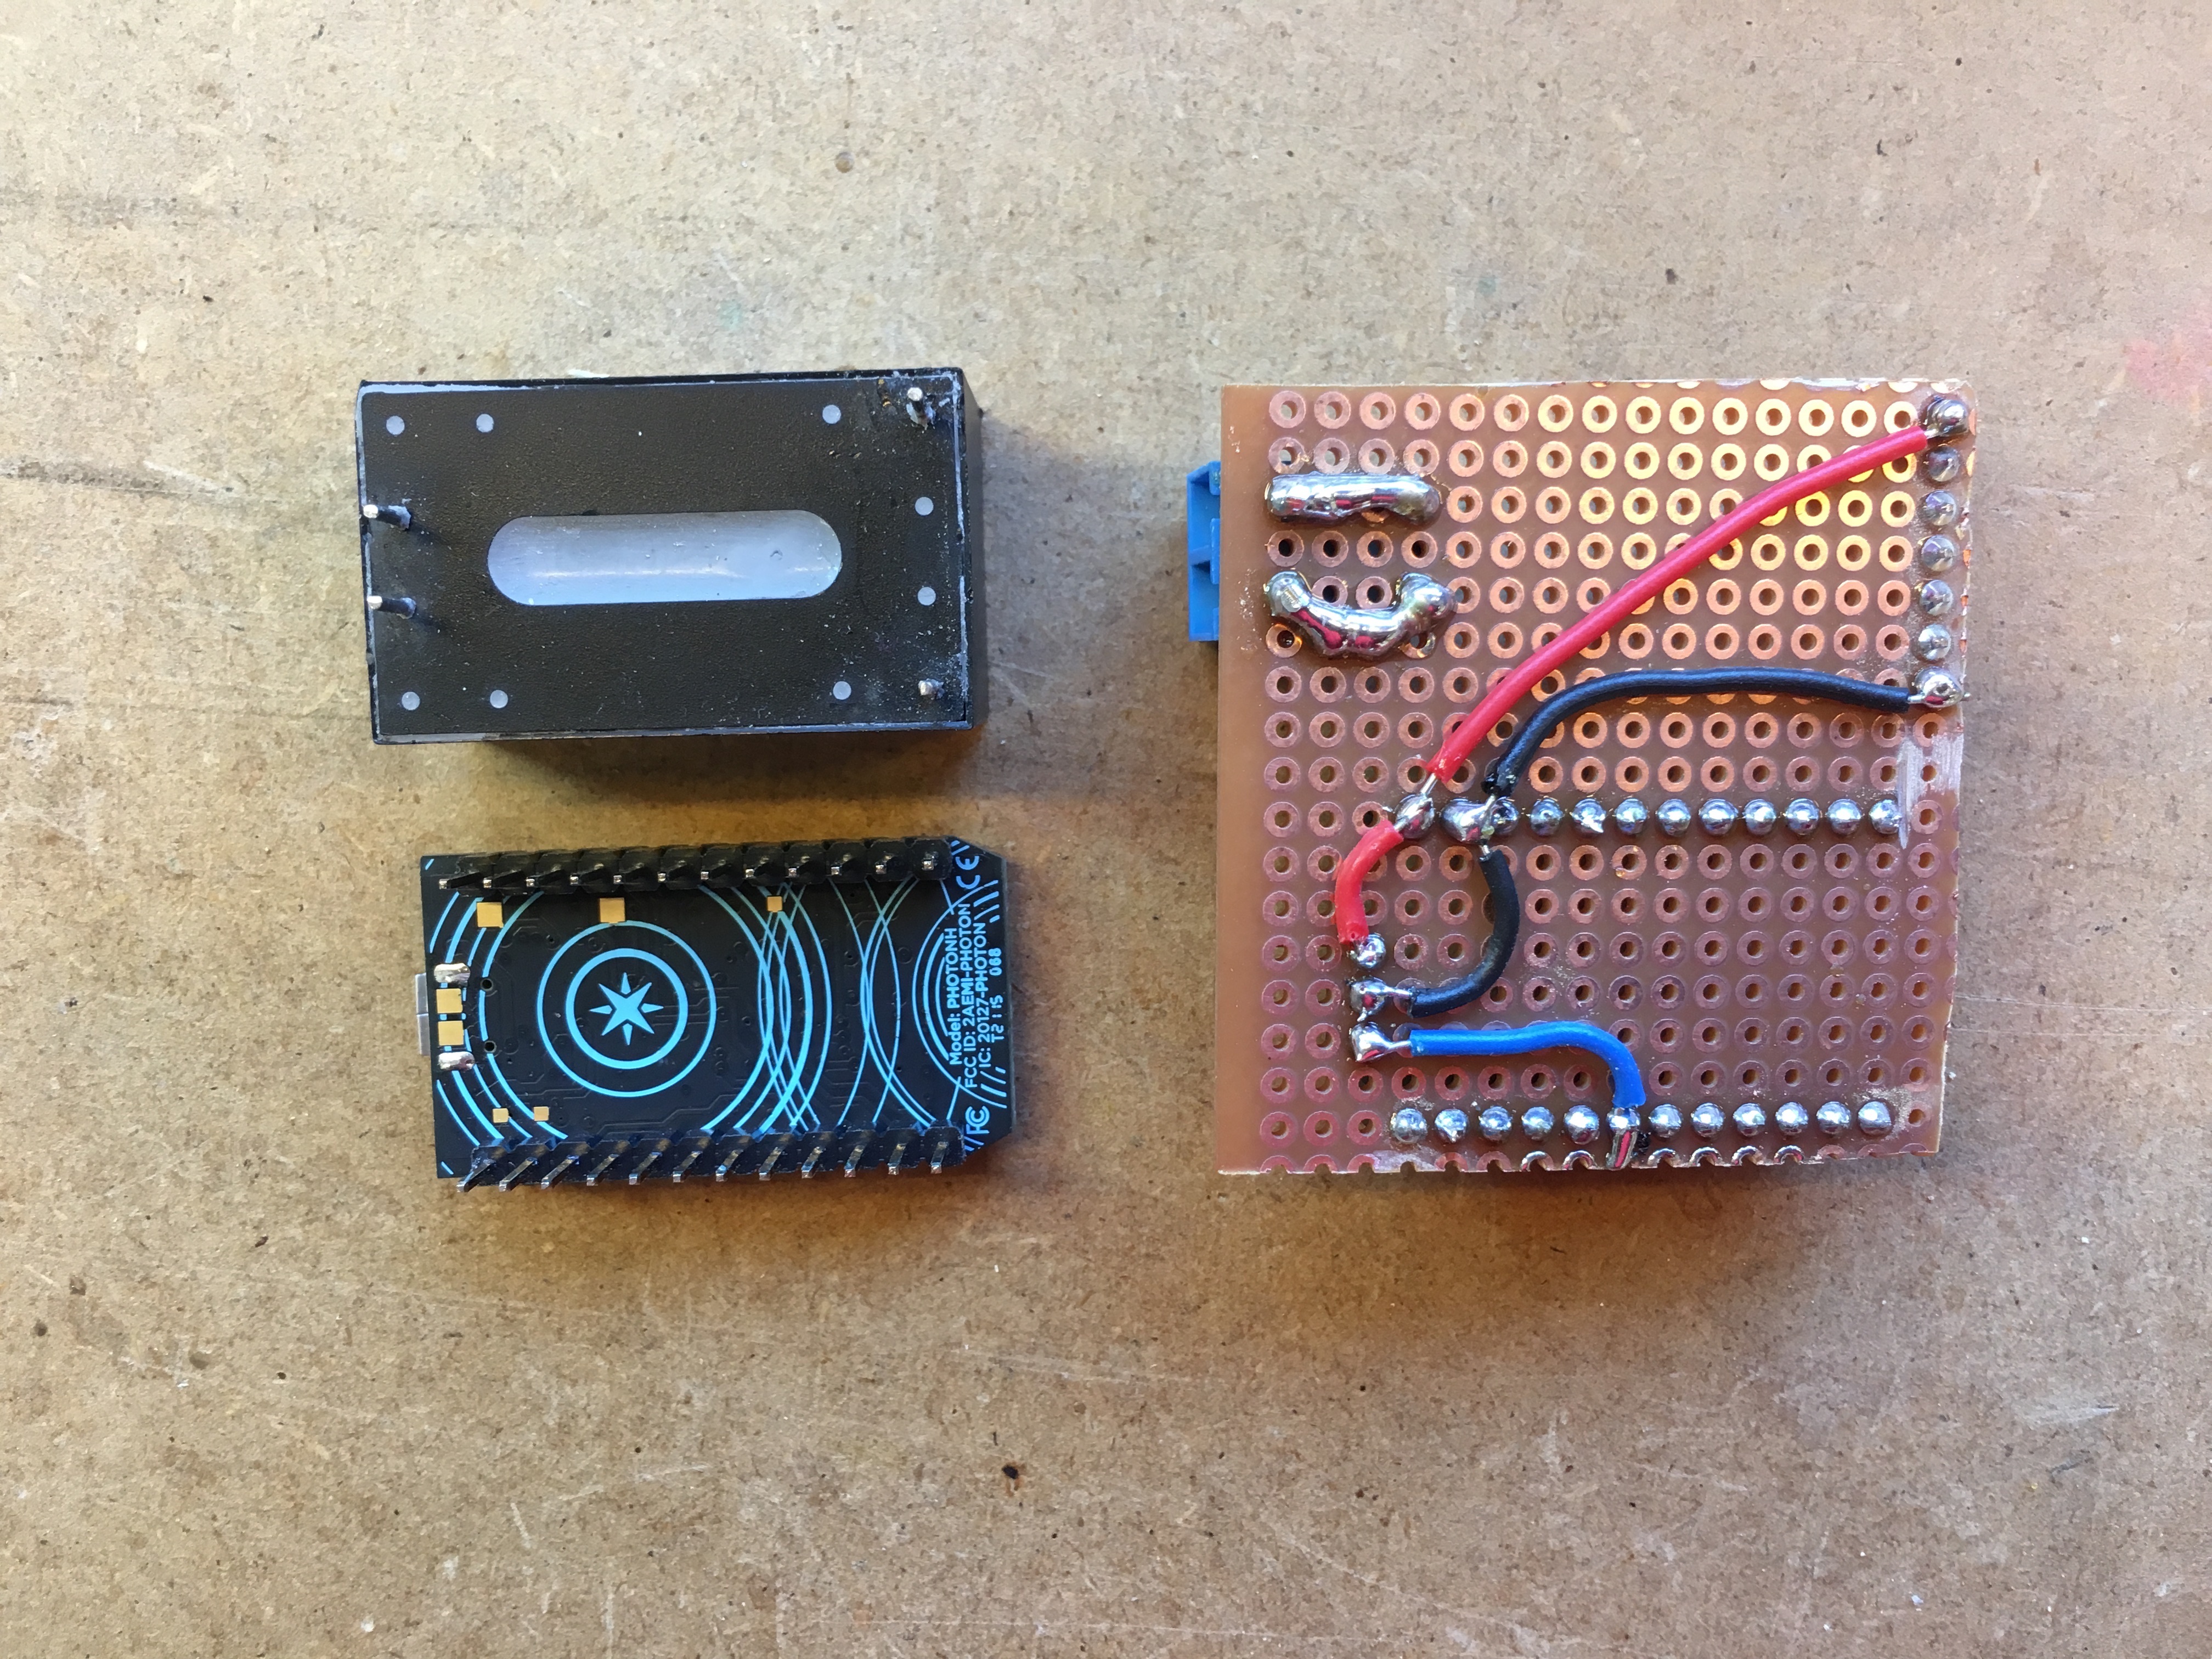
After having built version 1 using a teared down Apple USB charger, he was looking for a better solution to bring 220V down to 5V. He found the HiLink ACDC 5V 3W module ↗. Wonderful. So now all that was left, was once again, putting it all together.
That’s when I entered the Open Garage ↗. Since I had everything required to do just that, I offered an afternoon of my time to make a simple board with headers to fit the Photon and the HiLink and allow for attaching the 220V and the Neopixel. No rocket science, just a bit of fun, mostly refreshing my rusty soldering skills and Anthony had three boards, ready to be plugged in.
When we finished version 2, Anthony made a little Youtube video, showing the possibilities and outlining some of the technical components we used. It shows also the lamps in action, using some basic code, hosted on a web page. So, no mandatory proprietary app required. (note: The video isn’t available anymore 😔)
Version 3 - The Proof-of-Concept
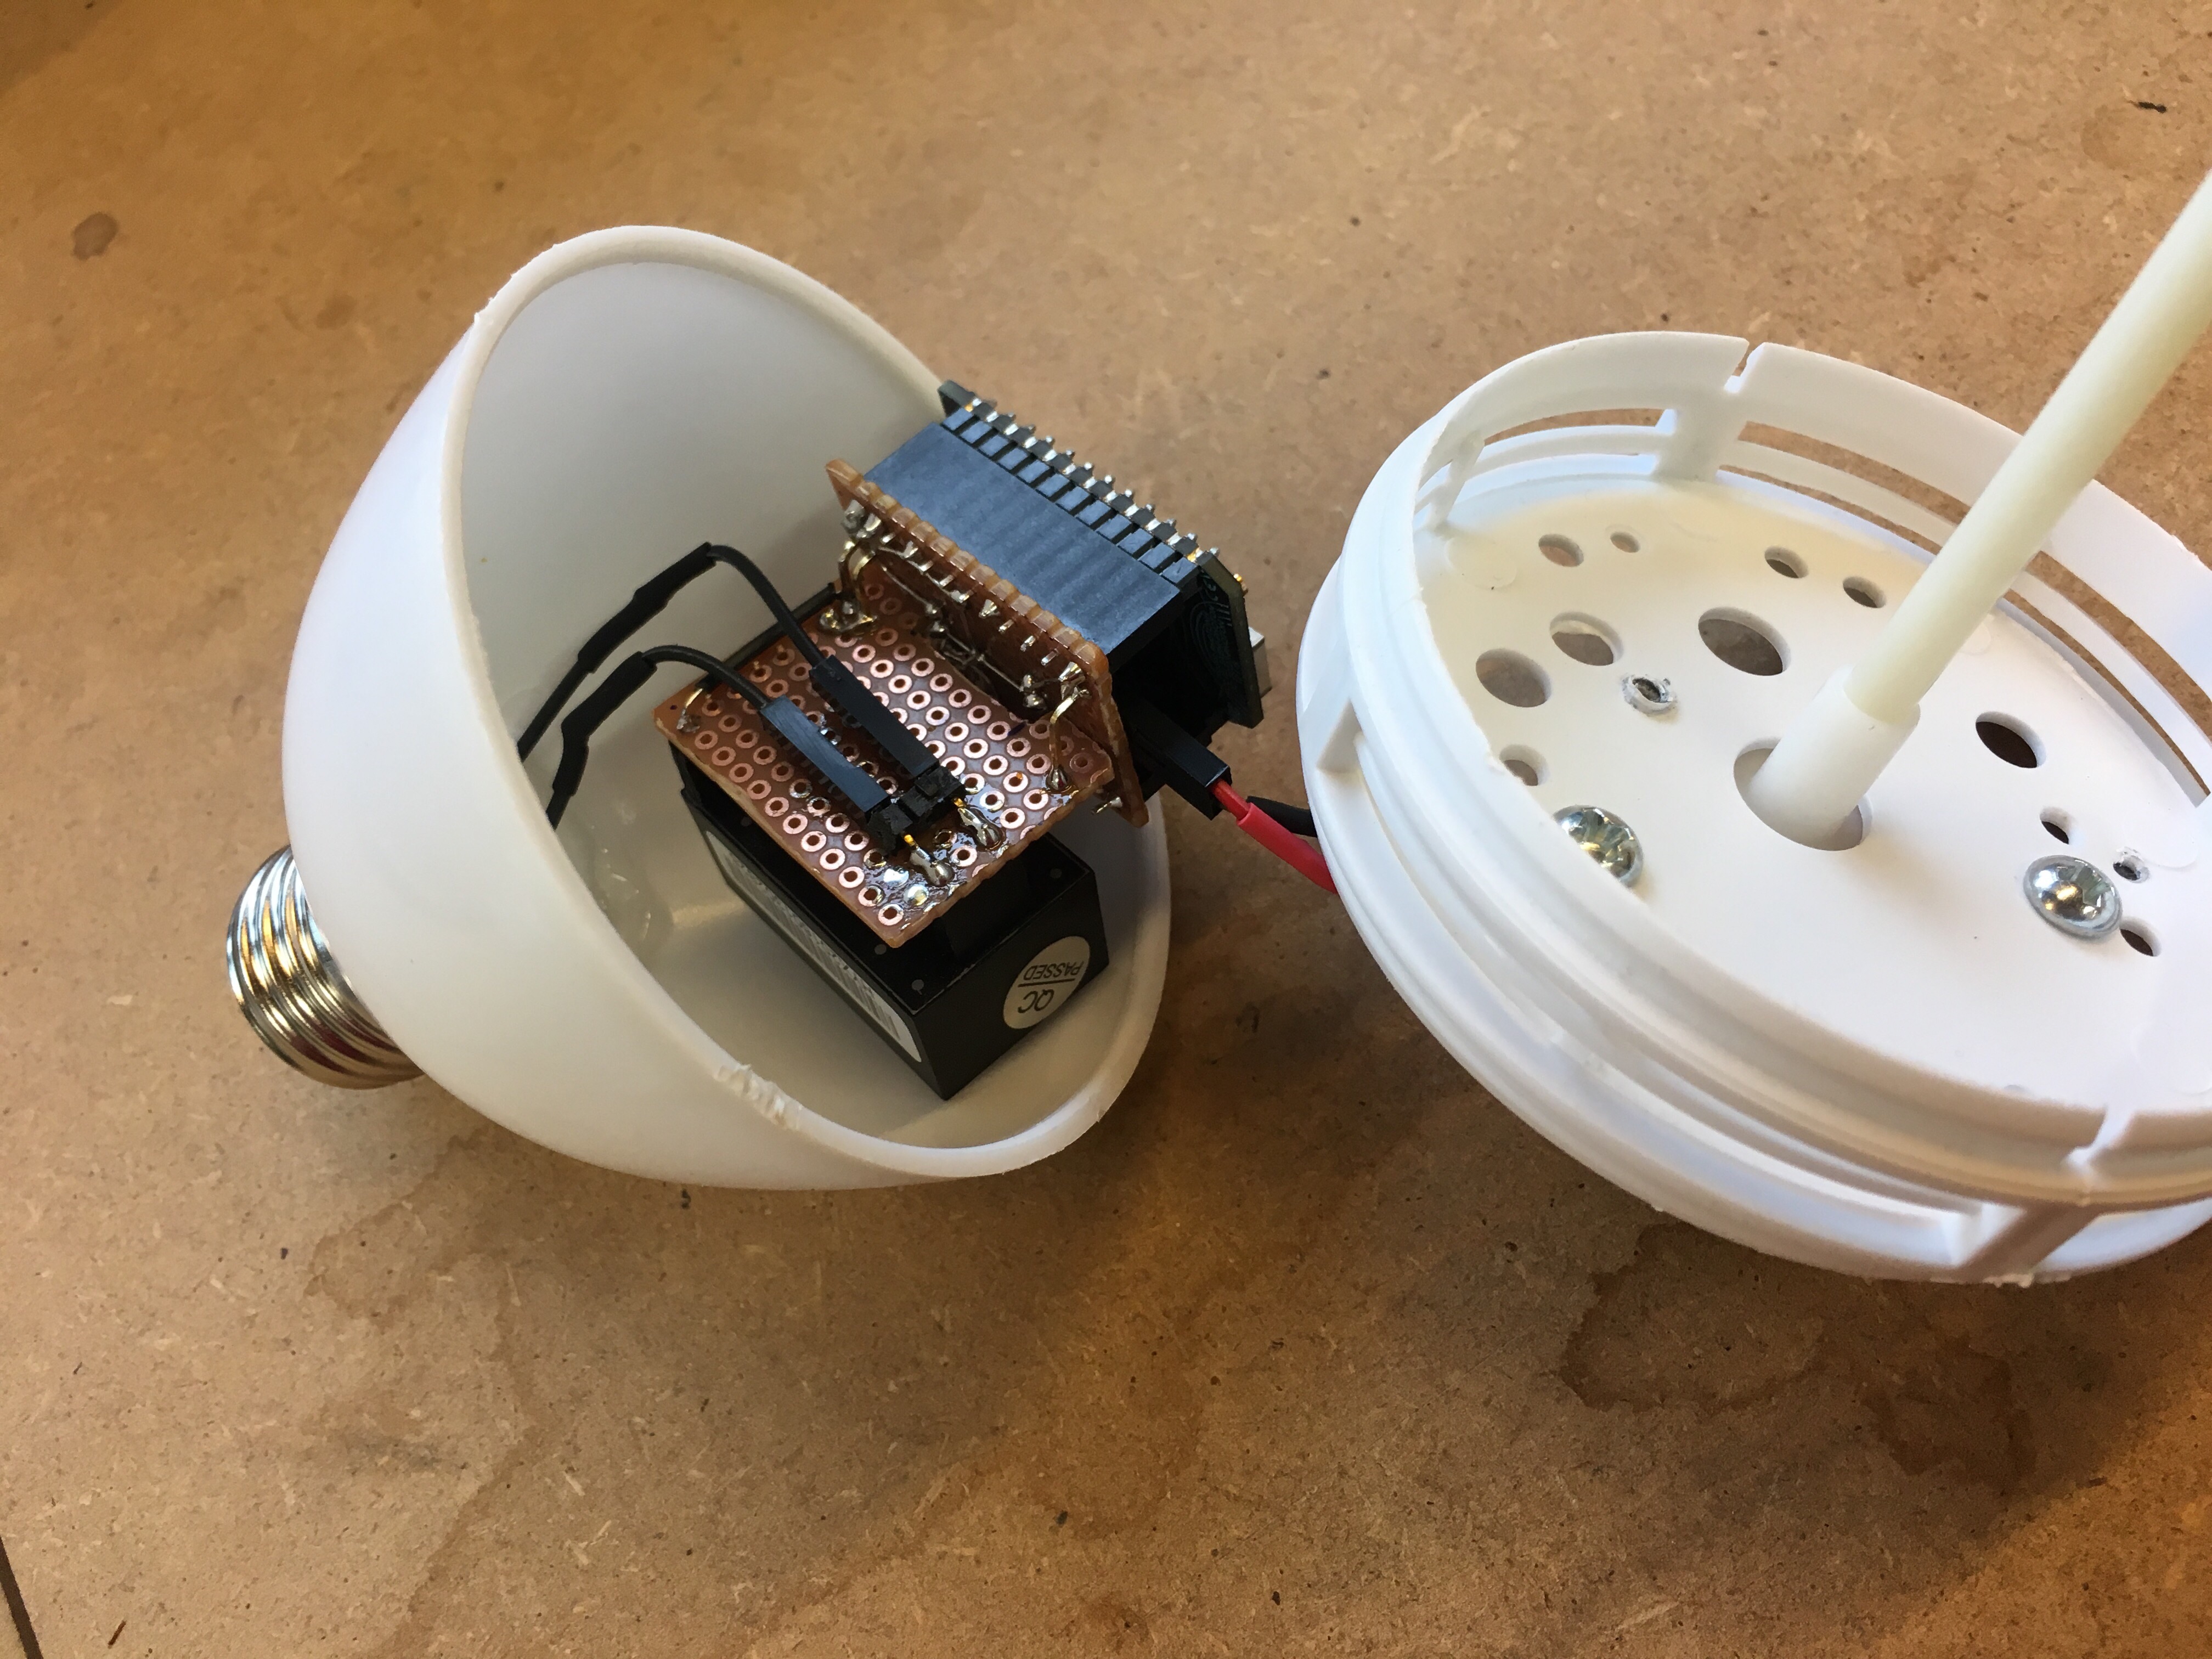
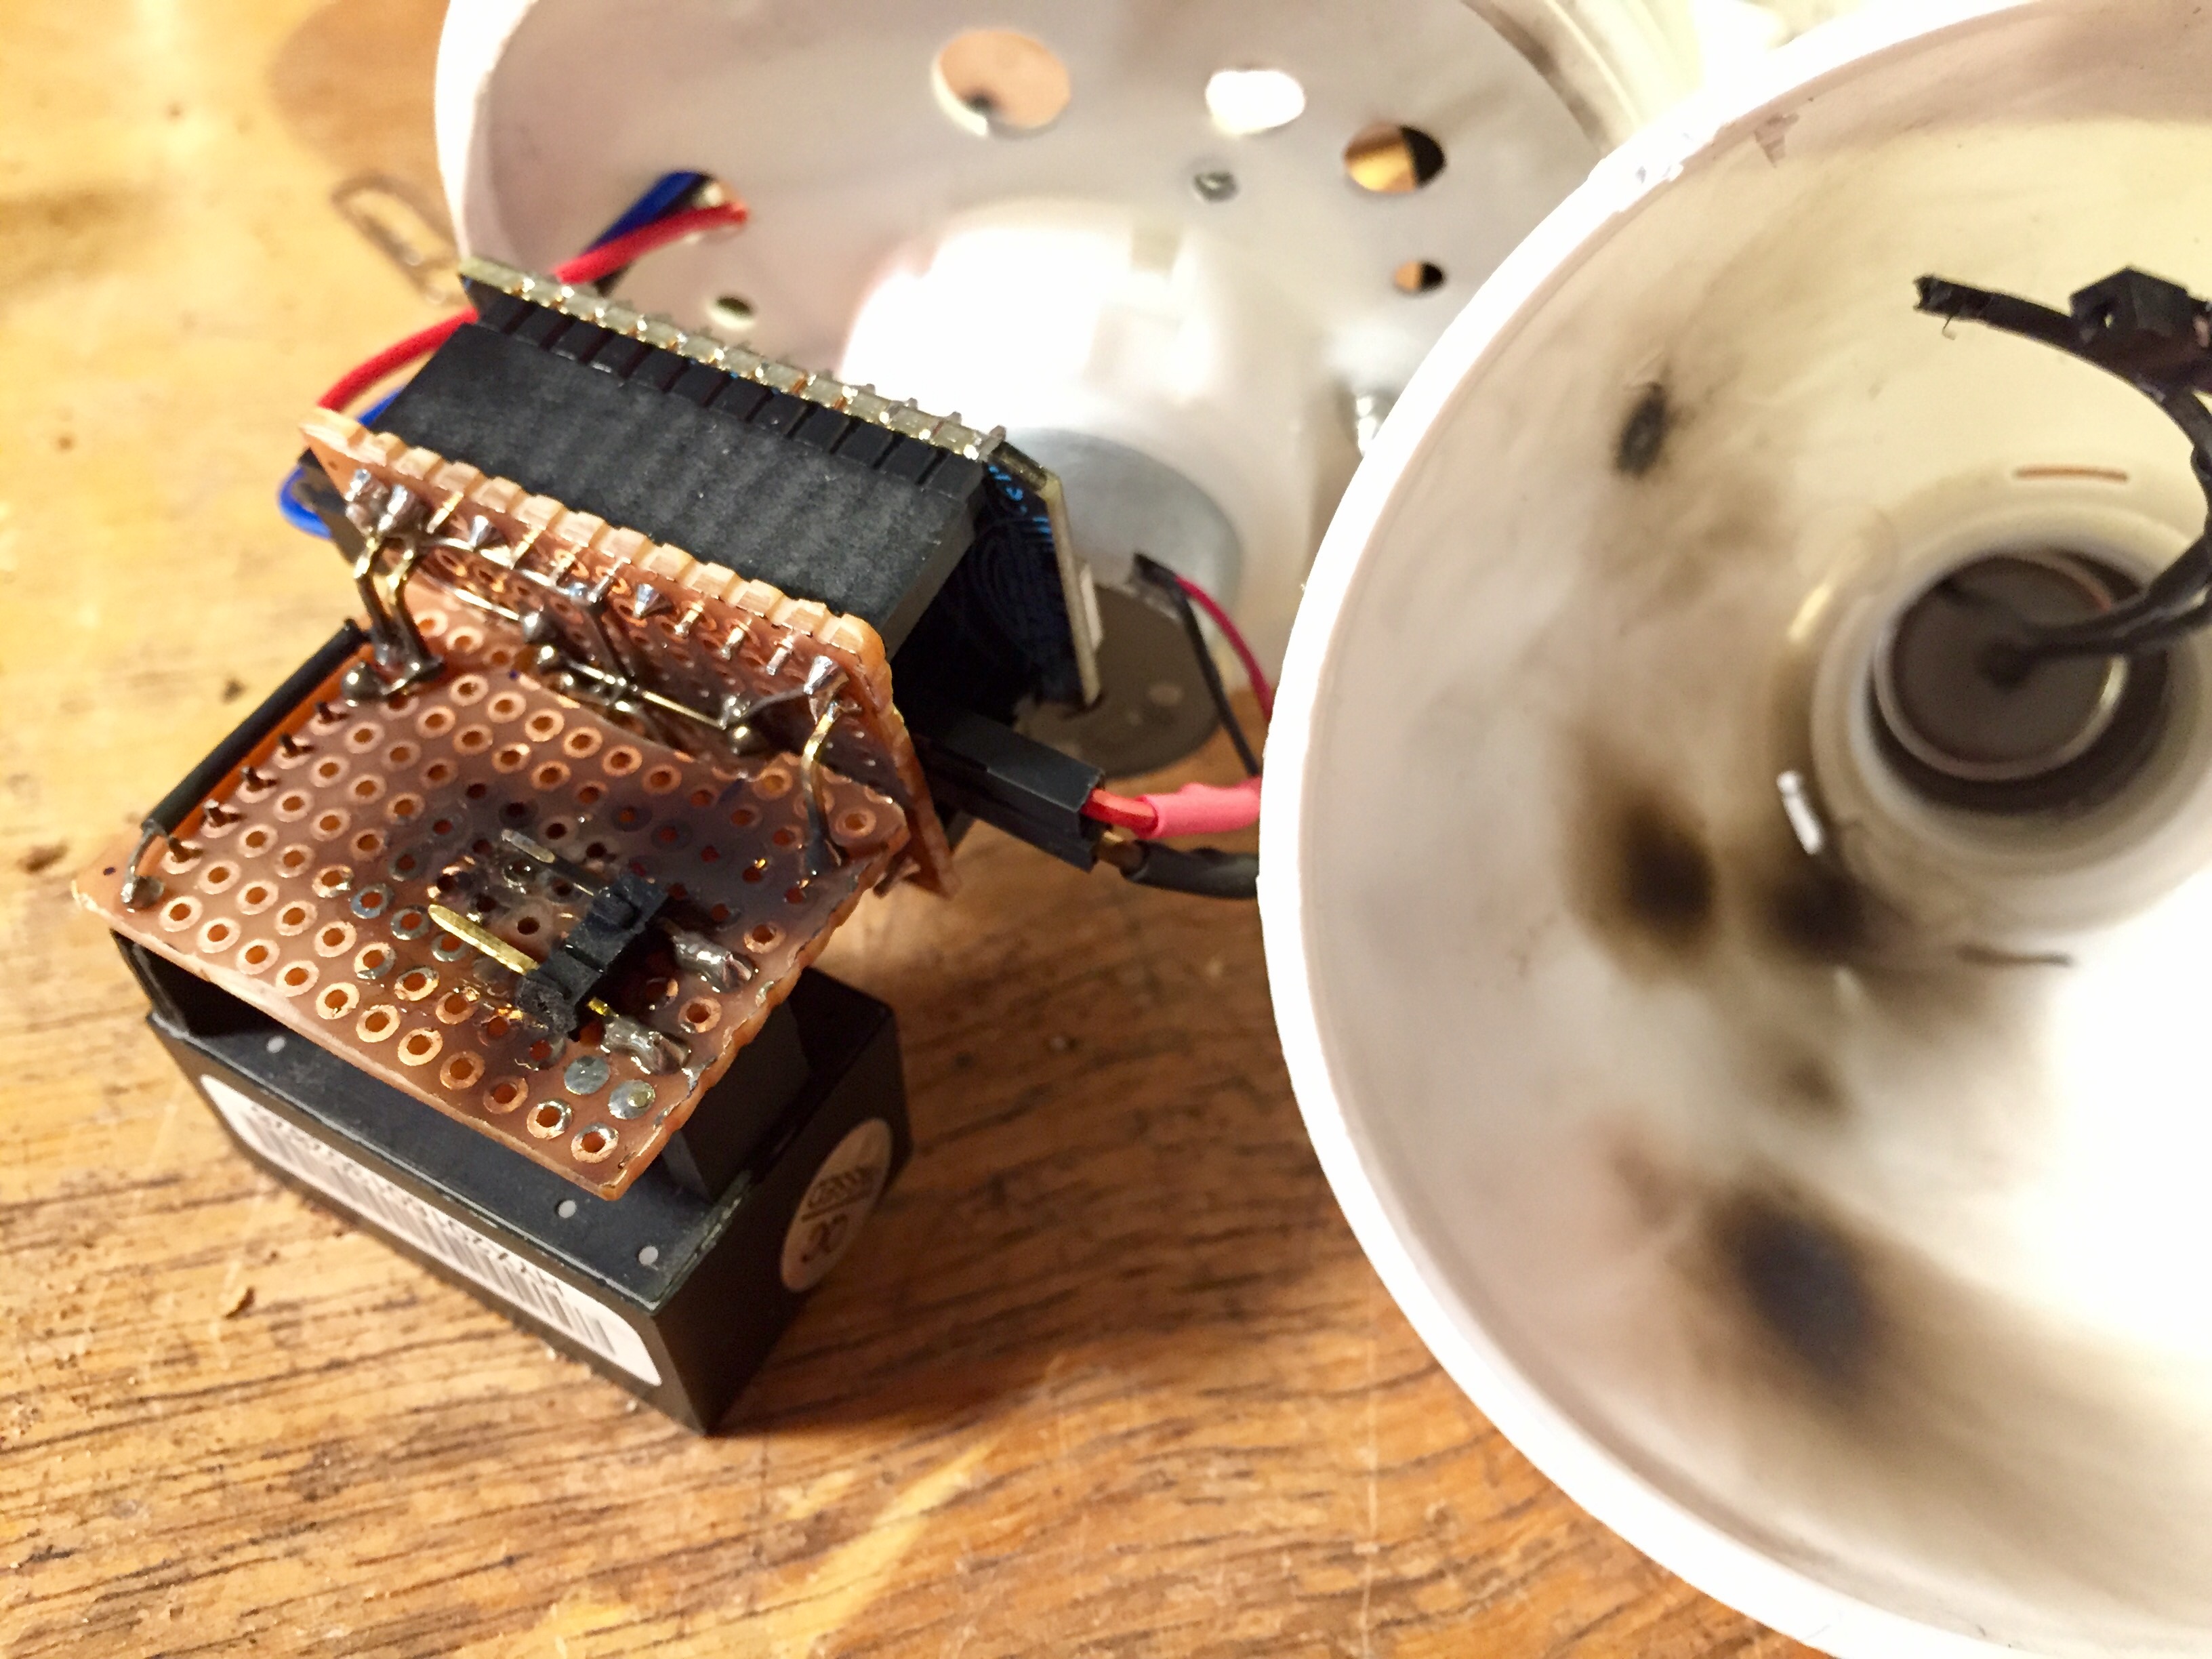
Besides the converter, the motor driving the dome was also removed, and that tickled my interest. Could we keep that in there, still fit the Photon and the HiLink and drive it using the Photon?
I took a Photon and HiLink module back to my shop and started trying out different setups around the motor. After a few tries I managed to get everything in the bulb, including headers, so that none of the modules had to be soldered. It was a great way to discover nice soldering and PCB mounting tricks to get it done.
So now, we had a drop-in replacement for the original €3 disco light, with far more possibilities.
Fail Forward
While fitting everything in there, I decided to replace the screw terminals with simple Dupont contacts. Not such a good idea. The dome had been spinning nicely for about an hour when I left the Open Garage, heading home. En route, I received a message from Anthony:


Version 4 - Feature Creep
Will there be a next version? Probably. It’s just too much fun trying to squeeze in even more, allowing for more crazy use cases. The first idea that came to our mind was the possibility to use the dome as a button to give feedback.
We’ll see ;-)